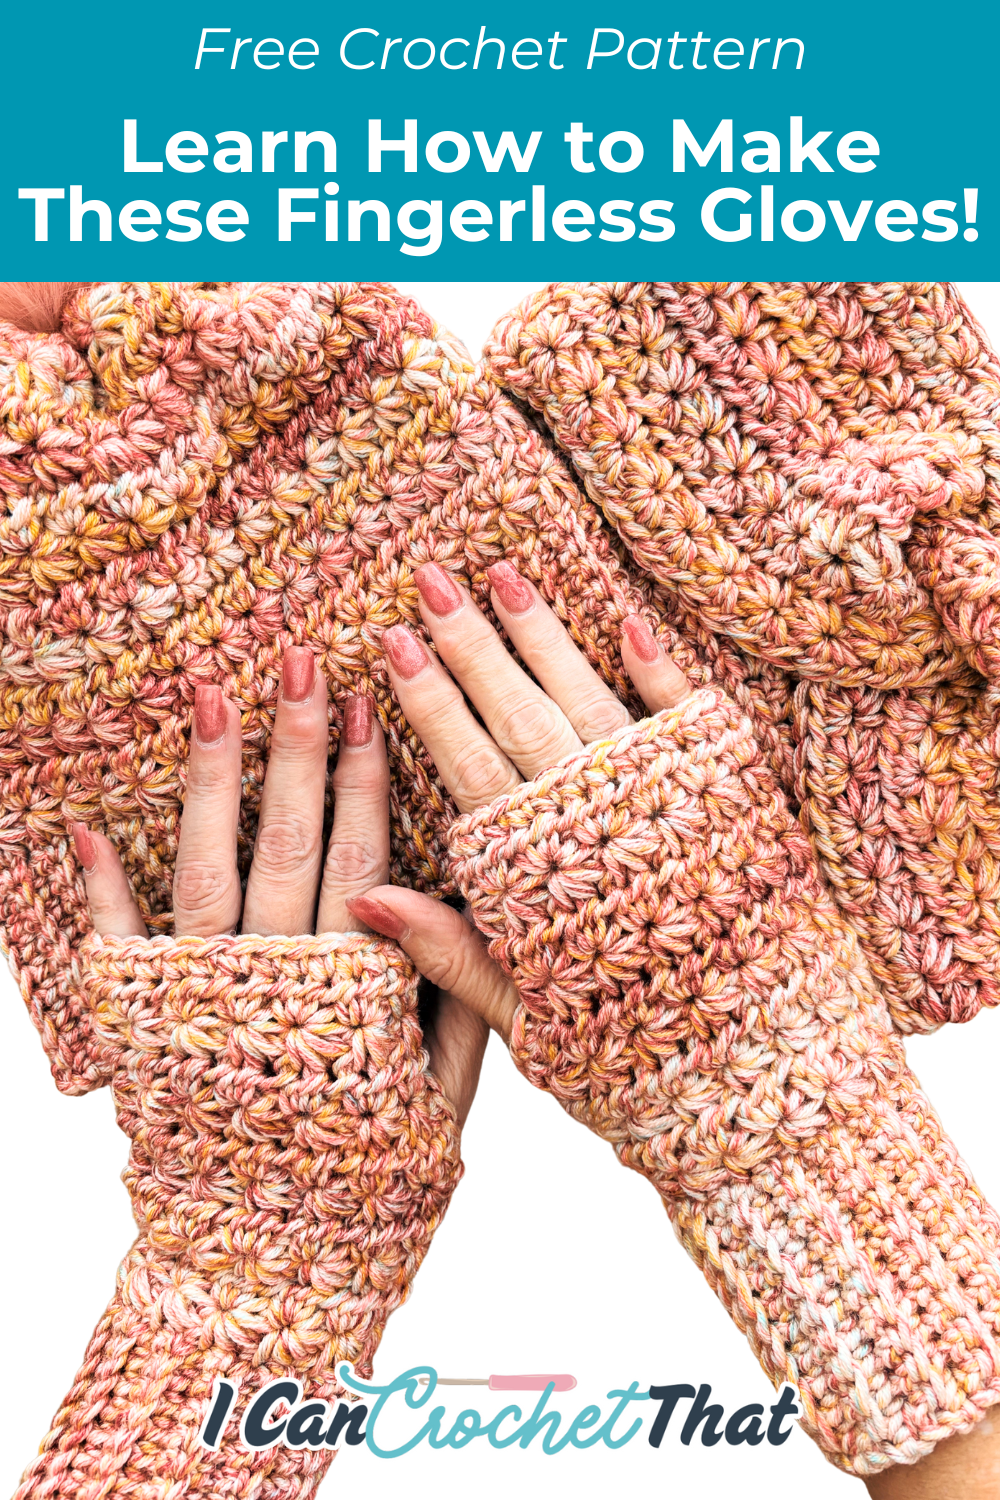
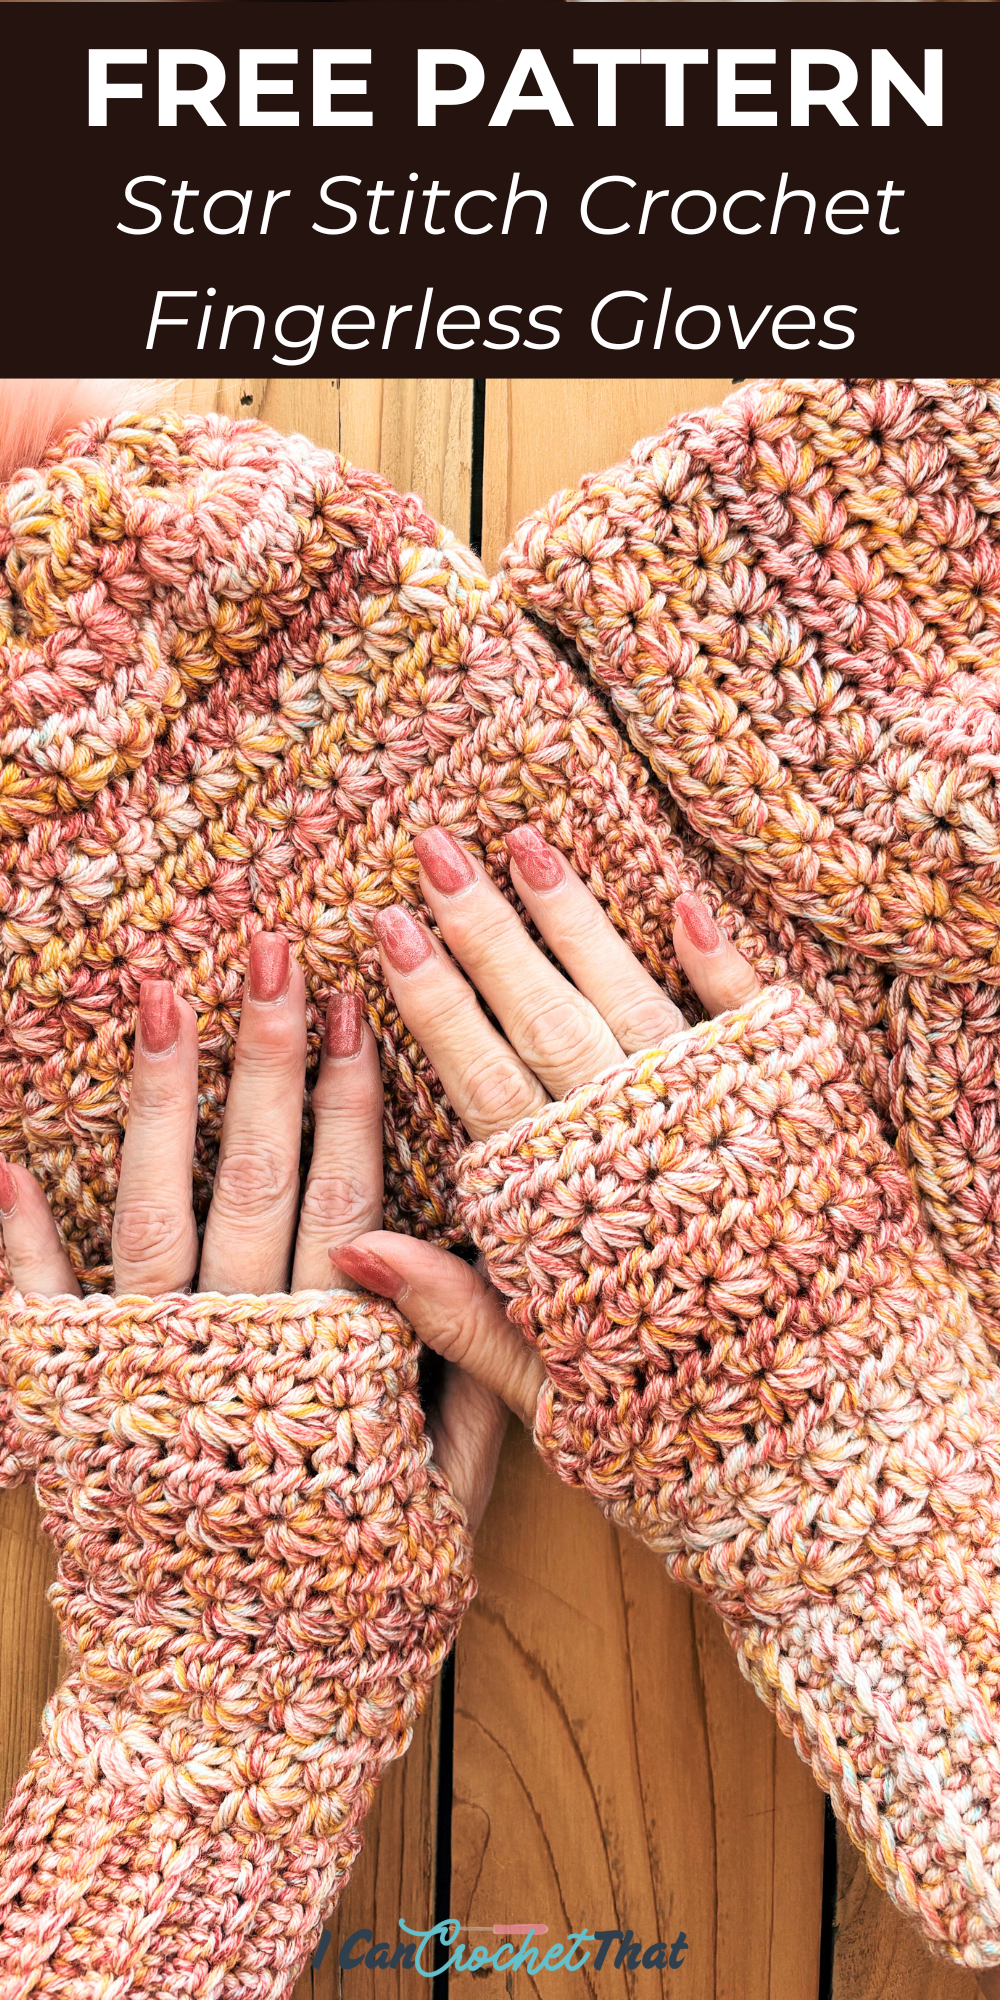
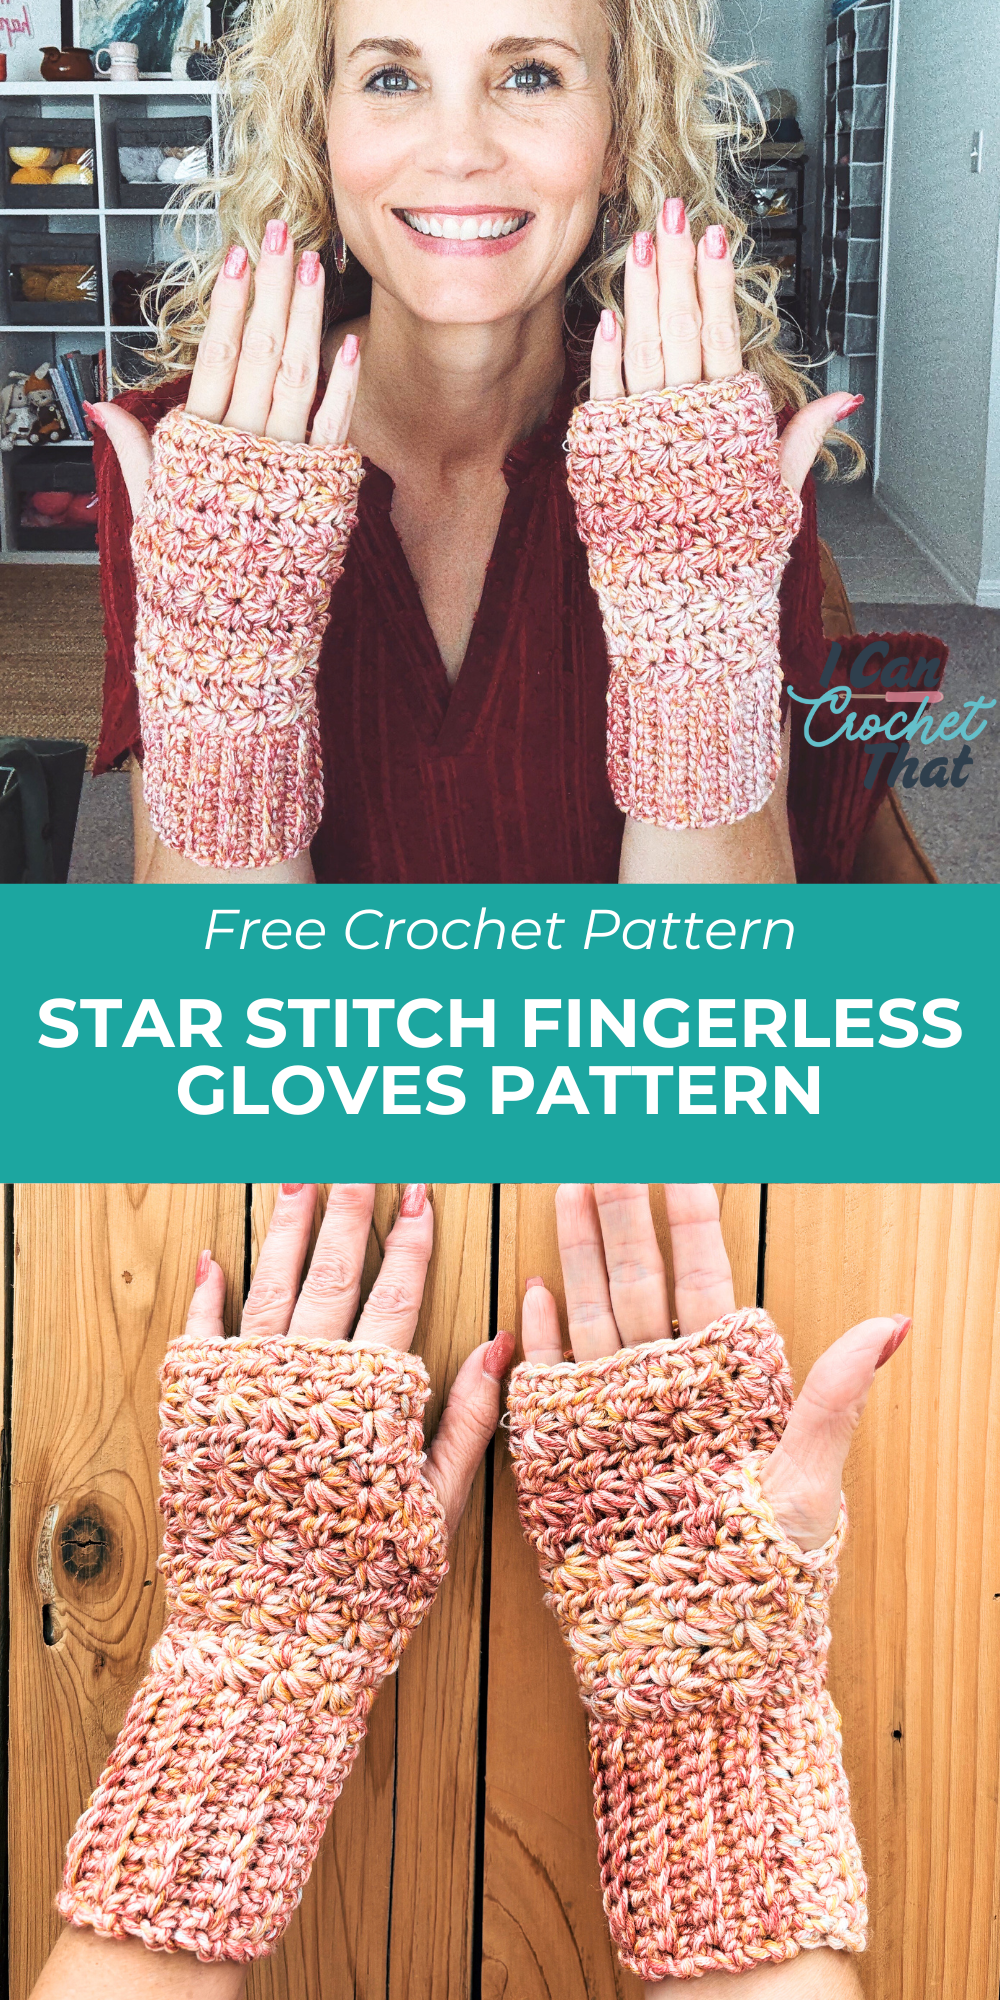
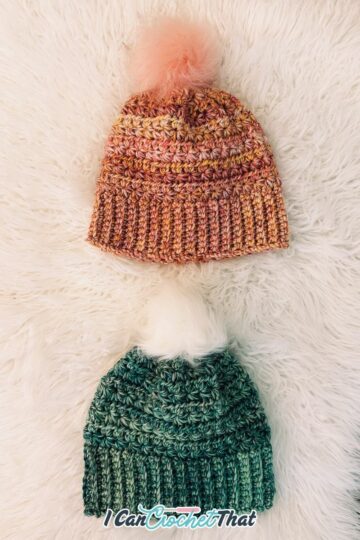
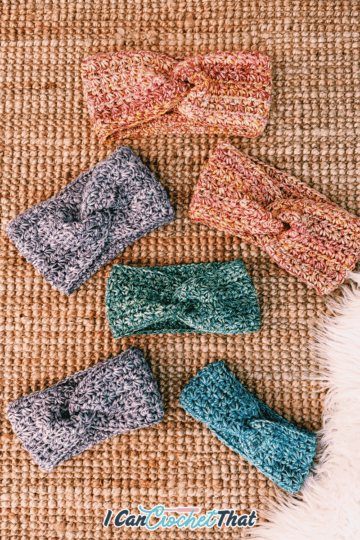
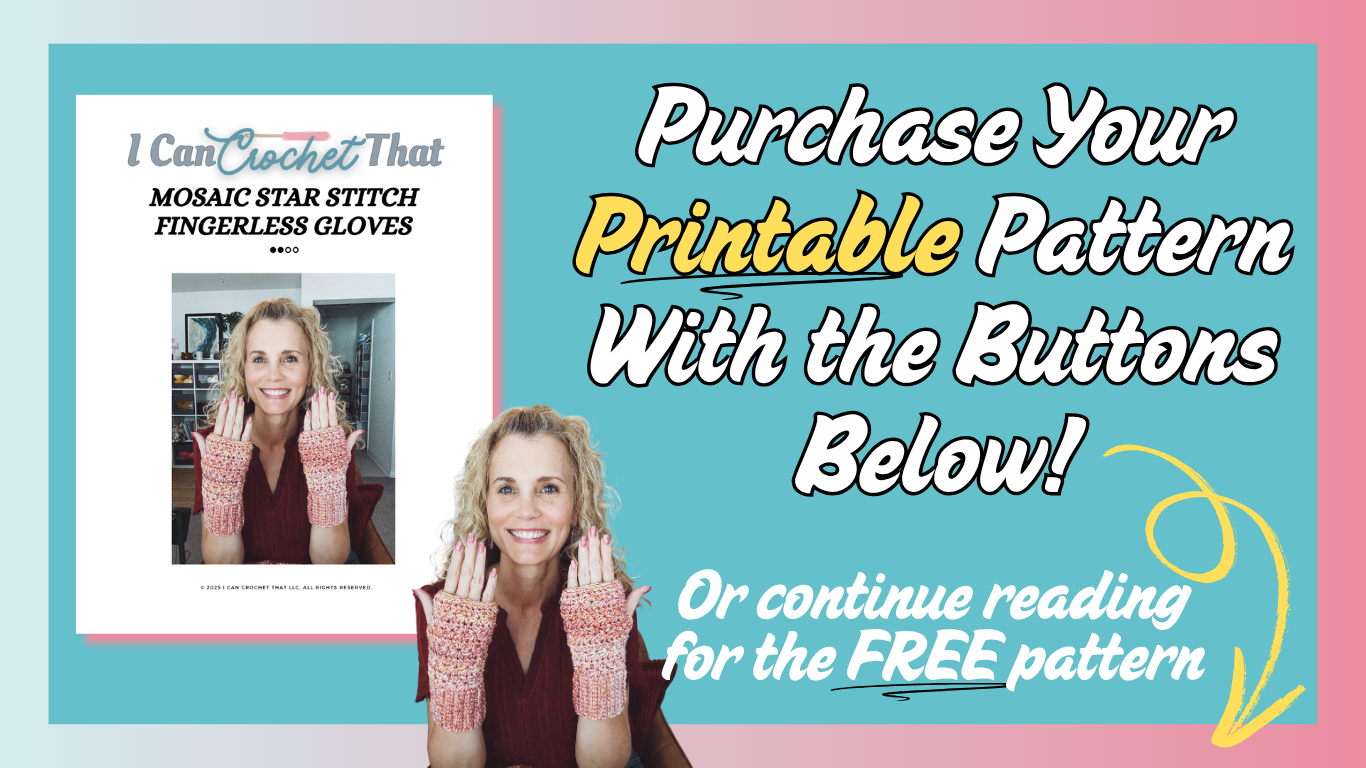
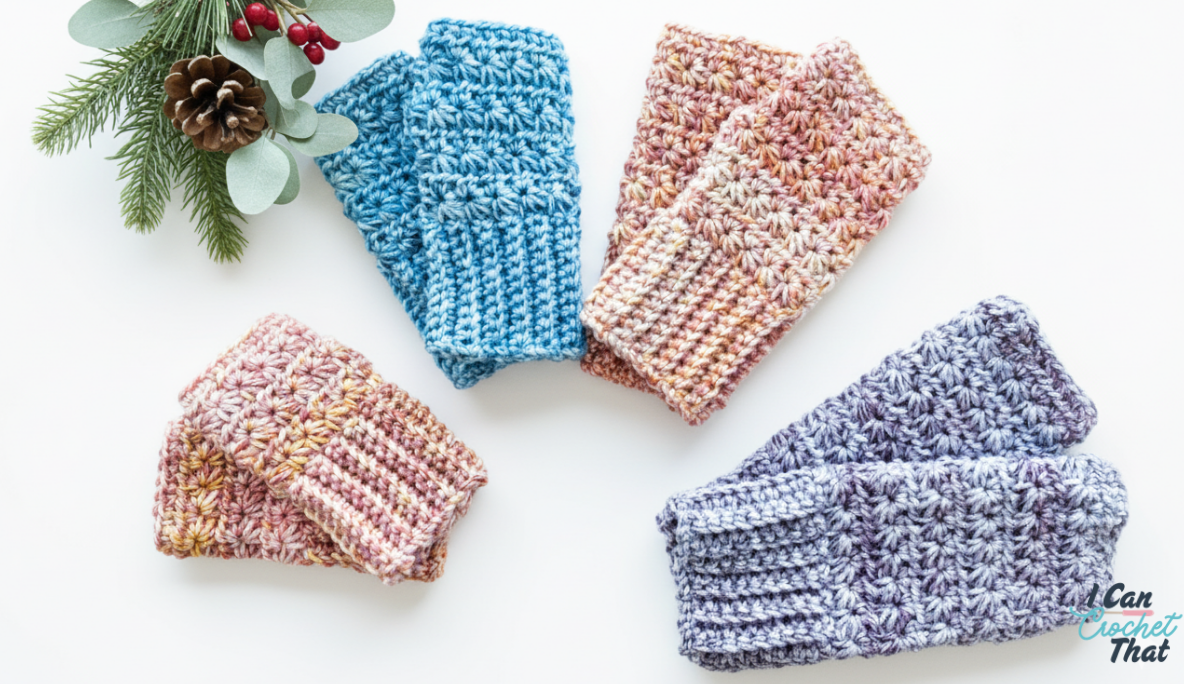
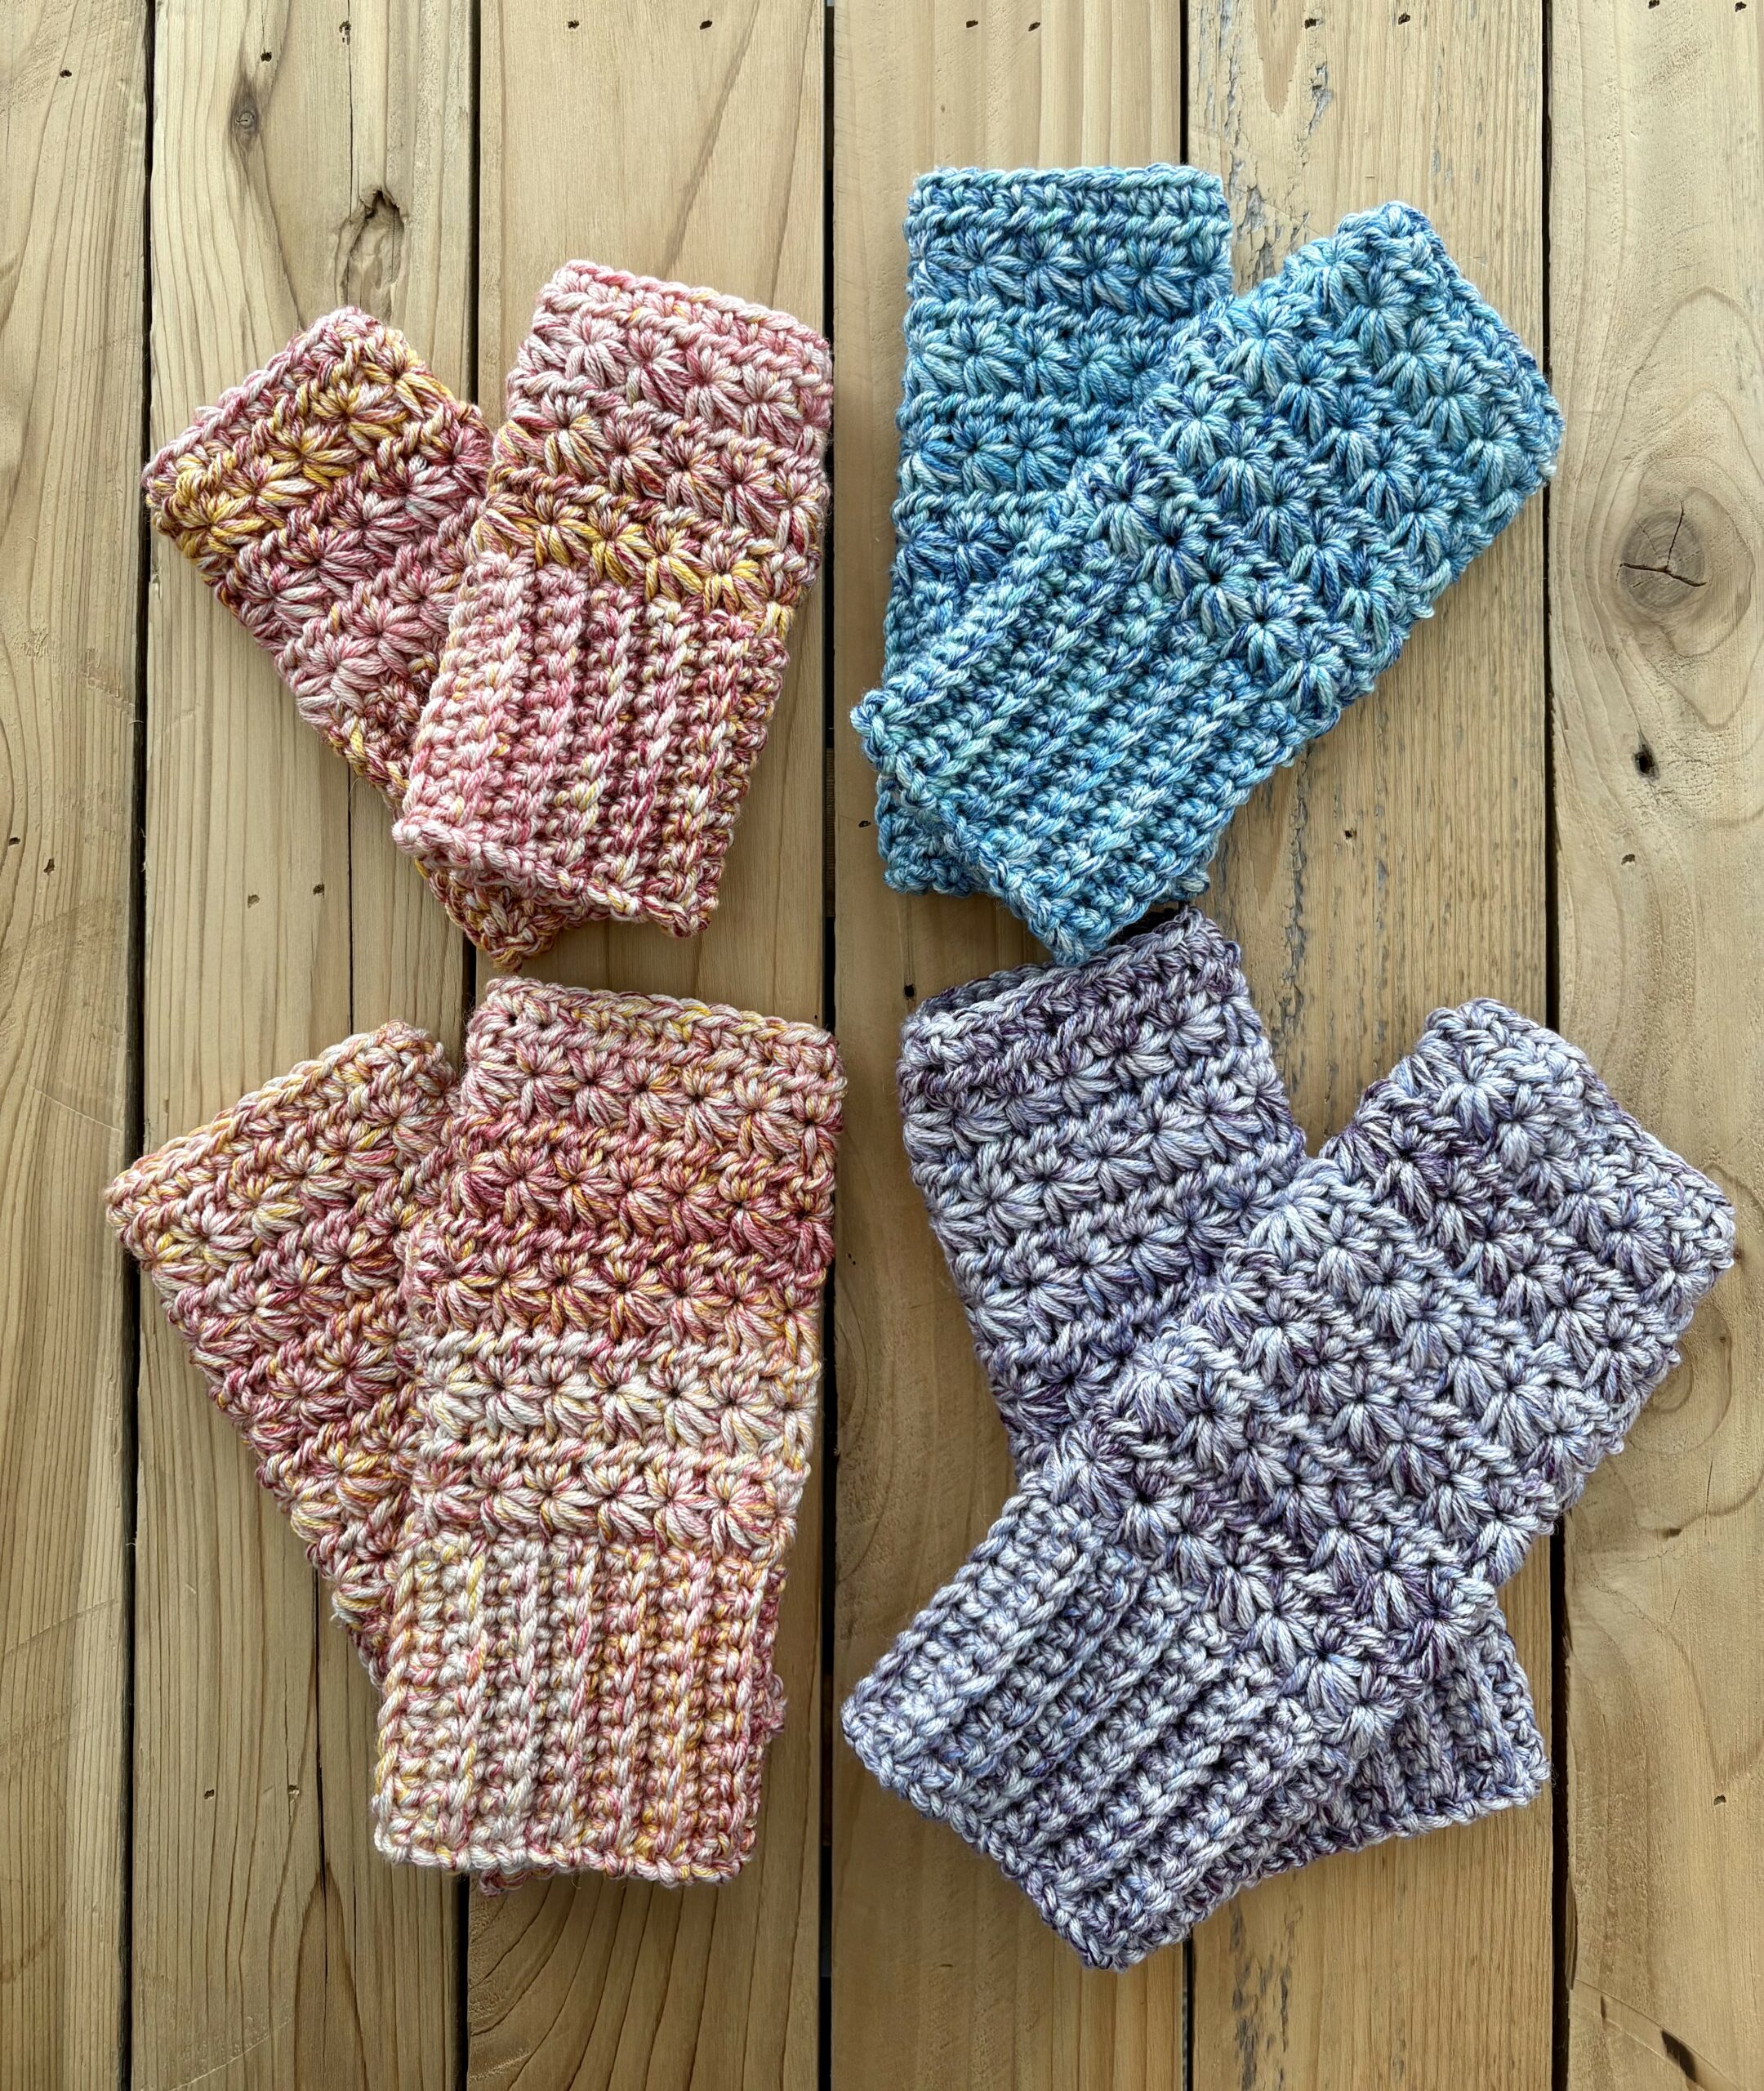
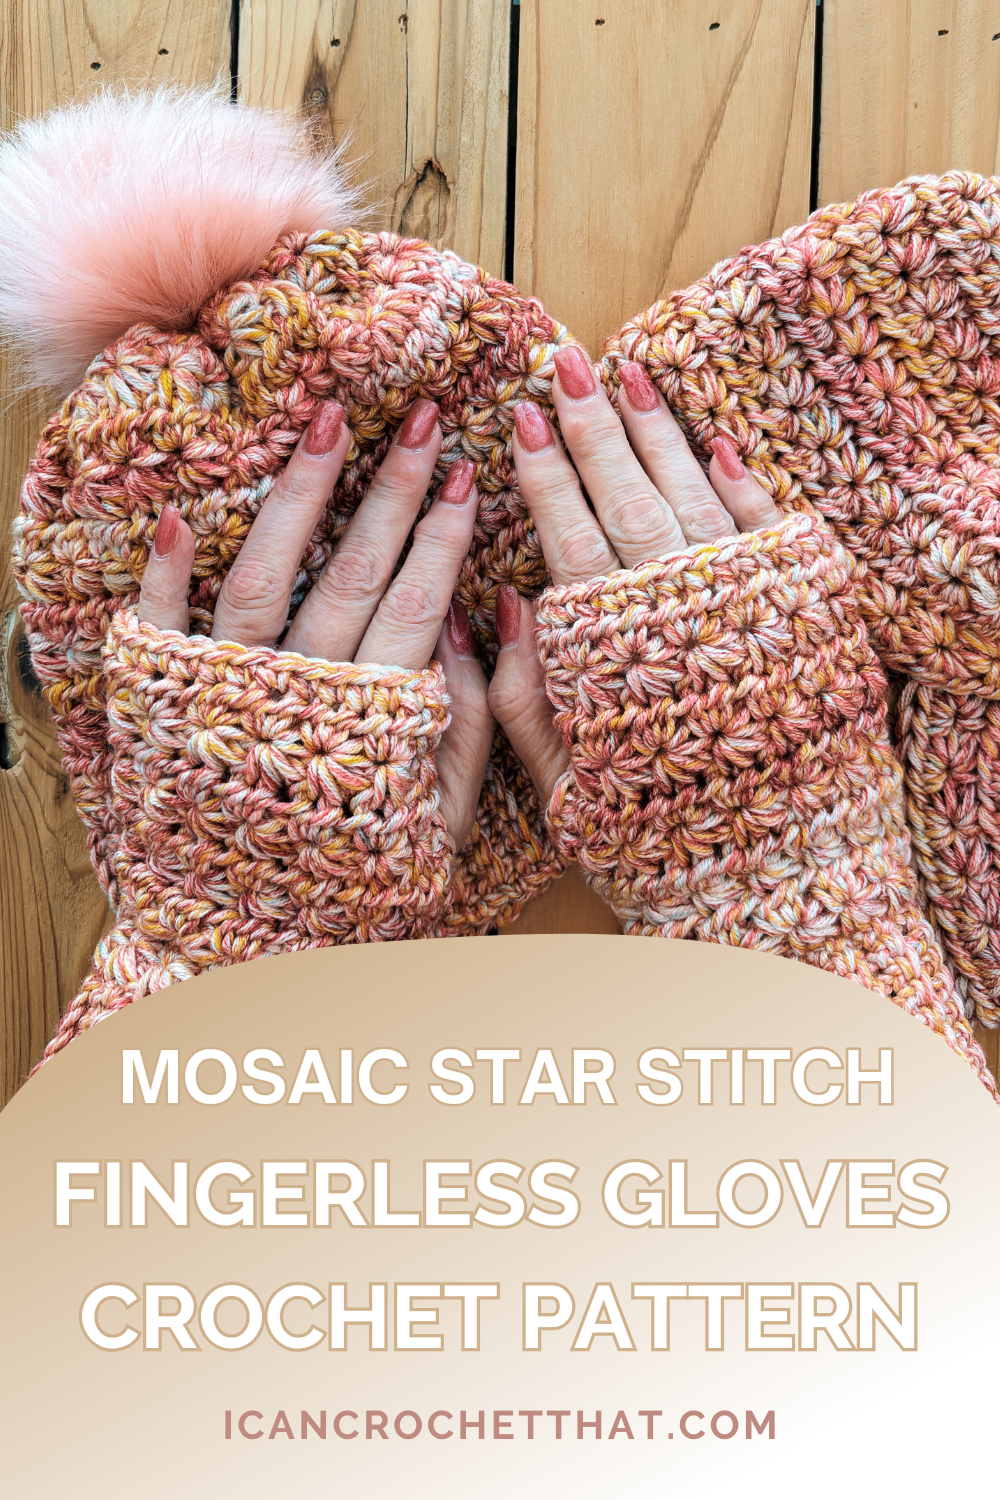
If you love quick, cozy projects with stunning texture, you’re going to love these Mosaic Star Stitch Fingerless Gloves. They’re part of the Mosaic Star Stitch Trio — a matching set that also includes a beanie and ear warmer.
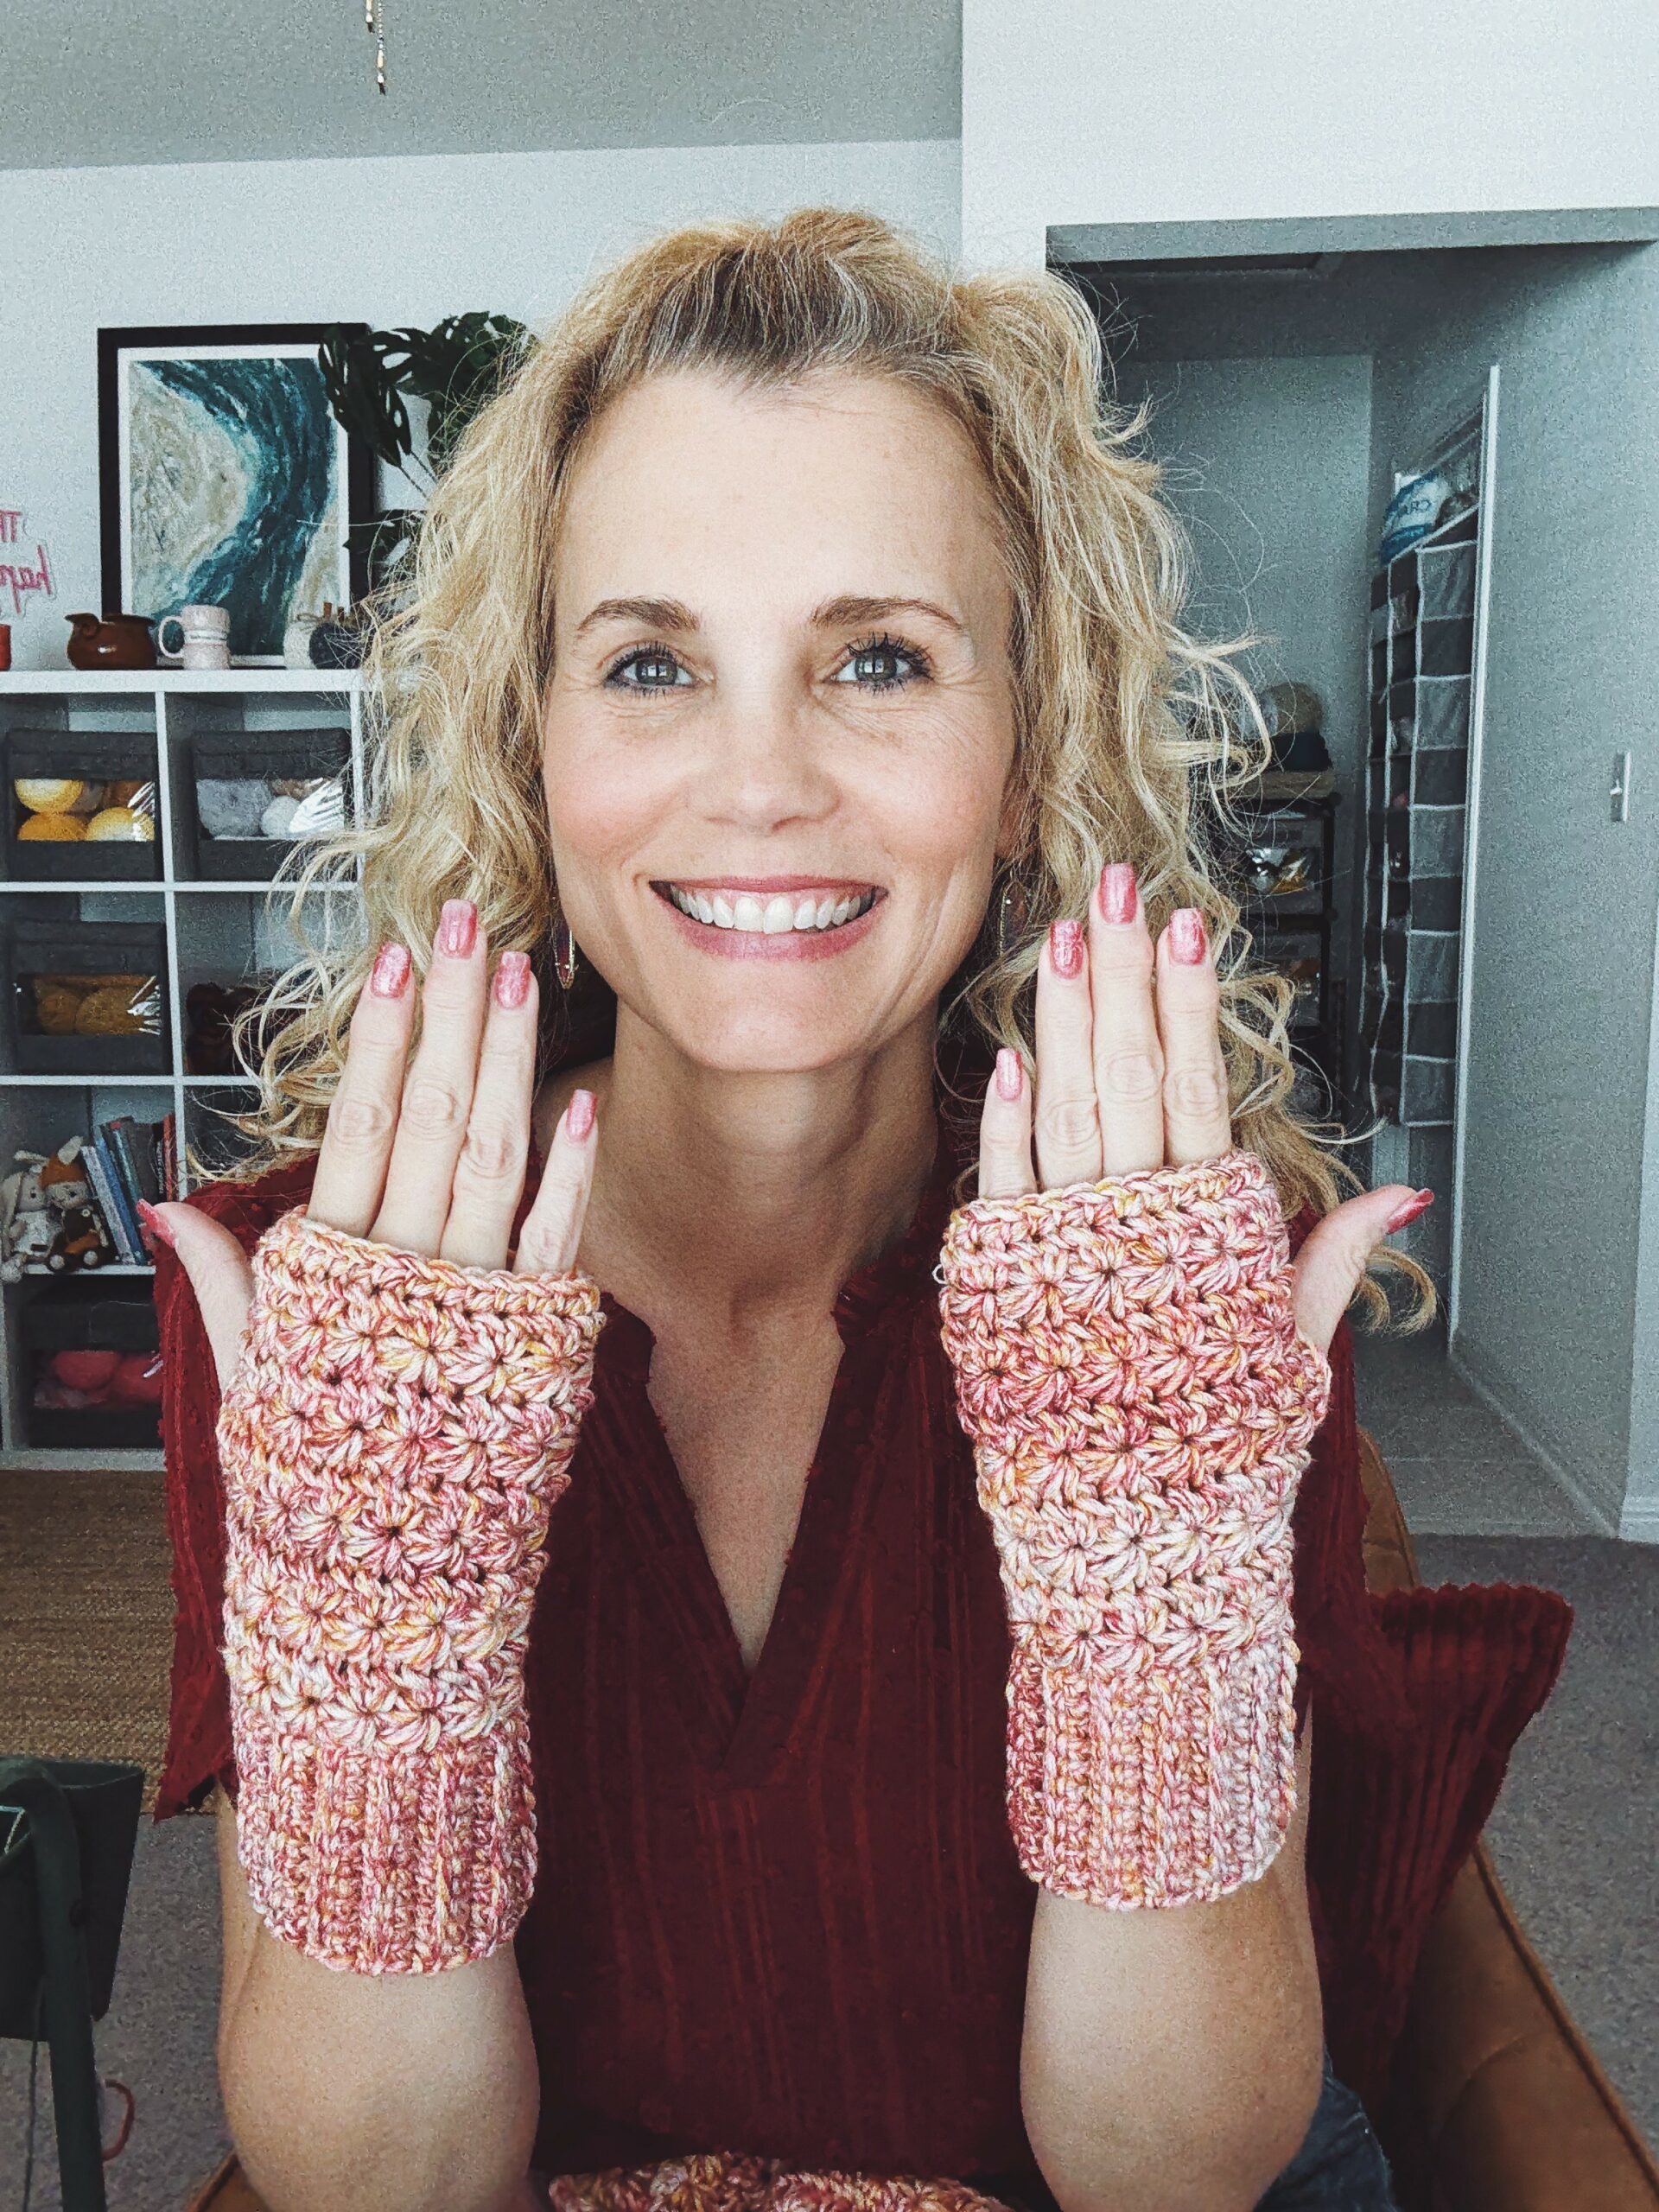
This design uses a chunky #5 yarn and the star stitch, which creates that beautiful look without any complicated techniques. The result? A soft, comfortable pair of gloves that work up fast and make a perfect handmade gift.
Paid PDF includes instructions for all four sizes: Toddler to Adult Large
Mosaic Star Stitch Crochet Fingerless Gloves Video Tutorial
🧶 Materials
Yarn: Caron Simply Me Mosaic (Bulky #5, 62% Acrylic / 20% Nylon / 18% Wool, 140 g / 173 yds per skein)
Amount Used: 87 g (≈108 yds) for one pair of gloves
Purchase Yarn at Michaels.com HERE or via our Amazon.com store HERE
Hook: 5.5 mm (I)
Notions: Yarn needle, scissors, measuring tape
✨ Notes
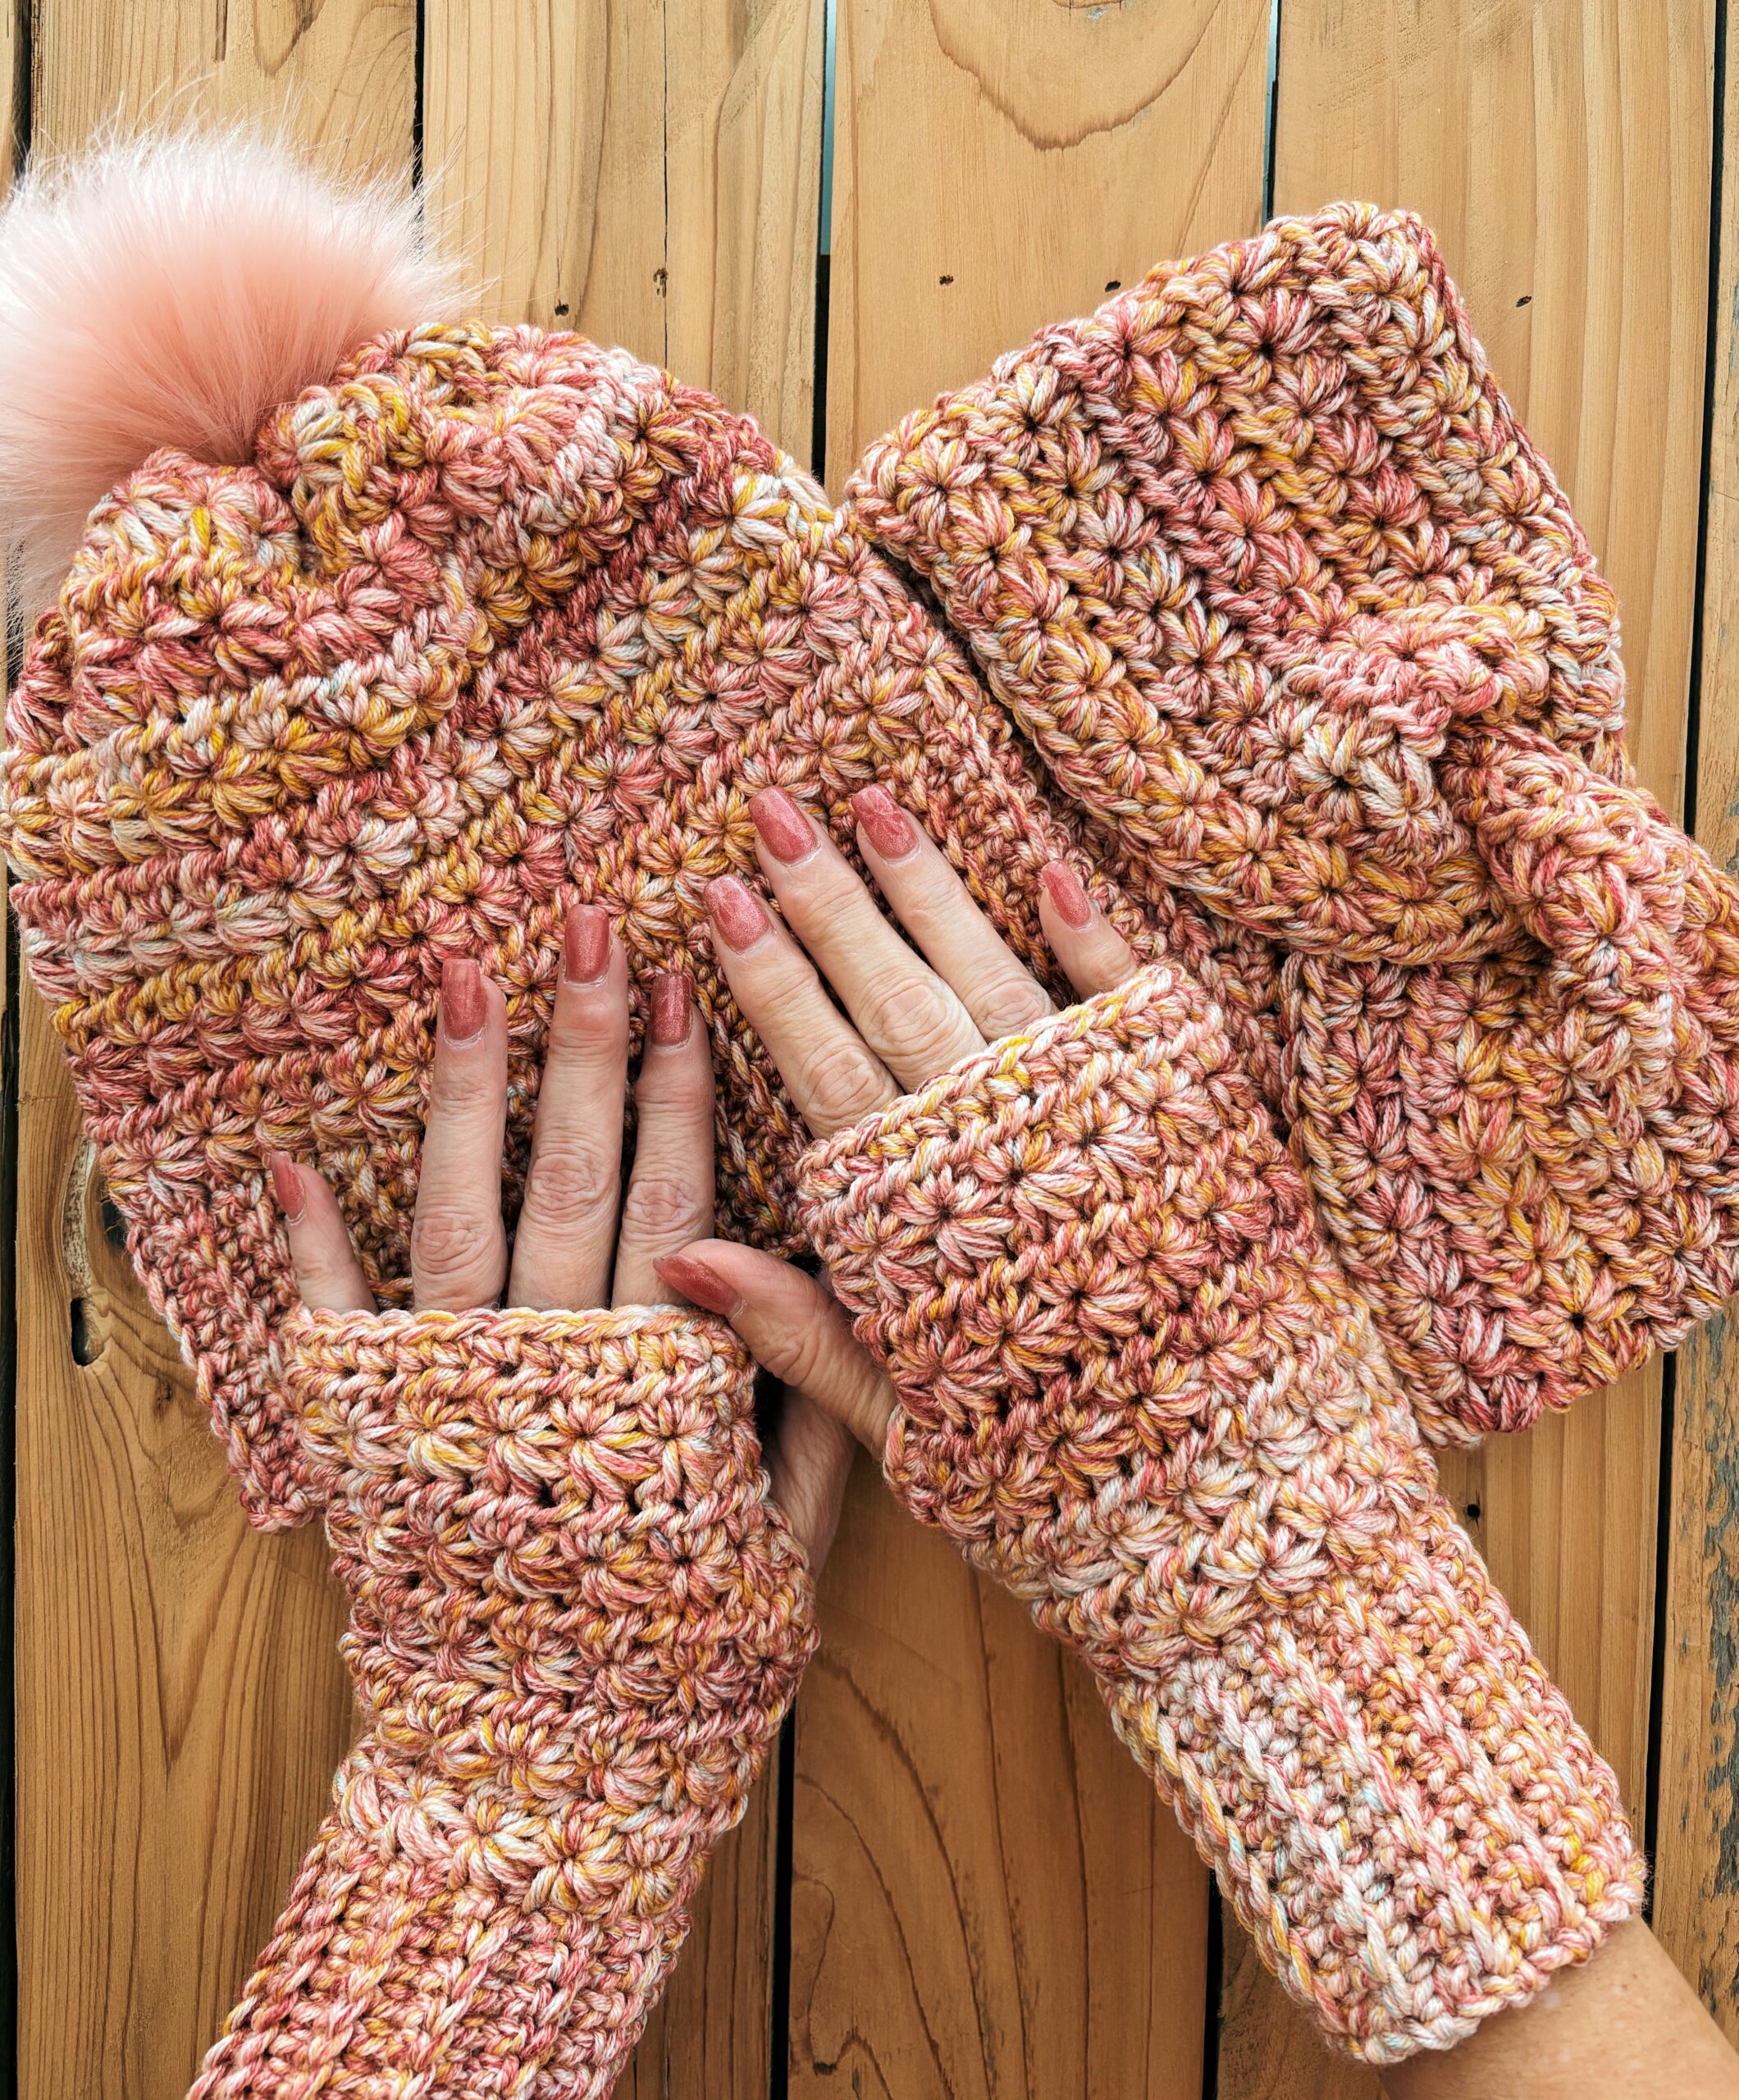
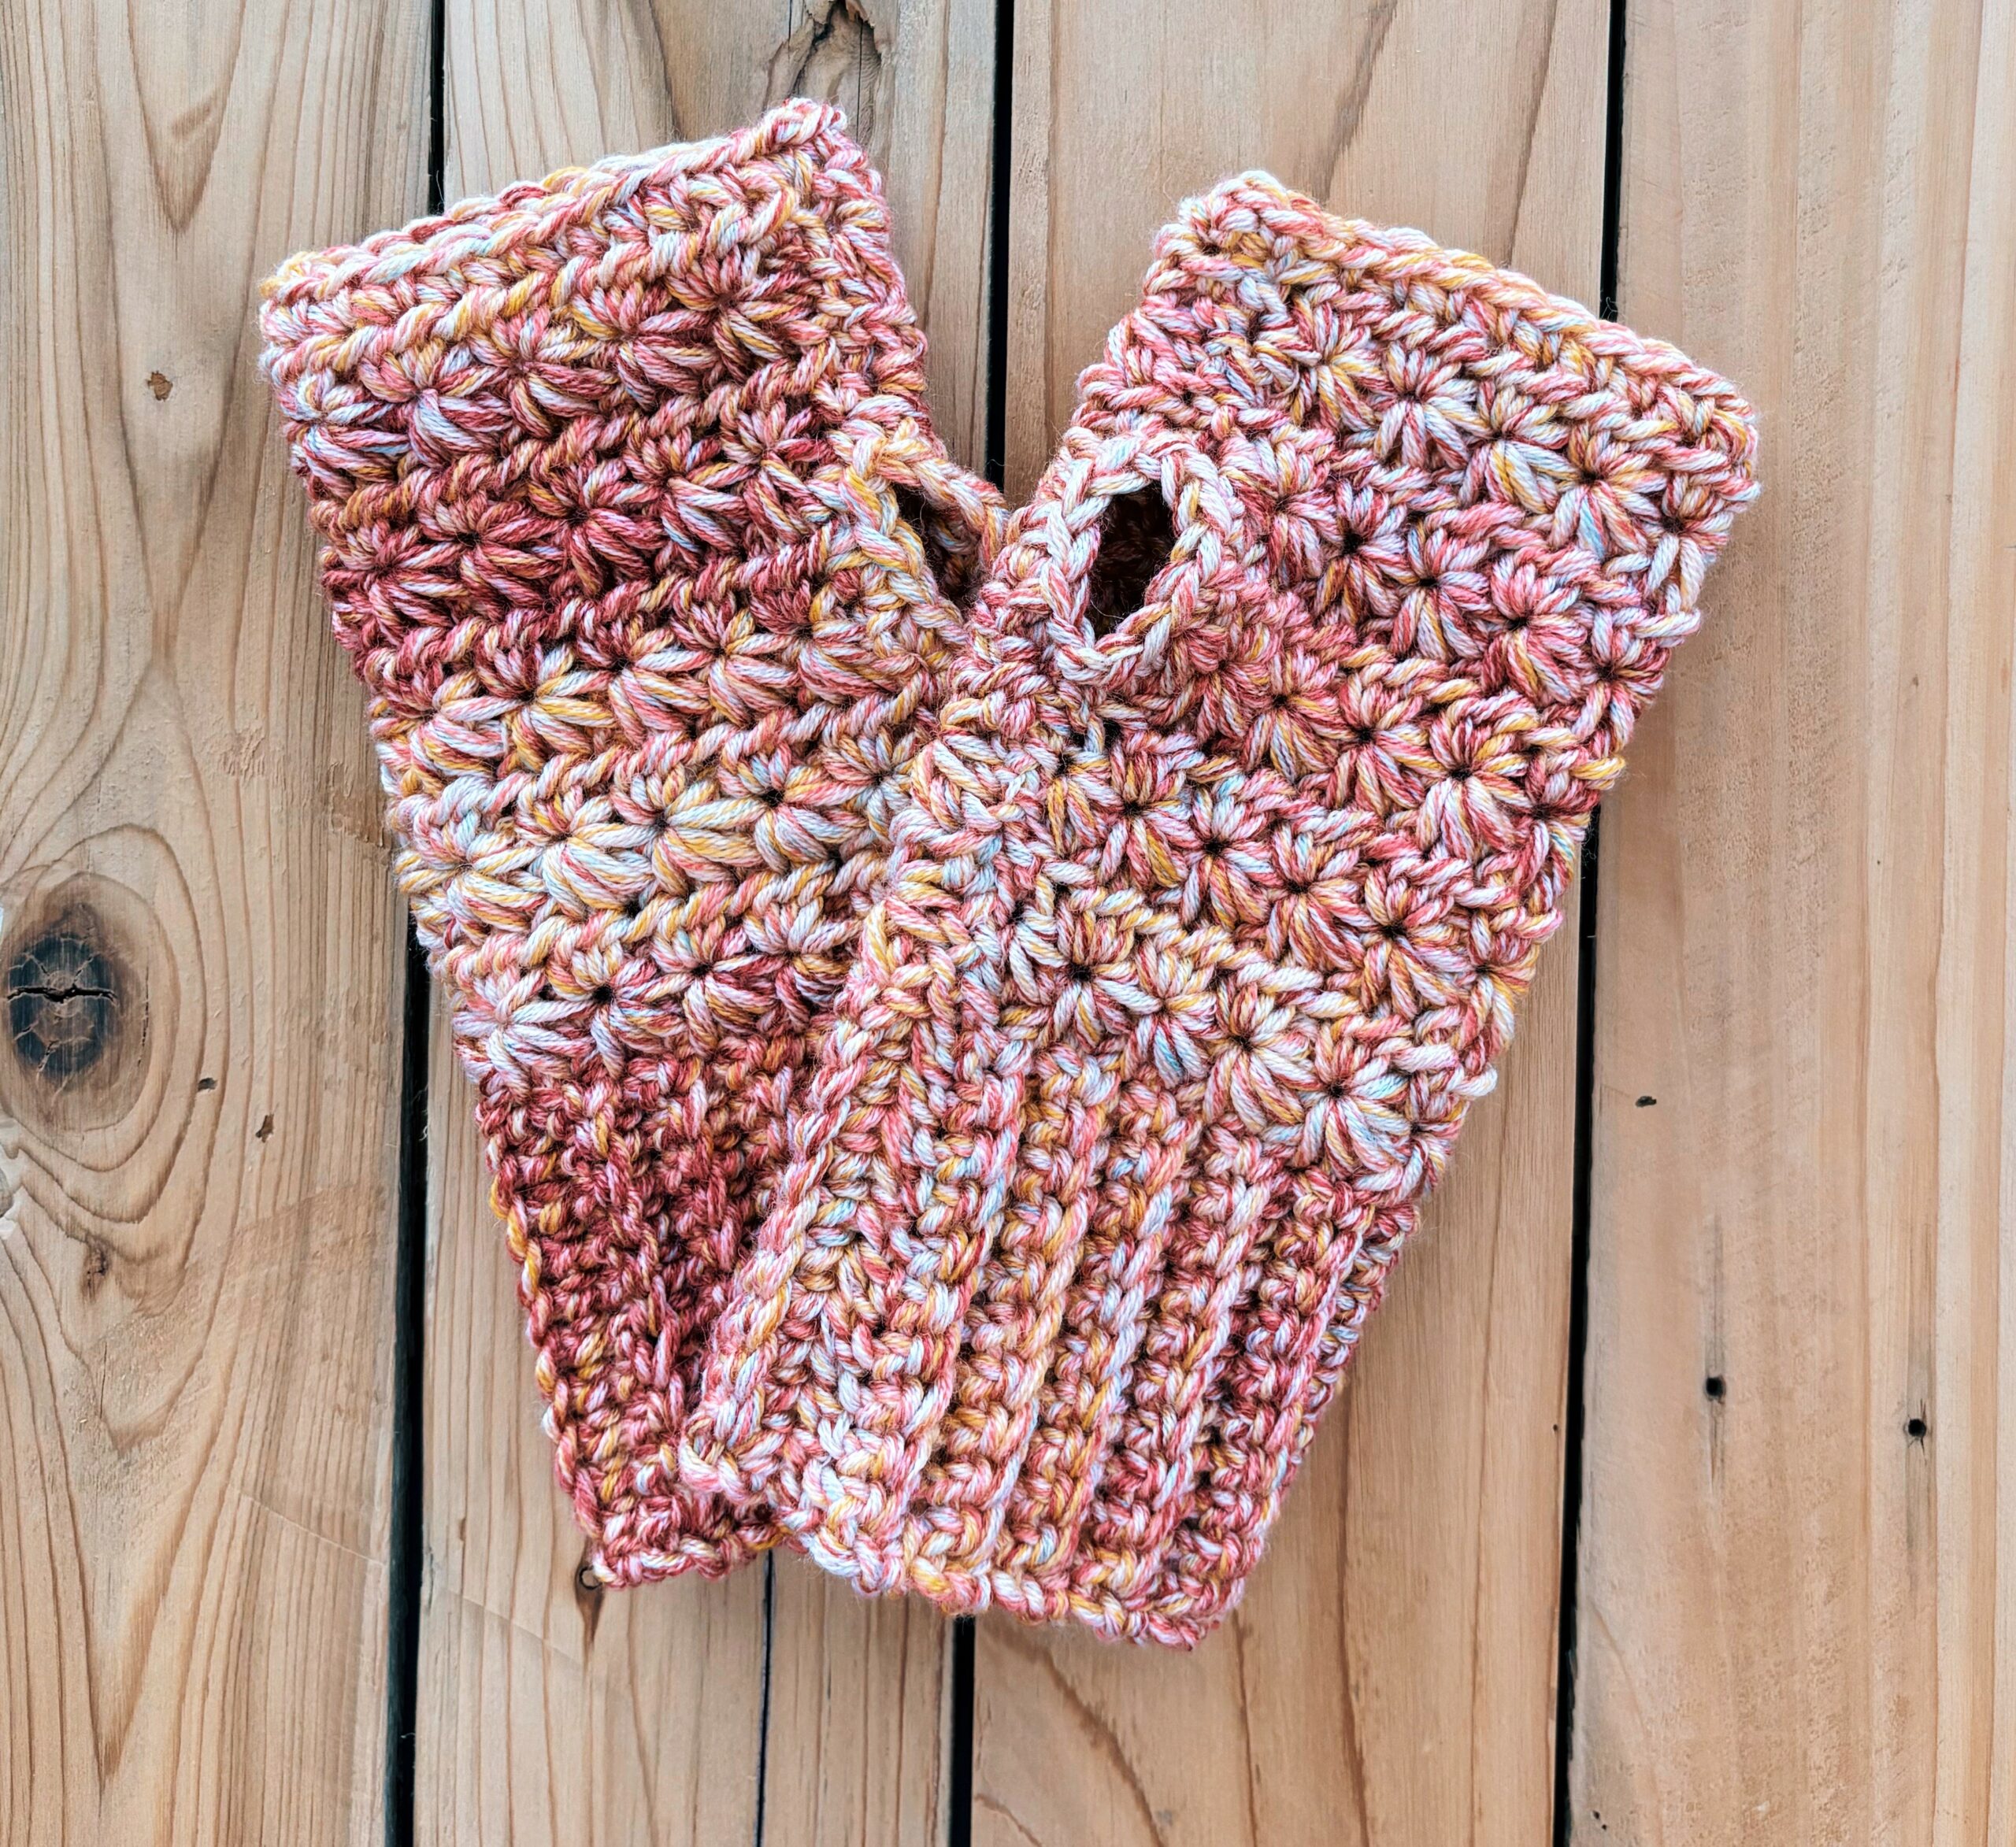
- The gloves are worked flat from the cuff up and seamed together to form the thumb opening.
- The star stitch creates a textured look that highlights the mosaic yarn’s subtle color shifts.
- Make two identical gloves.
- Gauge (2" x 2"): 4 star stitches x 5 rows
- Skill Level: Easy / Confident Beginner
- Finished Size: Approx. 8” tall × 3½” wide (fits average adult woman)
🧵 Abbreviations
| Abbrev. | Meaning |
|---|---|
| ch | chain |
| sc | single crochet |
| scBLO | single crochet in back loop only |
| hdc | half double crochet |
| sl st | slip stitch |
| YO | yarn over |
Mosaic Star Stitch Fingerless Gloves
Part of the Mosaic Star Stitch Trio
These gloves are quick to make, cozy to wear, and look beautiful in chunky variegated yarns like Caron Simply Me Mosaic. Choose your size below and follow the pattern start-to-finish — each one is written separately for clarity.
Teen / Small Adult Size (More Sizes available via paid PDF)
Cuff
Start with a 40″ tail (you’ll use this later for seaming).
Ch 12.
Row 1: Sc in 2nd ch from hook and in each ch across. (11 sts), Ch 1, turn.
Rows 2–26:
Sc through both loops in the first st, scBLO in the next 9 sts, sc through both loops in the last st. (11 sts), Ch 1, turn after each row.
Your cuff should measure about 7 inches when lightly stretched.
Do not fasten off. You’ll now work along the long edge of the cuff.
⭐ Star Stitch Section
Row 1 – Star Stitch Row (12 full stars + ½ star)
Ch 3.
Insert hook in 2nd ch from hook, pull up a loop. (2 loops on hook)
Insert hook in 3rd ch from hook, pull up a loop. (3 loops on hook)
Pull up one loop in each of the next 3 rows of cuff (6 loops on hook).
YO, pull through all 6 loops, ch 1 to close the star.
*Insert hook in eye of previous star (2 loops on hook), between last two spikes (3 loops), in same cuff row as previous star (4 loops), in next cuff row (5 loops), and in the next cuff row (6 loops). YO, pull through all 6 loops, ch 1 to close star.*
Repeat from * to * for a total of 12 full star stitches.
(Last stitch of row is a half star)
Insert hook in eye of previous star (2 loops on hook), between last two spikes (3 loops), in same cuff row as previous star (4 loops), yo, pull through all 4 loops, ch 2, turn
Row 2: Half Double Crochet Row
Work 2 hdc in the eye of each full star (the ch-1 space) across.
Finish with 1 hdc in the edge of the starting chain. (26 hdc total - this is counting the ch 2 you started the row with)
Row 3:
Ch 3.
Insert hook in 2nd ch from hook, pull up a loop. (2 loops on hook)
Insert hook in 3rd ch from hook, pull up a loop. (3 loops on hook)
Pull up one loop in each of the next 3 sts (6 loops on hook).
YO, pull through all 6 loops, ch 1 to close the star.
*Insert hook in eye of previous star (2 loops on hook), between last two spikes (3 loops), in same st as previous star's last st (4 loops), in next st (5 loops), and in the next st (6 loops). YO, pull through all 6 loops, ch 1 to close star.*
Repeat from * to * for a total of 12 full star stitches.
Last stitch of row is a half star
Insert hook in eye of previous star (2 loops on hook), between last two spikes (3 loops), in same st as previous star’s last st (4 loops), yo, pull through all 4 loops, ch 2, turn

Rows 4 - 10:
Repeat rows 2 and 3
You will have five full star stitch rows total, ending with an hdc row.
Fasten off, leaving a small tail for seaming.
Instructions for seaming and finishing.
Seaming & Finishing
1. Top Seam
- Fold glove right sides together.
- Using the tail from fastening off, seam down from the top about 1½ star stitch rows (≈1½”).
- Fasten off and weave in the end.
2. Cuff Seam & Thumb Opening
- Using the starting tail, seam the cuff edges together.
- Continue seaming up the side about two star stitch rows to create the thumb opening.
3. Thumb Edging
- Turn glove right side out.
- Using the rest of the yarn from seaming the bottom of glove, Ch 1, sc evenly around (≈12 sc).
- Join with sl st to first sc, fasten off, weave in ends.
4. Top Edging
- Attach yarn to the top edge.
- Sc around (≈26 sc).
- Join with sl st to first sc, fasten off, weave in all remaining ends.
Repeat all steps for the second glove.
🌈 You Made It!
You just finished your Mosaic Star Stitch Fingerless Gloves!
They’re quick to make, beautifully textured, and the perfect weekend project.
Pair them with the matching Mosaic Beanie and Ear Warmer to complete the look — or gift them as a handmade set for the holidays.
Tag your makes #ICanCrochetThat and #MosaicStarStitchTrio so I can see and share your beautiful creations!
Pin to Save for Later