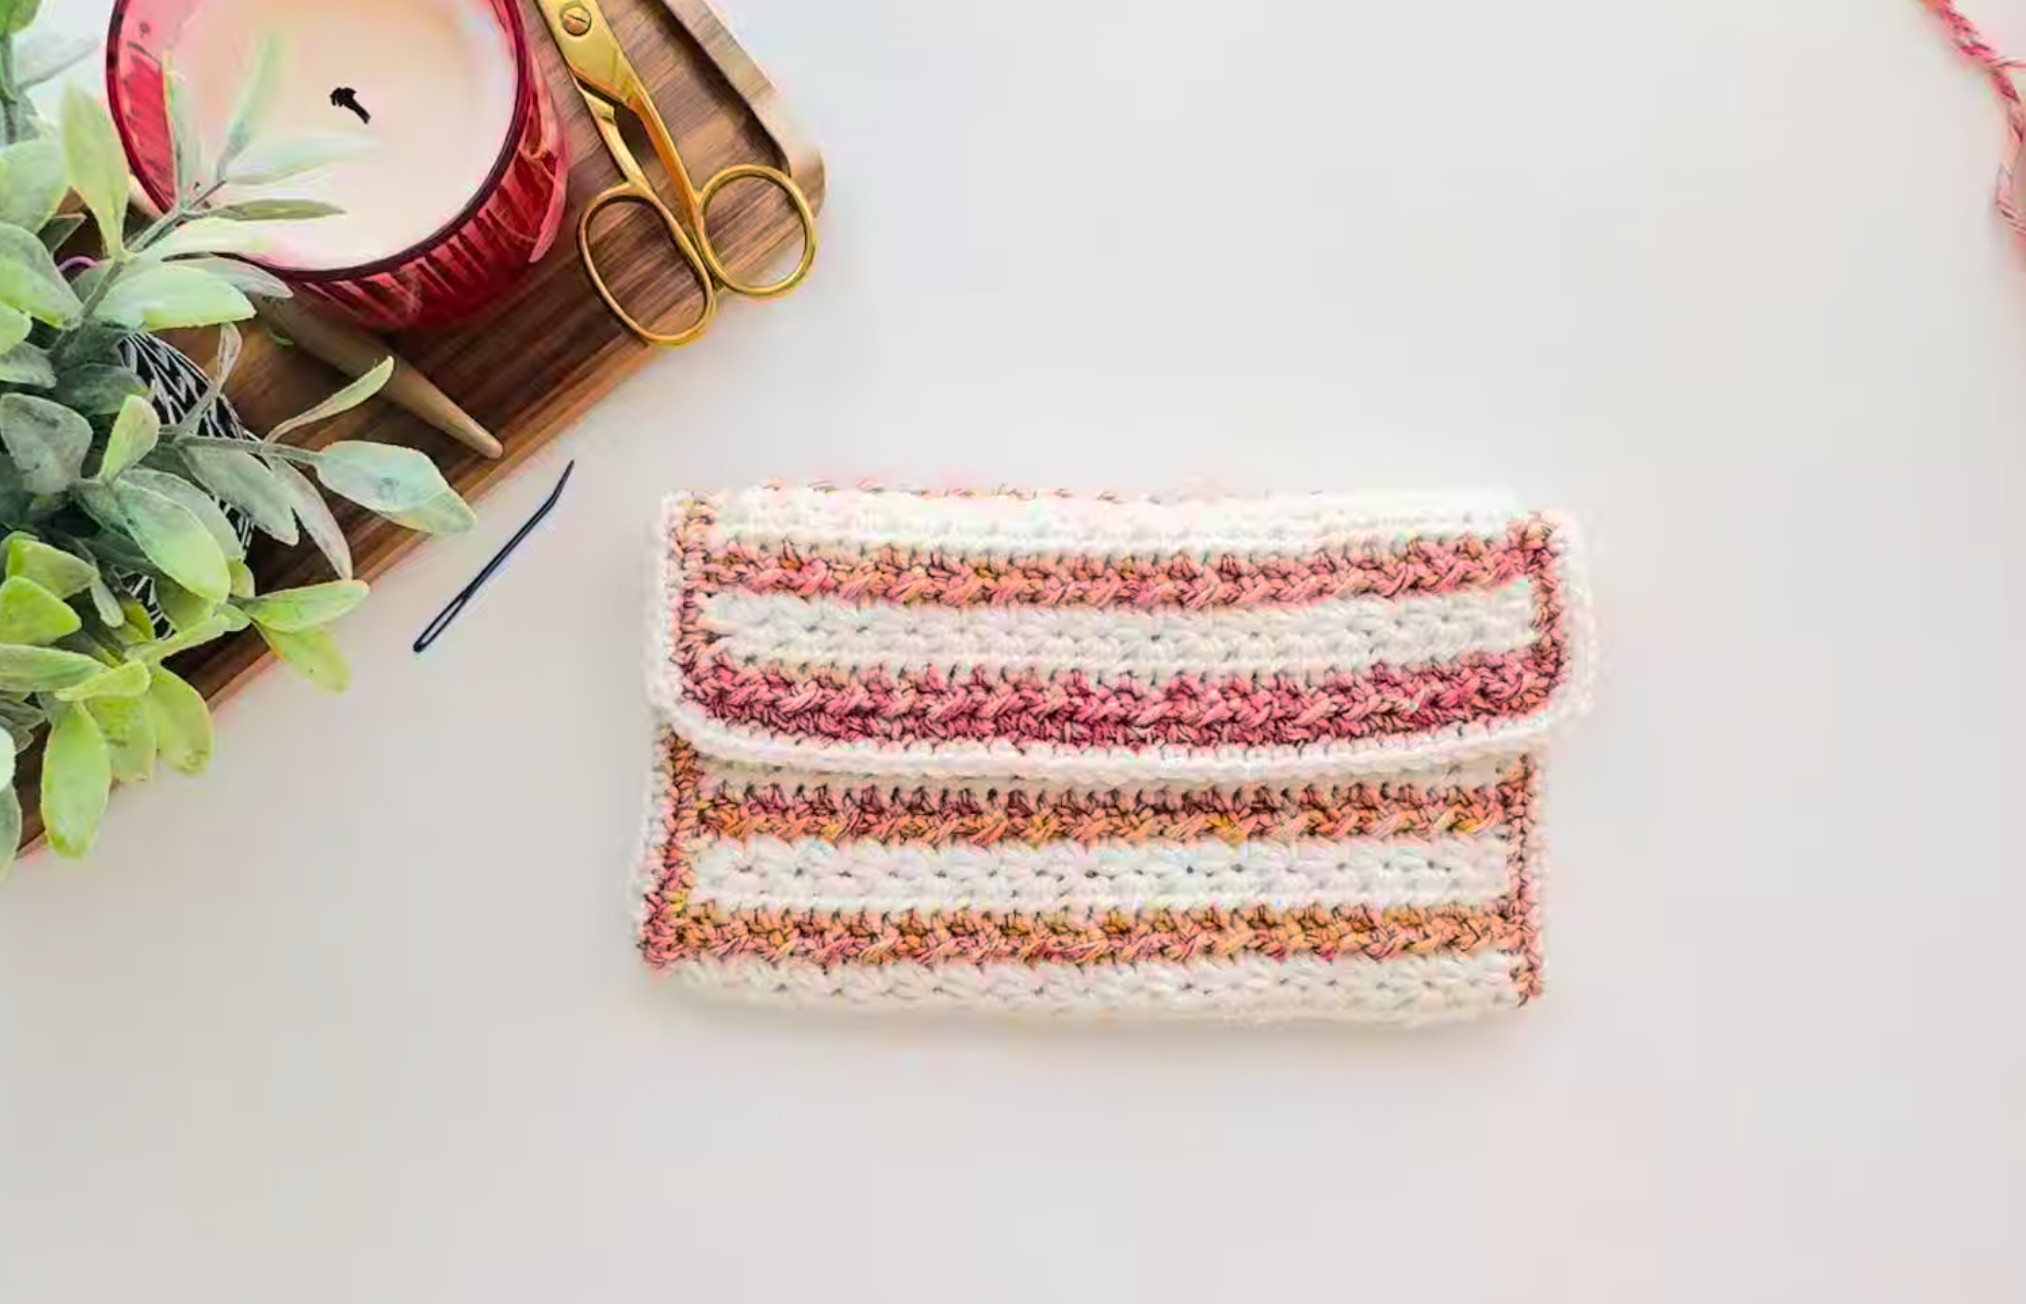
A Free Crochet Clutch Pattern
There’s something magical about combining texture and color in a small, giftable project, and this clutch does exactly that.
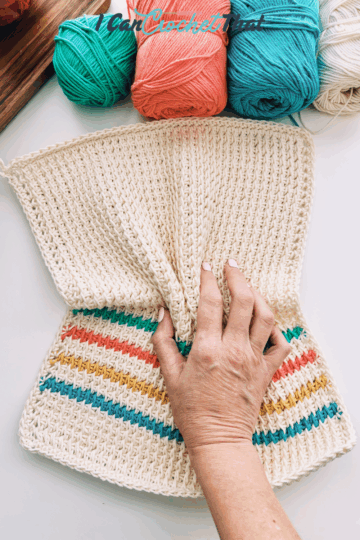
If you loved the texture combination from the Amelia Blanket, you’re going to love this accessory version.
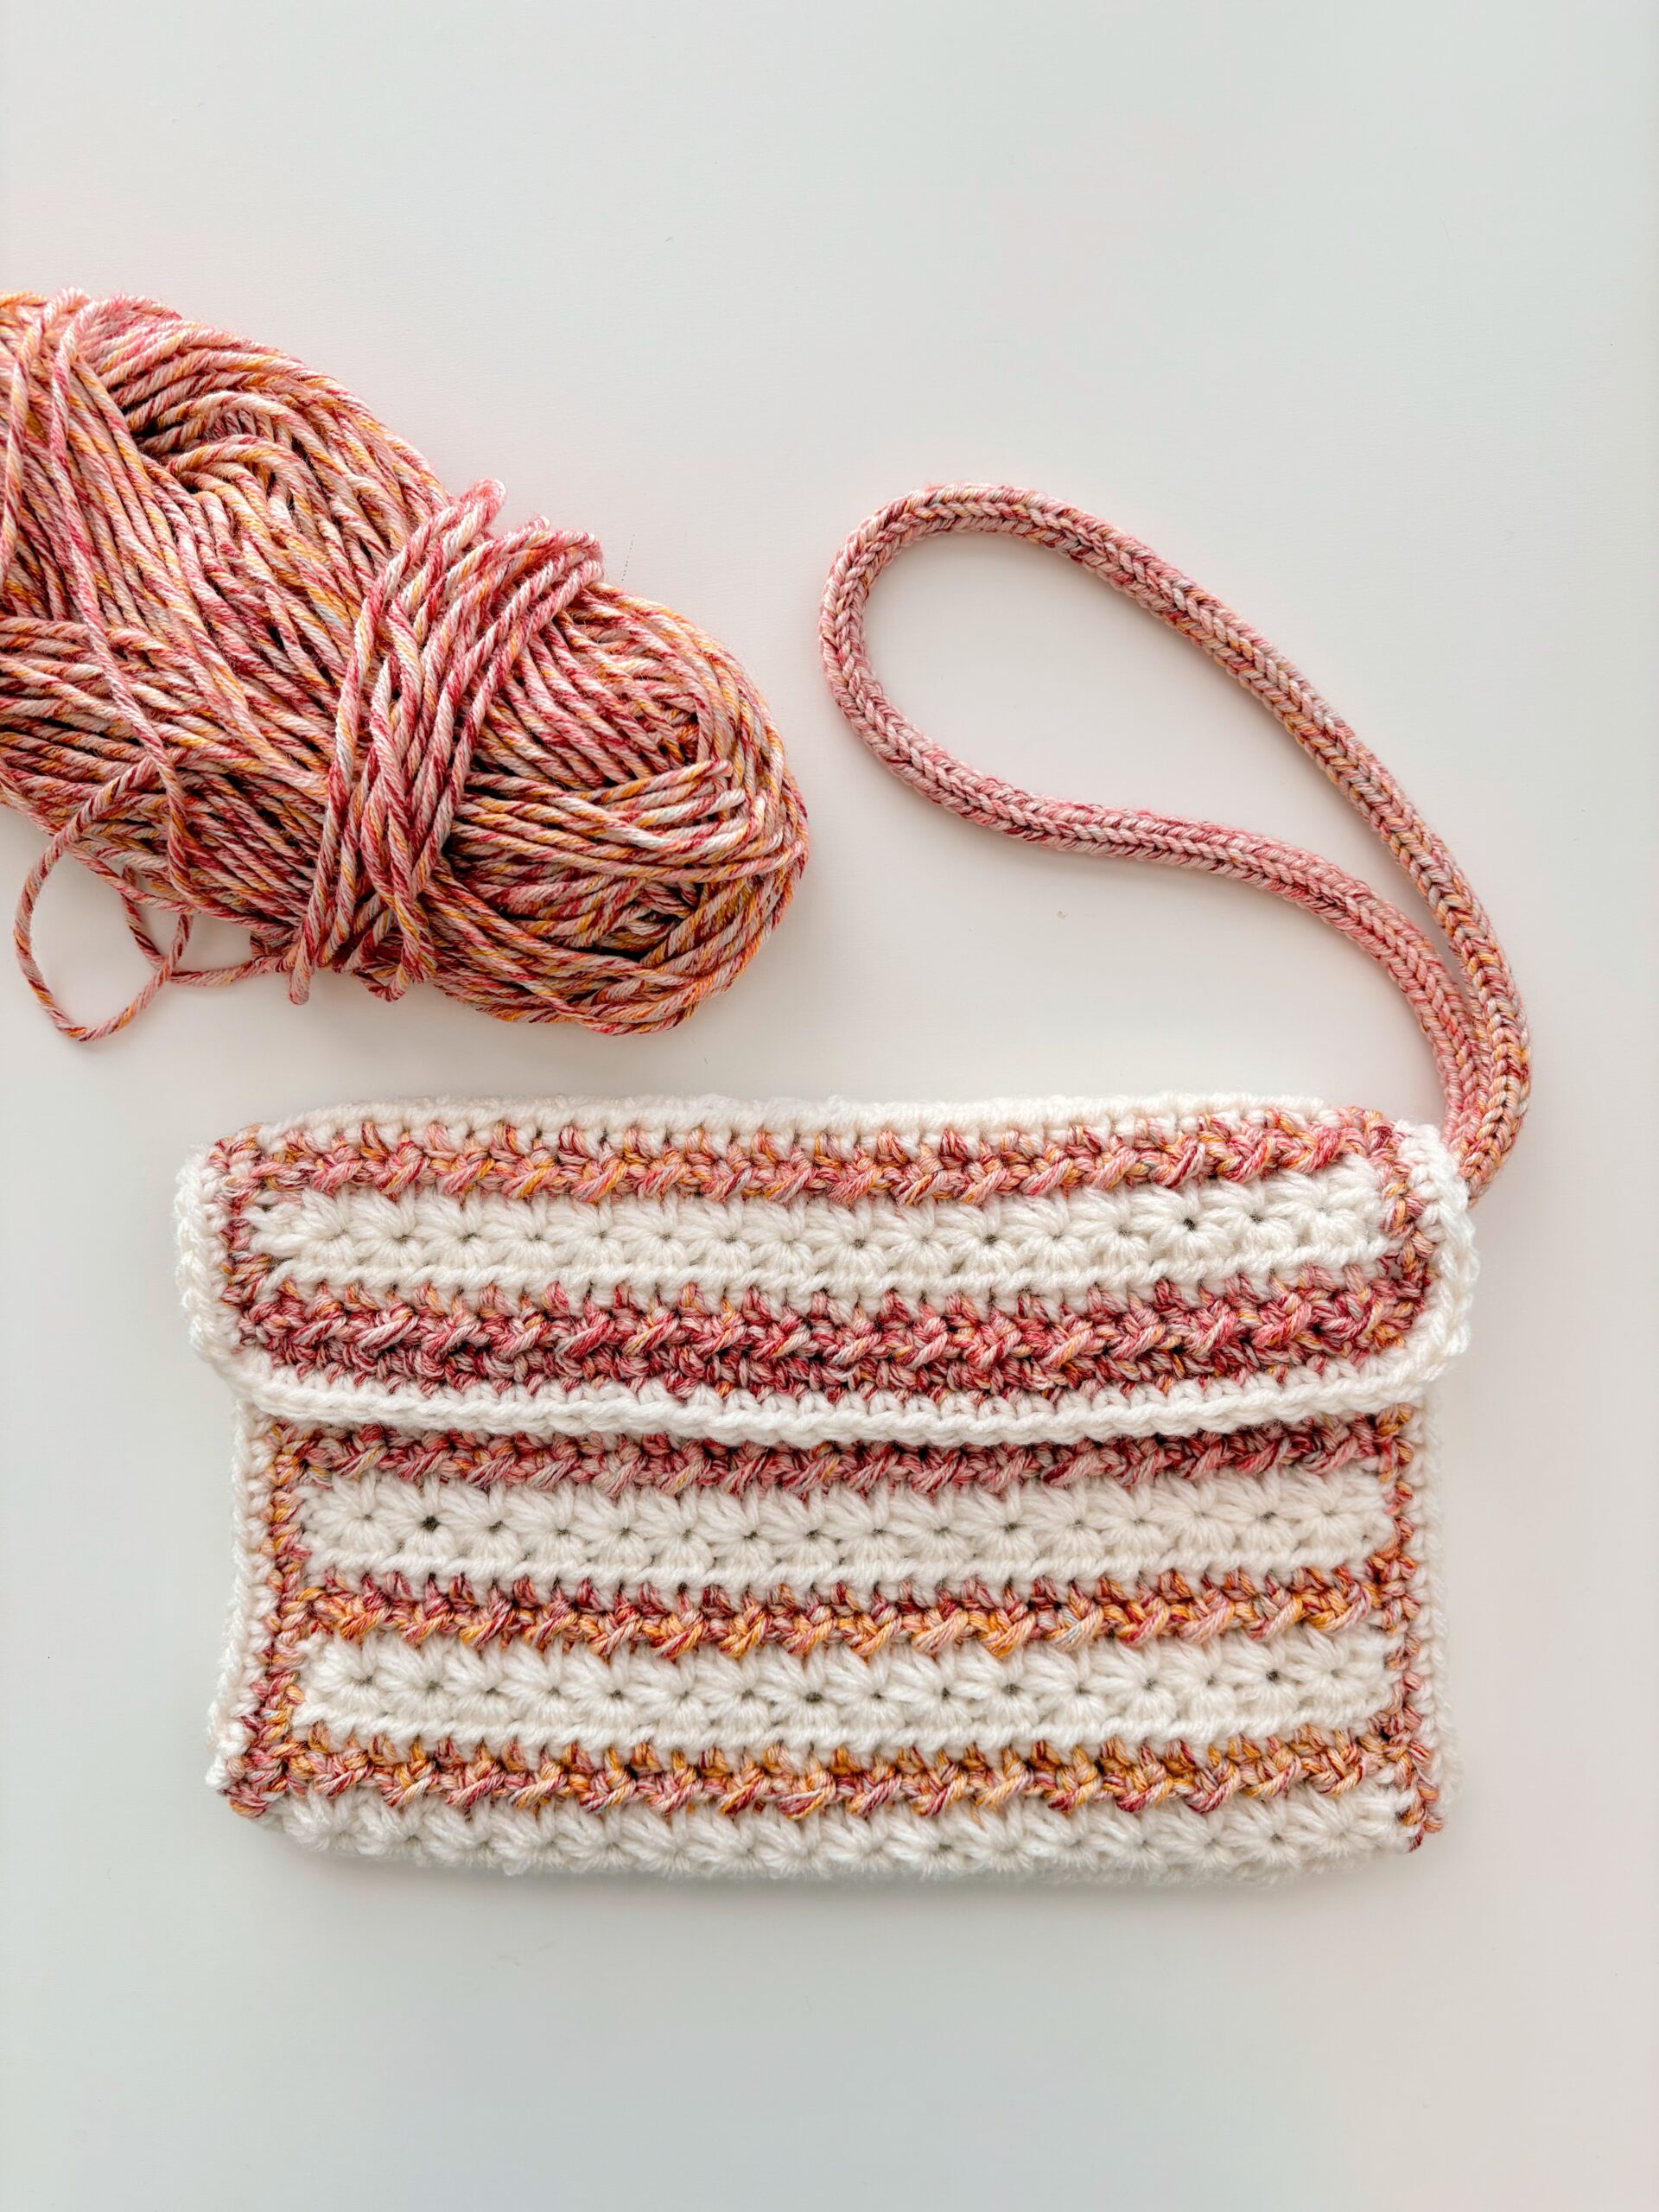
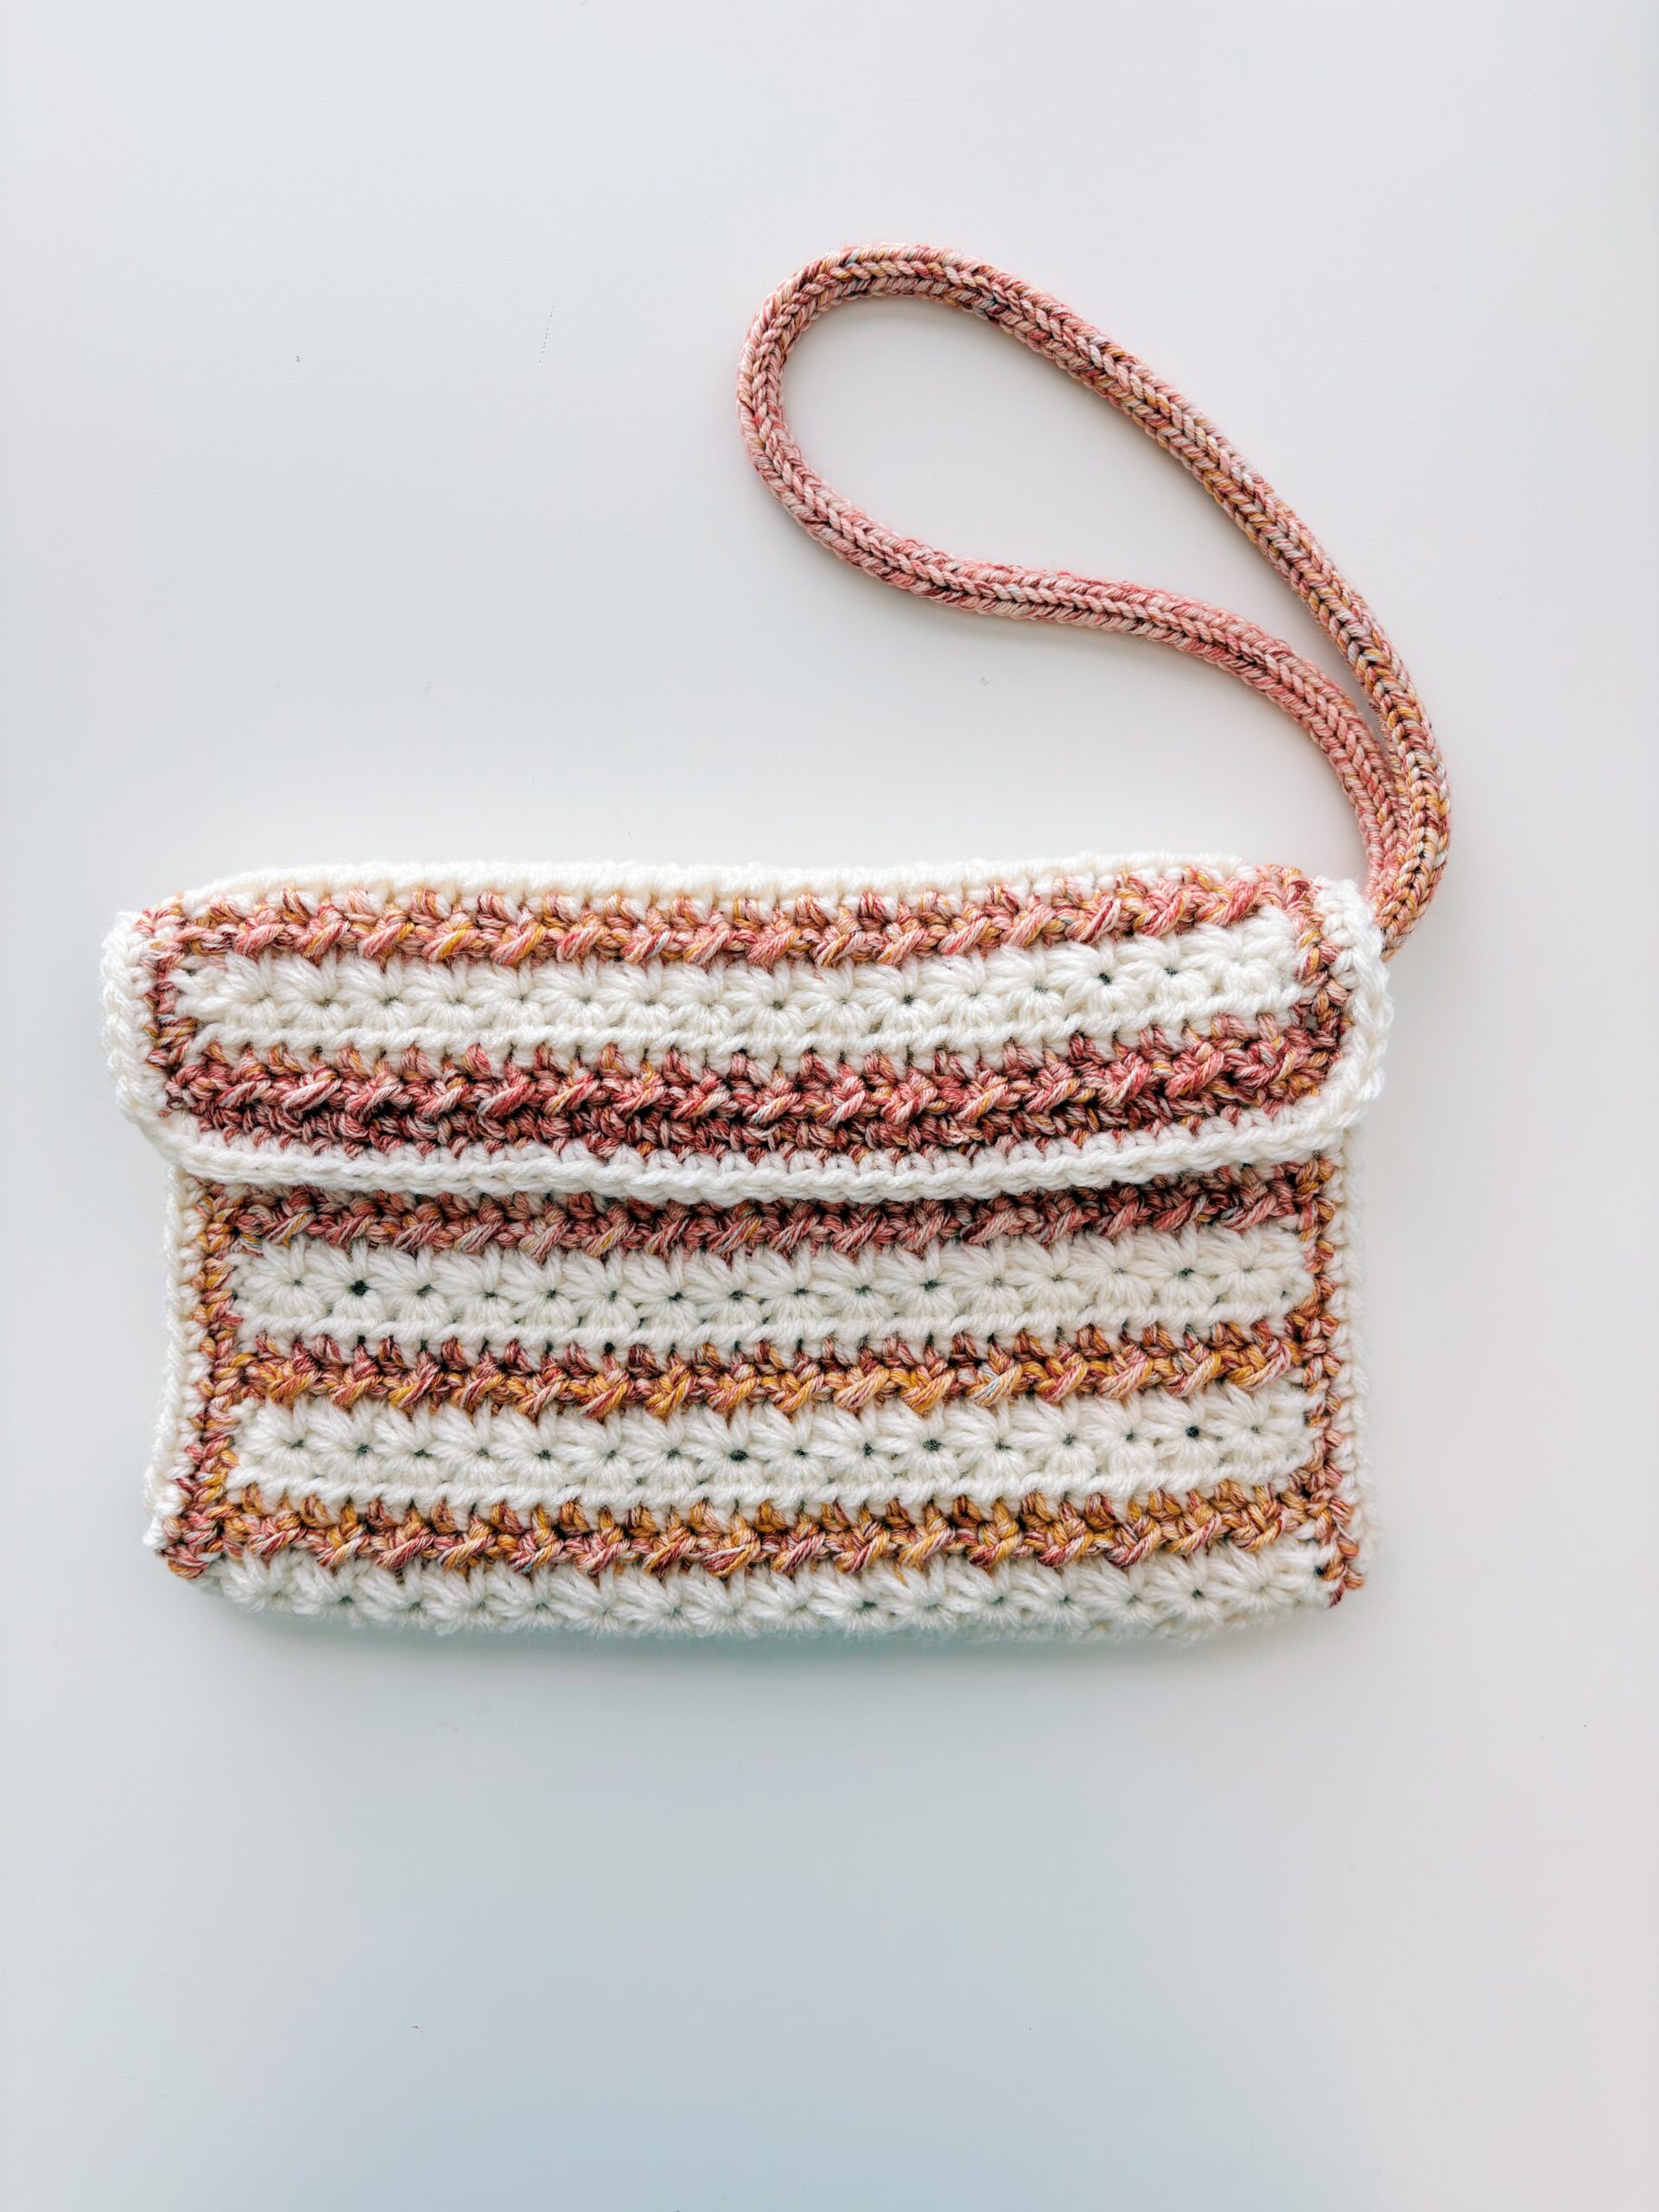
This crochet clutch uses alternating rows of Star Stitch and Crunch Stitch to create a beautifully textured fabric, paired with the same yarn from our Mosaic Star Stitch bundle for effortless color movement.
It’s structured.
It’s polished.
And it looks boutique-made, but it’s completely approachable.
Let’s make one.
Pattern Details
Skill Level: Advanced Beginner
- Finished size measures 9 ½” wide x 6 ½″ long
- Ch 1 and ch 2 do not count as a stitch
- You will change yarn every two rows without fastening off, but instead will carry the yarn up the sides
- To change the width, you’ll need a multiple of 2, plus 4
- To change the length, simply add more rows
- Video tutorial for the clutch is HERE
- I also have another video tutorial for the crunch stitch HERE if you’d like to watch it (although the tutorial is for the crunch stitch with two colors, the concept is the same for this pattern.)
Construction:
Rectangle worked flat → bordered → folded → seamed → optional I-cord handle added
Stitch Abbreviations
ch chain
rep repeat
yo yarn over
sc single crochet
hdc half double crochet
sl st slip stitch
sk skip
sp space
st(s) stitch(es)
sc2 means 2 single crochets in the same space
Materials
- 5.5 mm crochet hook (foundation chain only)
- 5.0 mm crochet hook (entire body) - See my favorite crochet hooks HERE
- Tapestry needle
Yarn Used:
- Color A (Cream): Big Twist Value in Ivory - Purchase at Michaels.com HERE
Approx. 95 yards - Color B (Self-Striping): Caron Simply Mosaic in Sunset - Purchase at Michaels.com HERE
Approx. 65 yards
Total finished clutch weight (including I-cord handle): 91g
Yardage may vary slightly depending on tension.
Optional:
- CayDo Automatic I-Cord Machine (for wrist strap) - Purchase on Amazon.com HERE or CayDo.com HERE
- See the iCord Machine in action on my Instagram HERE and HERE
- Snap or Button for flap closure
Gauge (4 x 4)
8 star sts x 12 rows
Free Crochet Clutch Video Tutorial
Crochet Star Stitch Instructions (Keep scrolling for Clutch Instructions)
ROW 1:
Chain 18 (or a multiple of 2 + 4)
Step 1: Insert your hook into the second chain from the hook and pull up a loop.
Step 2: Insert your hook into the next chain and pull up a loop. Continue this process—pulling up a loop in each of the next chains—until you have 6 loops on your hook.
Step 3: Yarn over and pull through all 6 loops on your hook.
Step 4: Chain 1 to secure the stitch. This creates the “eye” of the star, which is the small hole at the top. You’ll be working into this space for your next stitches, so take note of it.
Now, let’s continue creating star stitches across the row:
Step 5: Insert your hook into the eye of the previous star and pull up a loop. (2 loops on hook)
Step 6: Insert your hook into the space between the last two spikes (or loops) of the previous star, and pull up a loop. (3 loops on hook)
Step 7: Insert your hook into the same chain where the last loop of the previous star was made, and pull up a loop. (4 loops on hook)
Step 8: Insert your hook into the next chain and pull up a loop. (5 loops on hook)
Step 9: Repeat Step 8 once more—you should now have 6 loops on your hook.
Step 10: Yarn over, pull through all 6 loops, and chain 1 to secure the star stitch.
Repeat Steps 5–10 until you reach the end of the row.
To finish the row and avoid gaps at the edge, you’ll make a half star:
- Repeat Steps 5–7 only, pull through 4 loops on hook, ch 2, turn
You should have 7 stars and one half star
ROW 2:
Step 1: In the eye of each star stitch (the small hole created by the chain 1), work 2 half double crochets. Continue this across the entire row.
Step 2: When you reach the end of the row, finish by working 1 single crochet into the edge of the starting chain from the previous row.
STAR STITCH ROWS FOR REST OF THE CLUTCH
The star stitch is worked over a two-row repeat, and you'll return to it every time you're done with two rows of the crunch stitch.
When it's time to bring the star stitch back in, the first stitch of the row is worked a little differently since you’re no longer starting in a foundation chain.
Step 1: To begin the star stitch row, chain 3 and turn your work.
Step 2: Insert your hook into the 2nd chain from the hook and pull up a loop.
Step 3: Then, insert your hook into the 3rd chain from the hook and pull up another loop.
Step 4: Next, pull up one loop in each of the first three stitches of the row below (you should now have 6 loops on your hook).
Step 5: Yarn over and pull through all 6 loops, then chain 1 to secure the stitch—just like before.
Continue working the star stitch across the row using the same steps as you did in the original star stitch row.
Follow this with the second star stitch row (2 half double crochets into each eye, and a single crochet at the end), and repeat the process every time you return to the star stitch section of the clutch.
Important Design Note
The foundation chain is worked with a 5.5 mm hook (½ size larger) to prevent curving. The stitch pattern naturally pulls inward, so sizing up keeps the base straight and polished.
Switch to a 5.0 mm hook for all remaining rows.
Pattern Instructions
With Yarn A and hook 5.5 mm, Ch 36
Switch to 5.0 mm hook
Row 1 Star stitch row 1 instructions from above
Rows 2 Star stitch row 2 instructions from above (32 hdcs and one sc)
Switch to Yarn B, ch 1, turn
Row 3: hdc in 1st st, *sl st in next st, hdc in next st*, repeat from * to * ending with an hdc in the last st, ch 1, turn (33 sts.)
Row 4: sl st in 1st st, *hdc in next st, sl st in next st*, rep from * to * ending with a sl st in last st (33 sts)
Switch to Yarn A, ch 3 turn
Rows 5 & 6: Follow instructions for “STAR STITCH ROWS FOR REST OF CLUTCH”
Switch to Yarn B, ch 1 turn
Rows 7 - 40: rep rows 3 - 6
Do not fasten off either yarn
Border
Round 1 – Yarn B
Round 1
Edge 1: With Yarn B, ch 1, turn (you want the right side of the clutch facing you), sc2 in 1st st, sc across to last st, sc 2 in last st
Side 1: sc2 in first st, sc in each row along side, sc2 in last st
Edge 2: sc2 in first st, sc across to last st, sc 2 in last st
Side 2: sc2 in first st, sc in each row along side to last st, sc2 in last st, sl st to first sc from Edge 1, Fasten off Yarn B
Round 2 – Yarn A
Same instructions as Round 1
Fasten off Yarn A
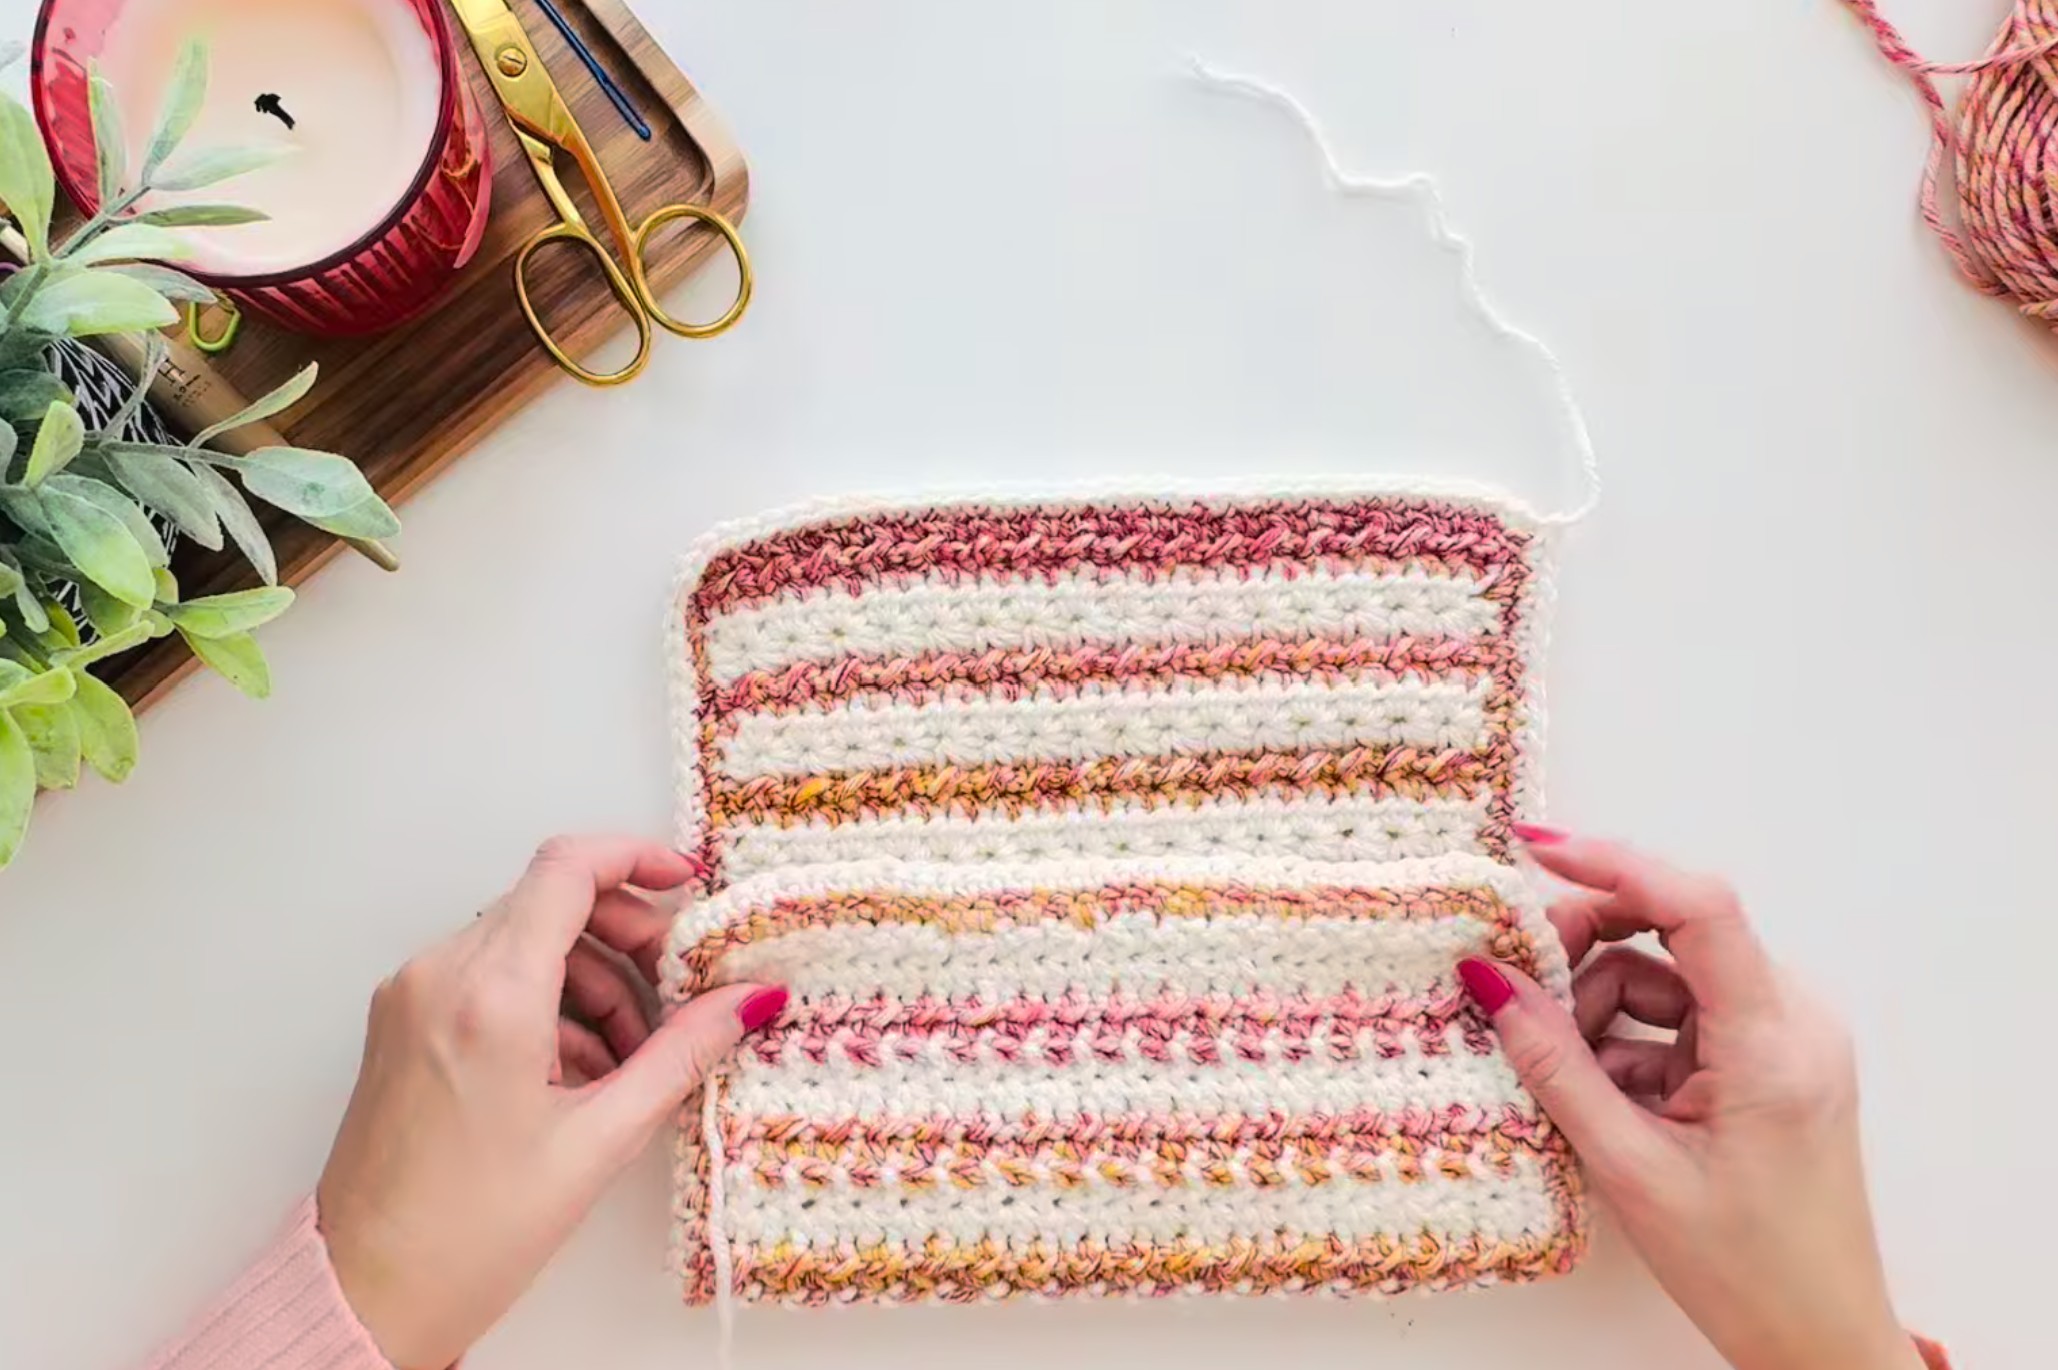
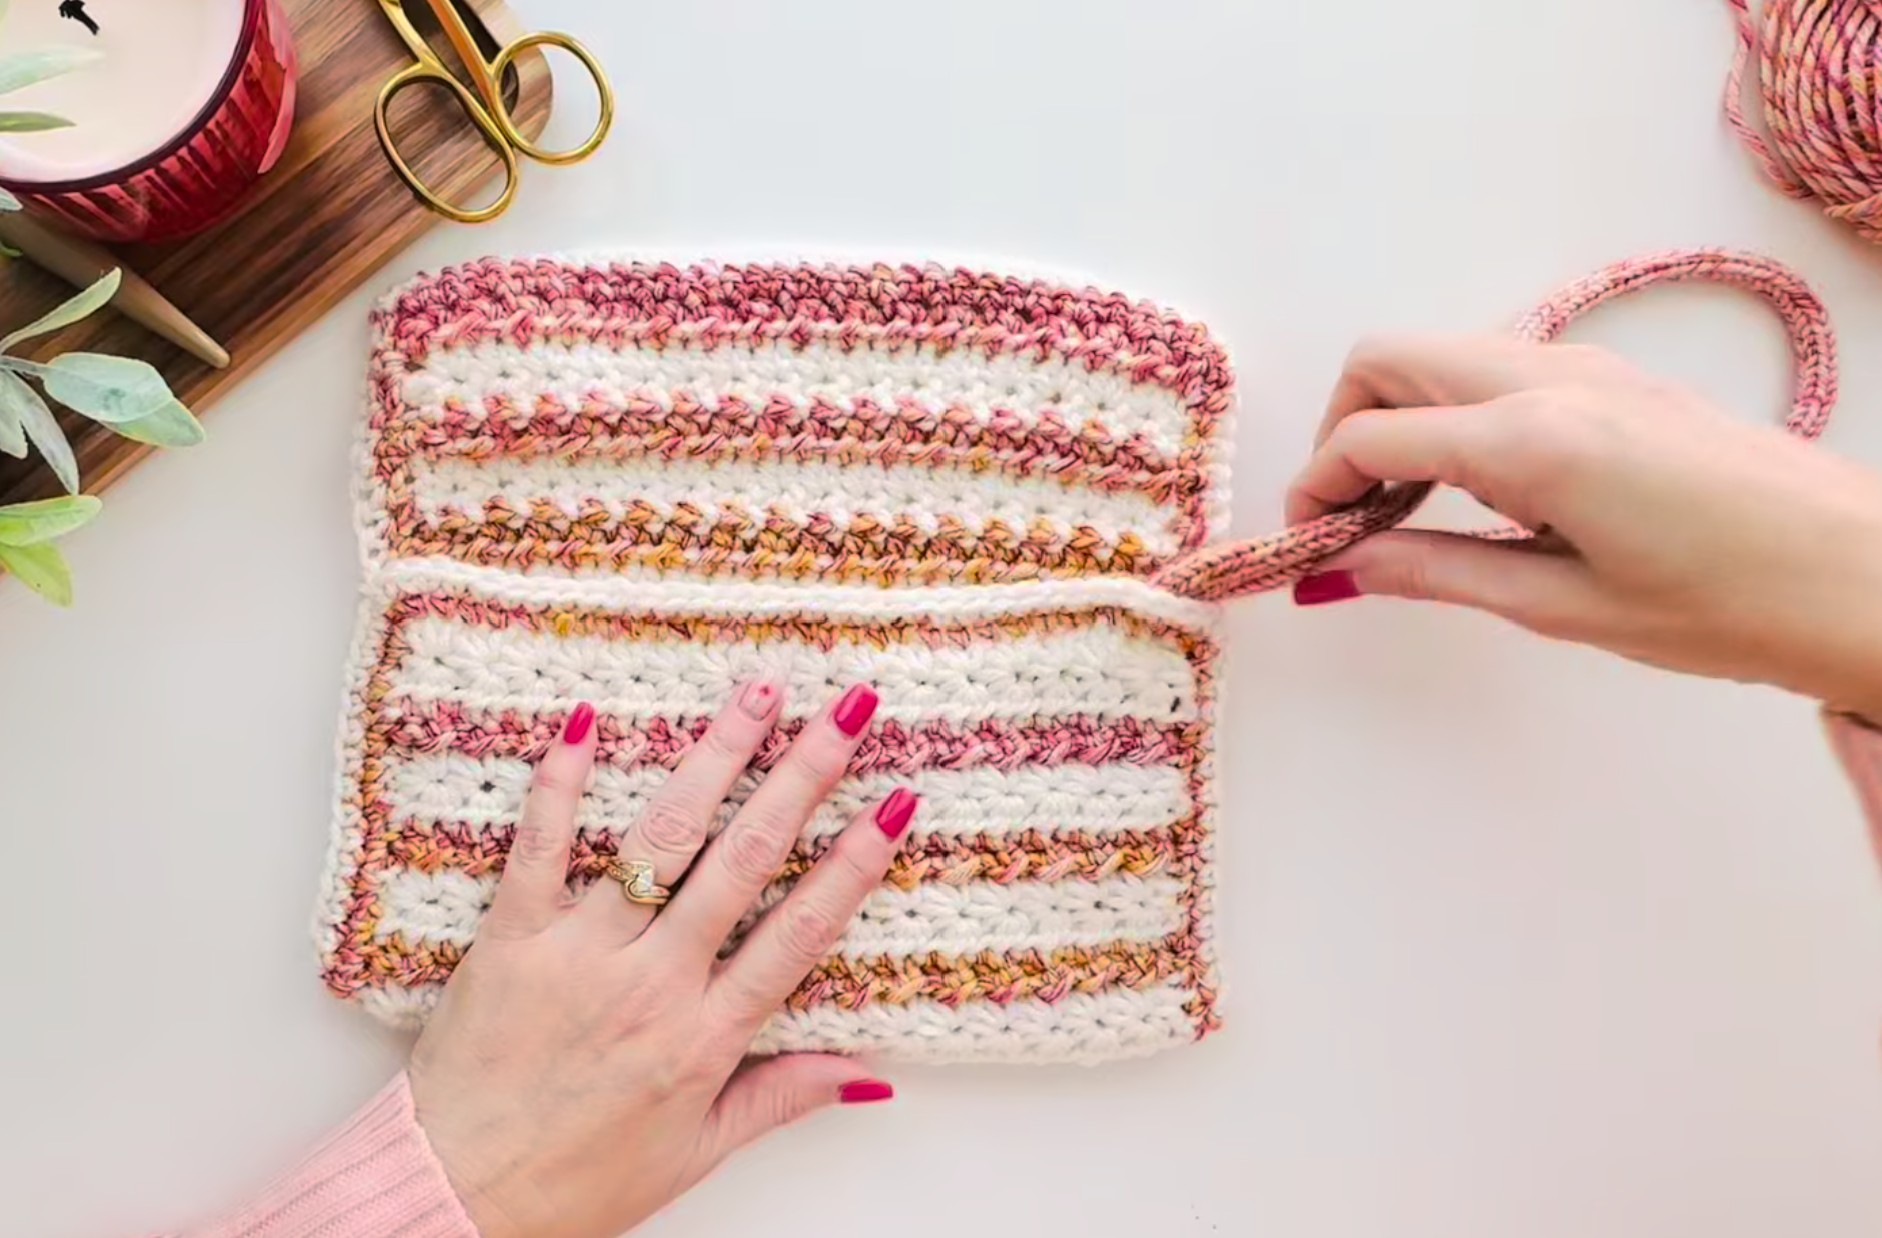
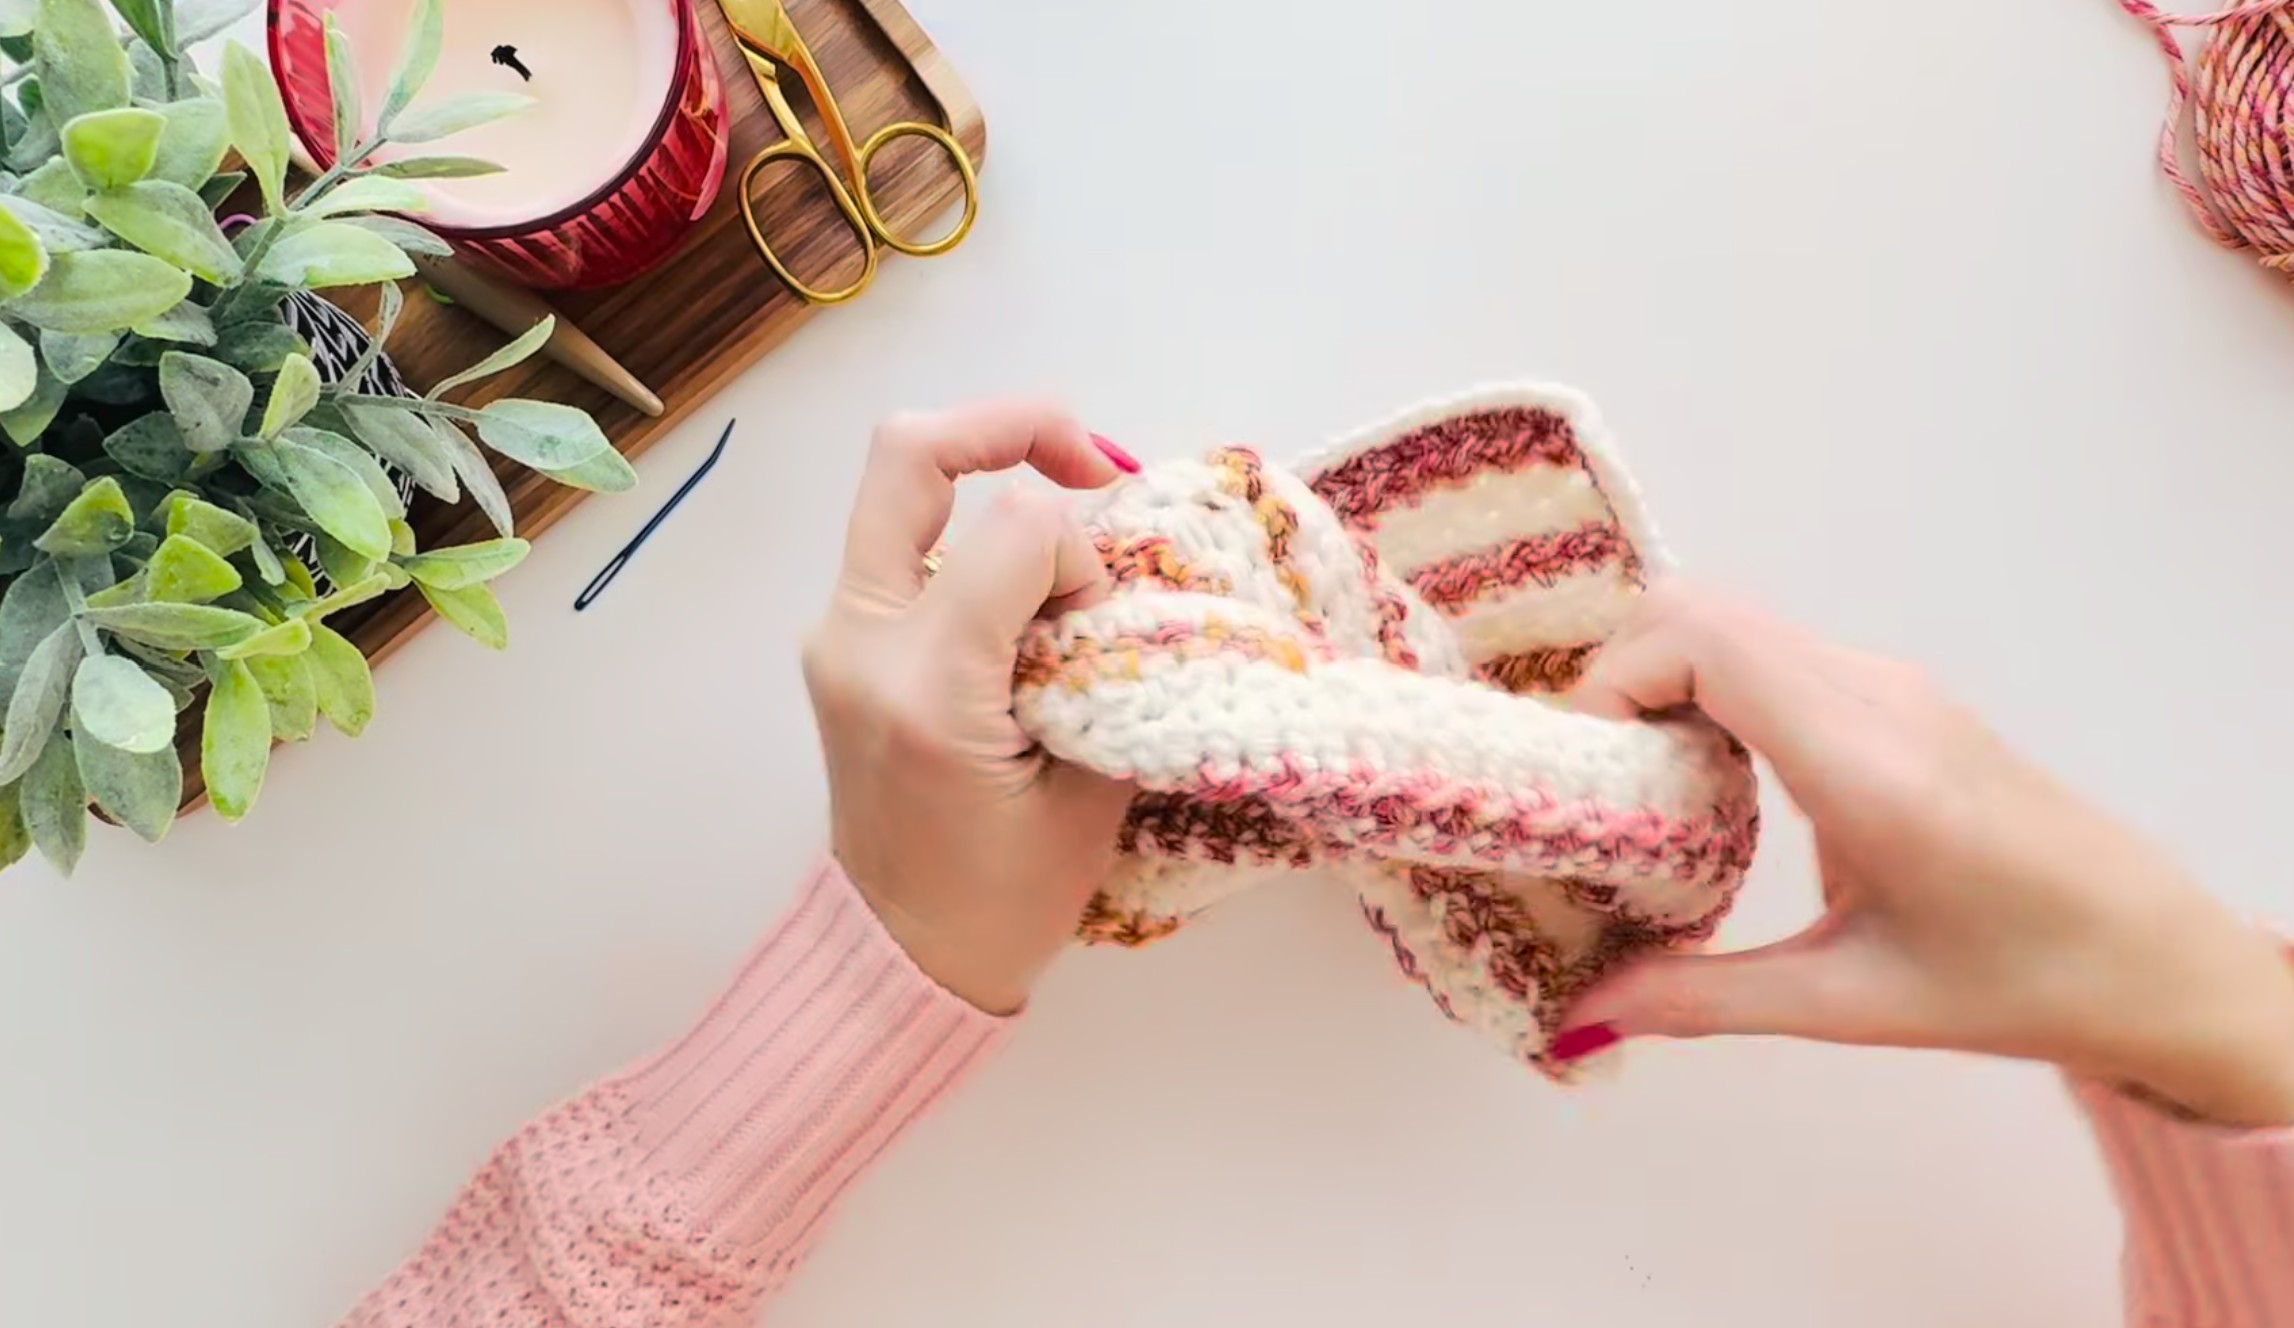
Forming the Clutch
Lay piece flat with right side facing up.
Fold bottom edge upward so that:
- The fold lands just above the 10th row of Star Stitch
- The fold aligns at the first Crunch Stitch row after that 10th Star row
Right sides should now be facing each other (wrong side facing out).
This creates:
- Lower pouch section
- Top flap section
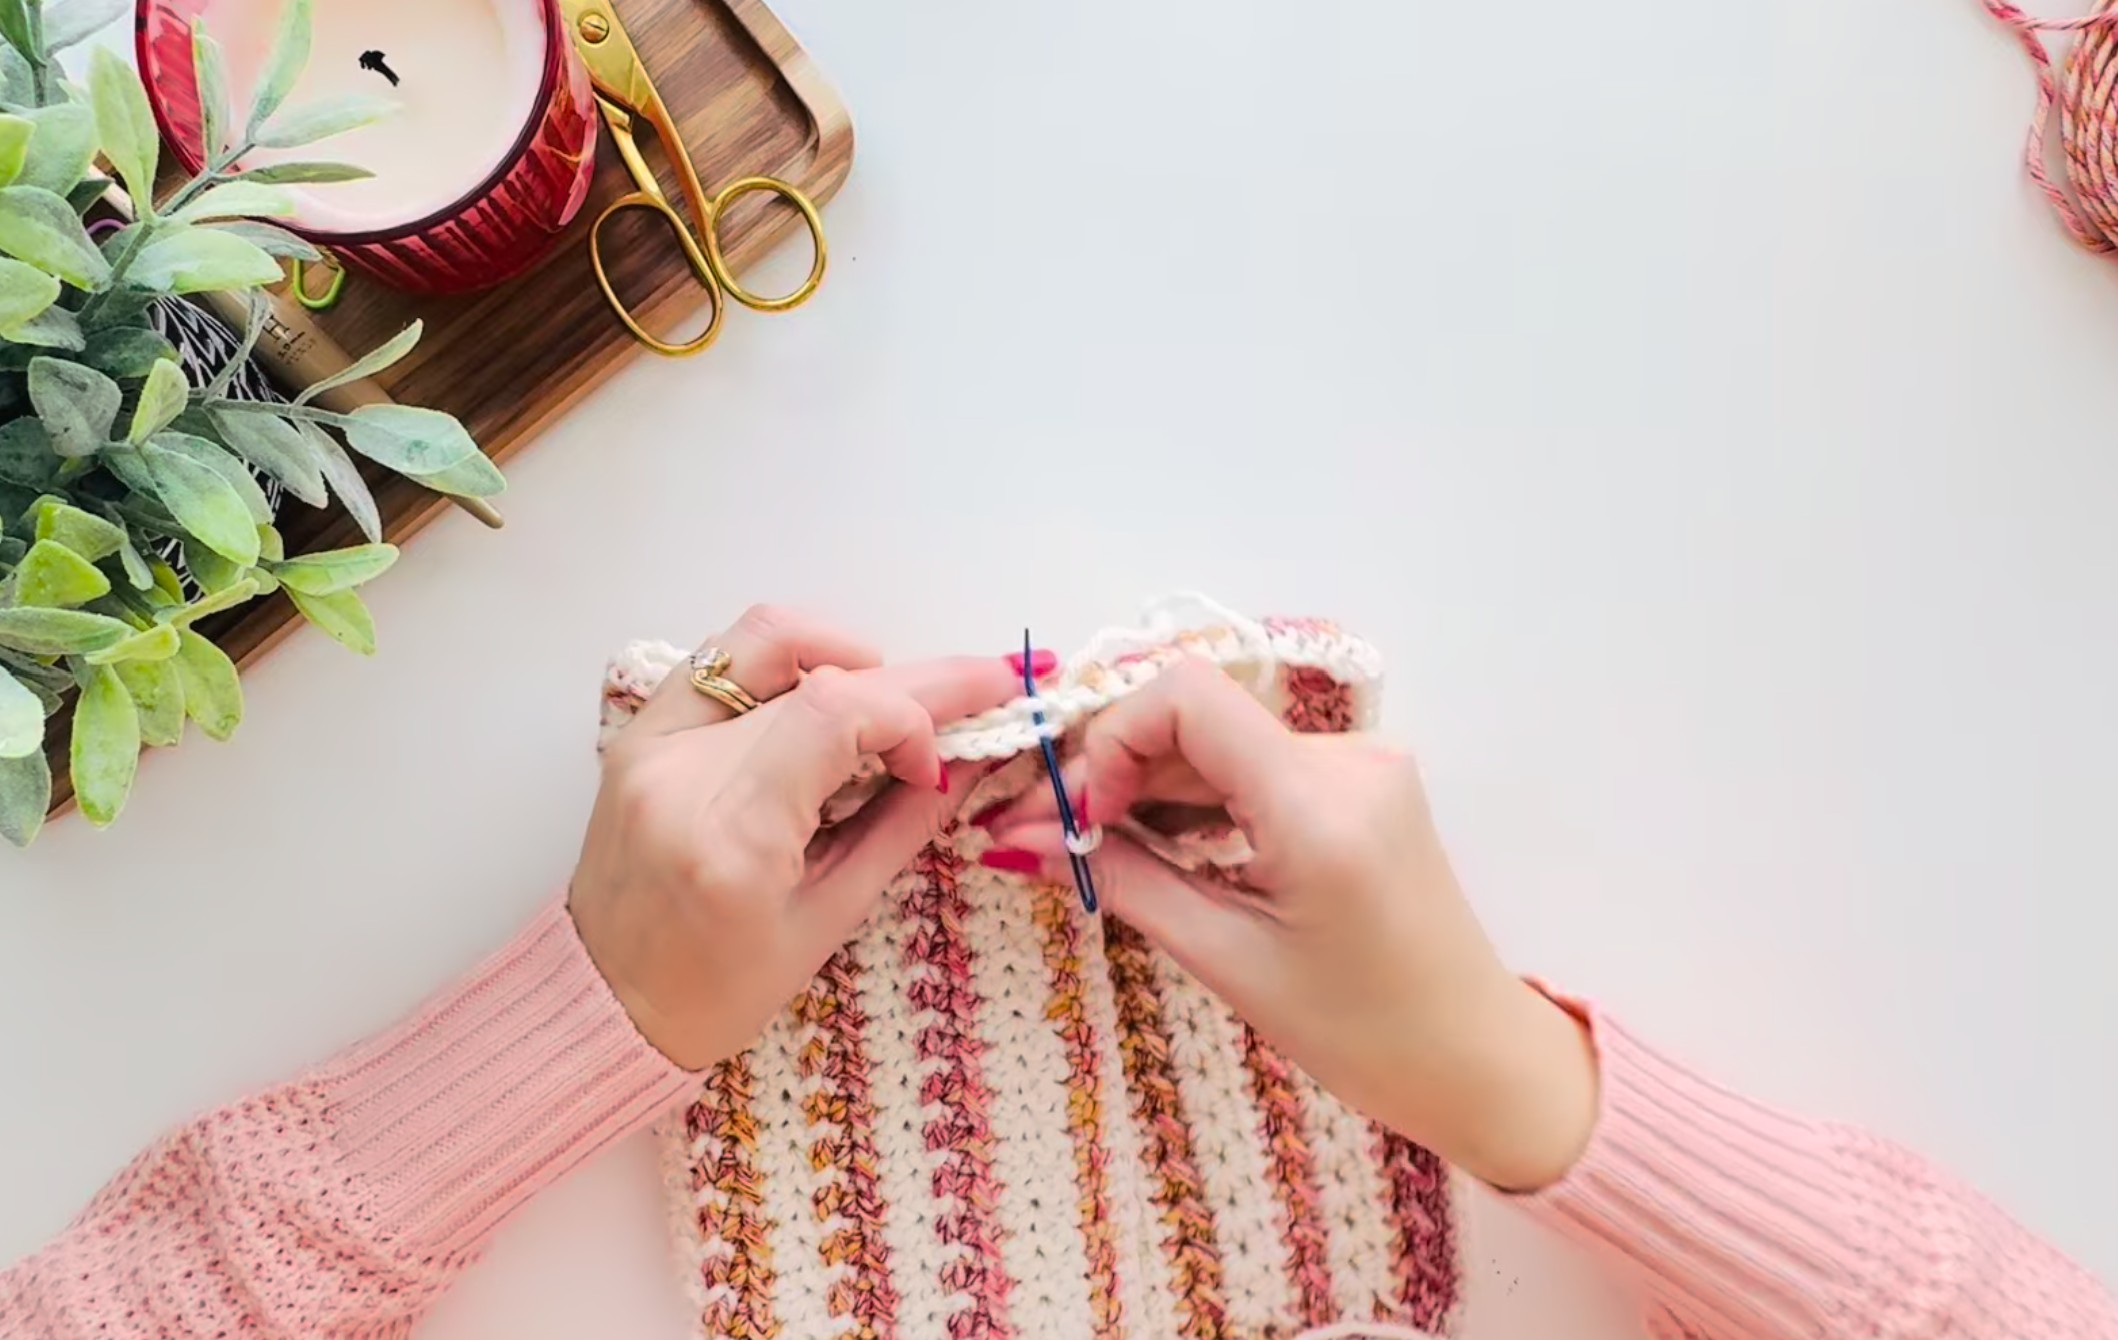
Seaming (Clean Edge Whip Stitch)
This clutch is seamed using whip stitch worked through the outside loops only of the border stitches.
Leaving the inside loops untouched creates a clean, professional seam and reduces bulk inside the clutch.
First Side
Thread the long foundation tail onto a tapestry needle.
Beginning at the fold:
- Insert needle into the first corner stitch.
- Work 3 whip stitches into that same stitch to reinforce the corner.
- Continue whip stitching down the side.
For each stitch:
- Insert needle under one outside loop of the front layer.
- Insert under the corresponding outside loop of the back layer.
- Pull snug, but not tight.
Continue to bottom edge. Fasten off.
Second Side
Attach matching yarn A at the fold.
Repeat:
- 3 whip stitches in the first corner stitch.
- Whip stitch down side through outside loops only.
Fasten off and weave in ends.
Turn clutch right side out.
You should see a clean seam edge with minimal bulk inside.
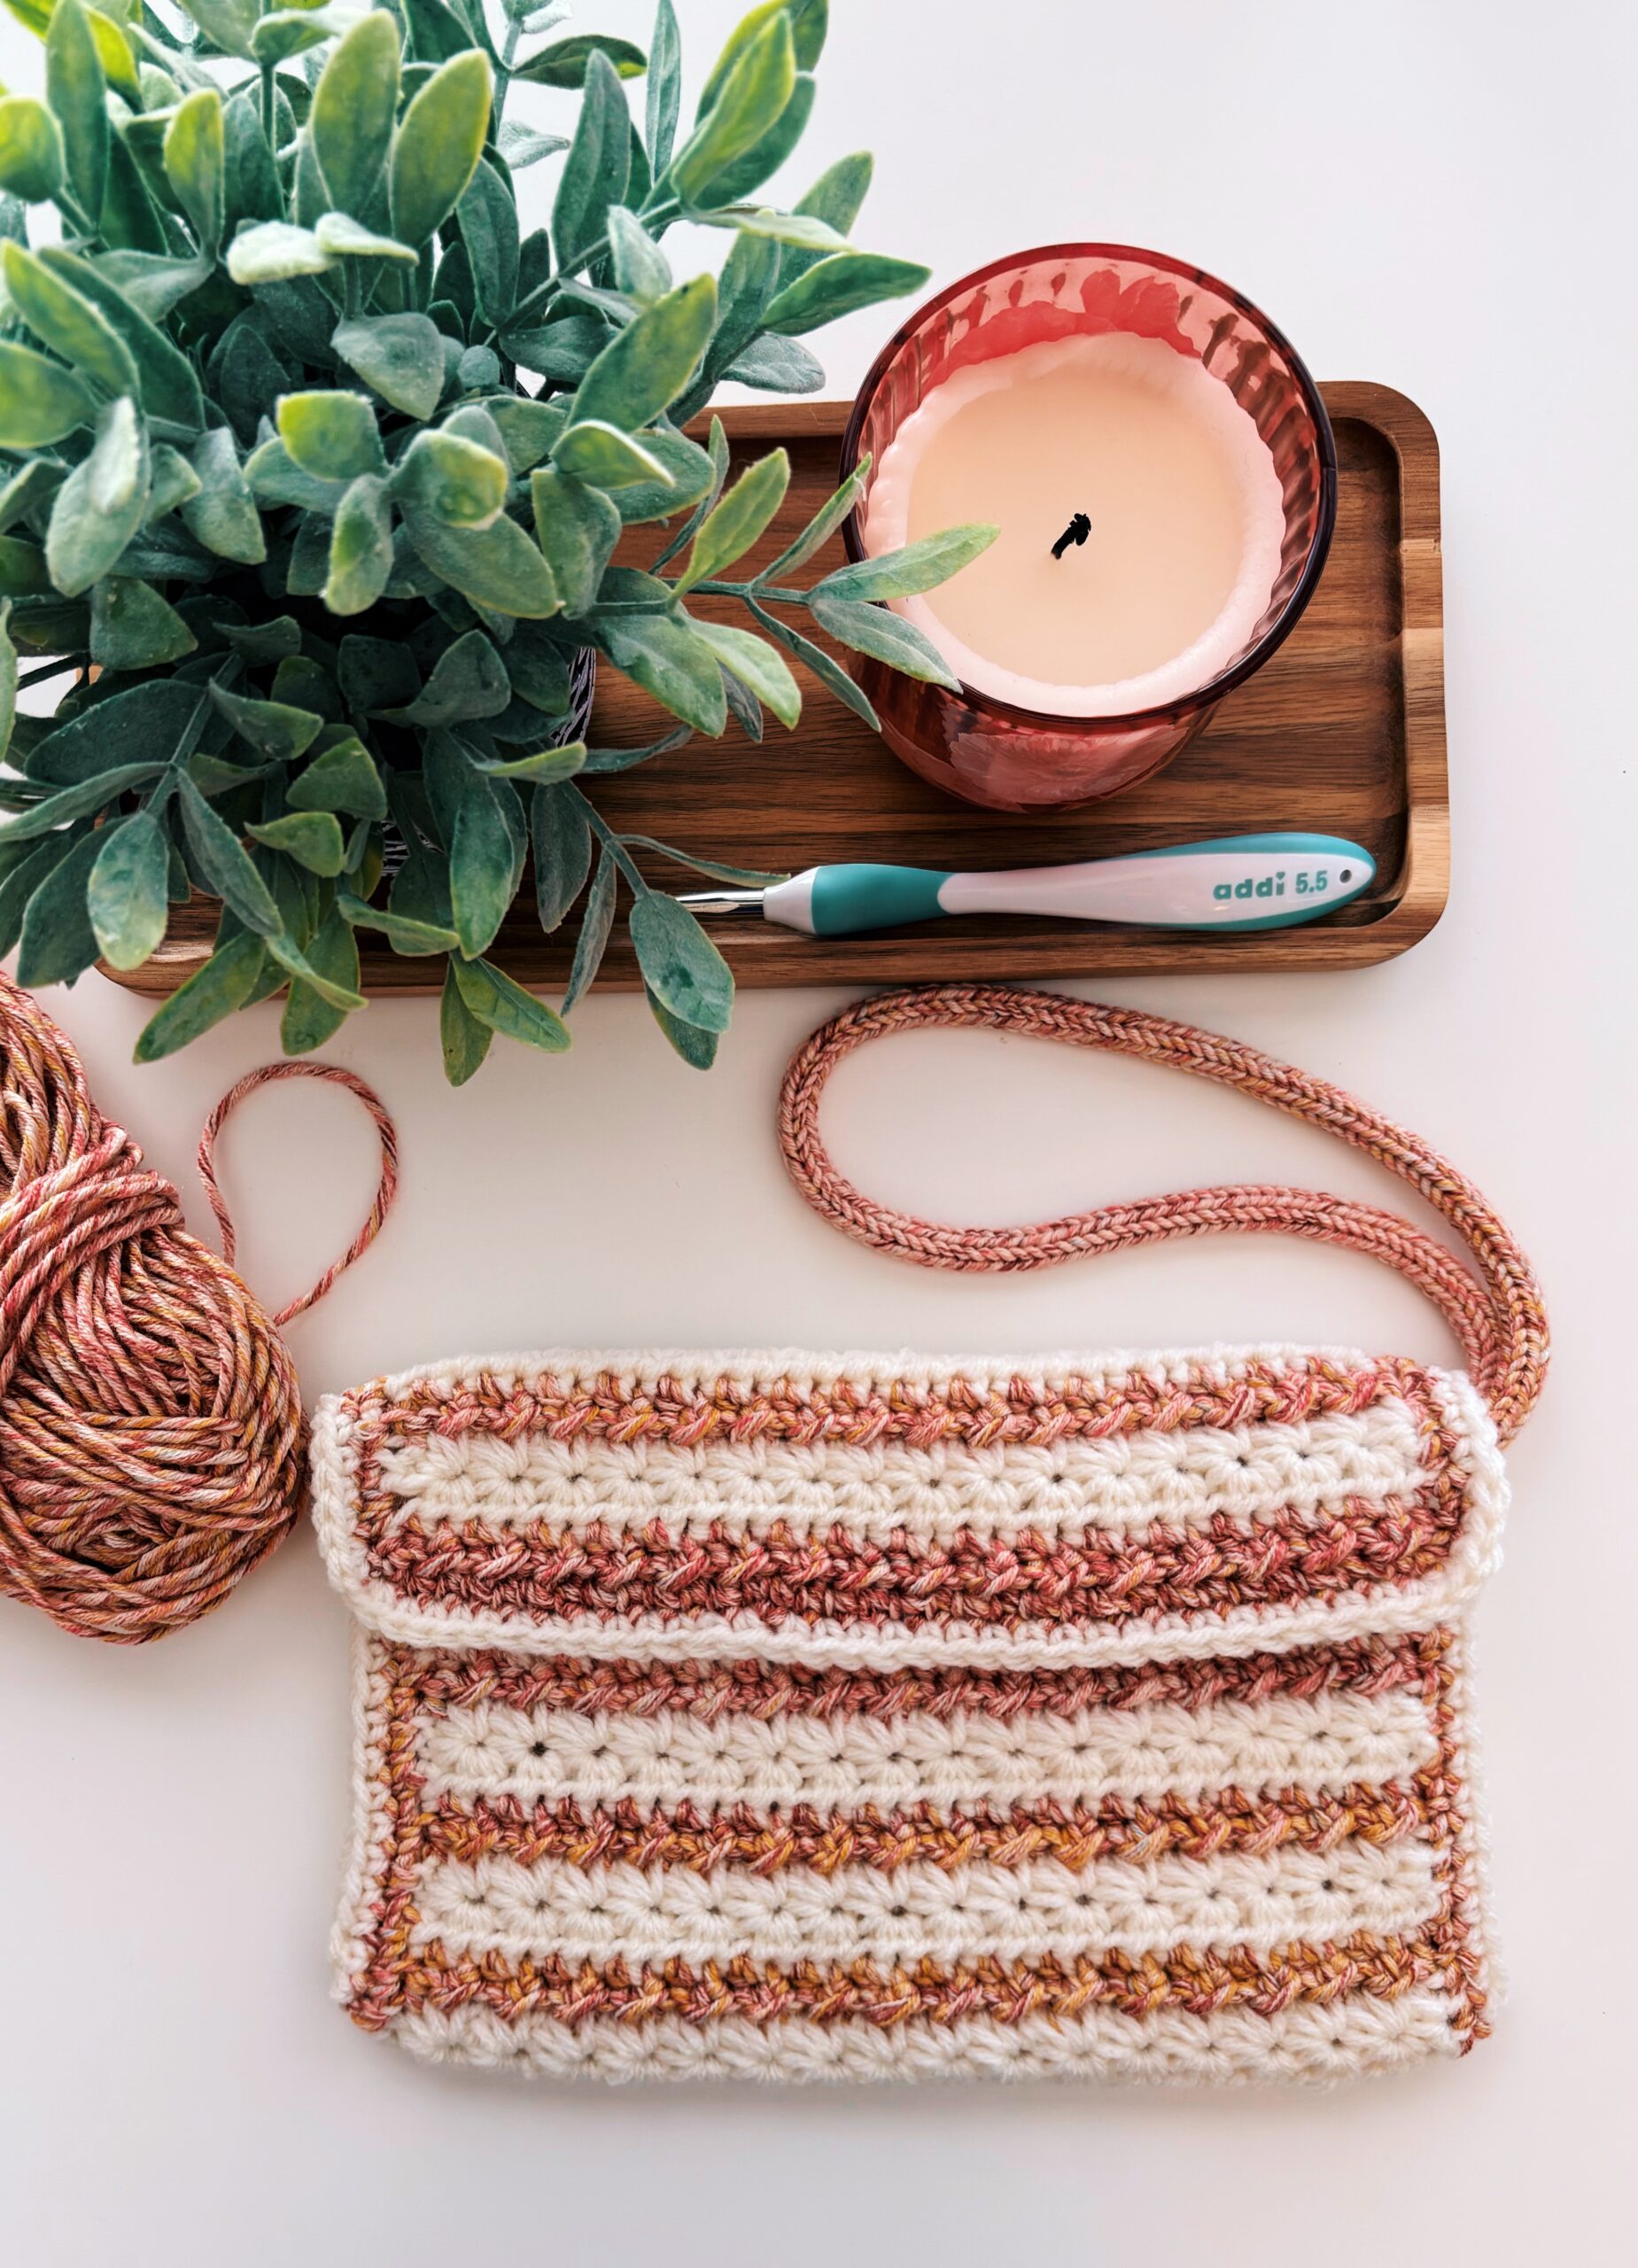
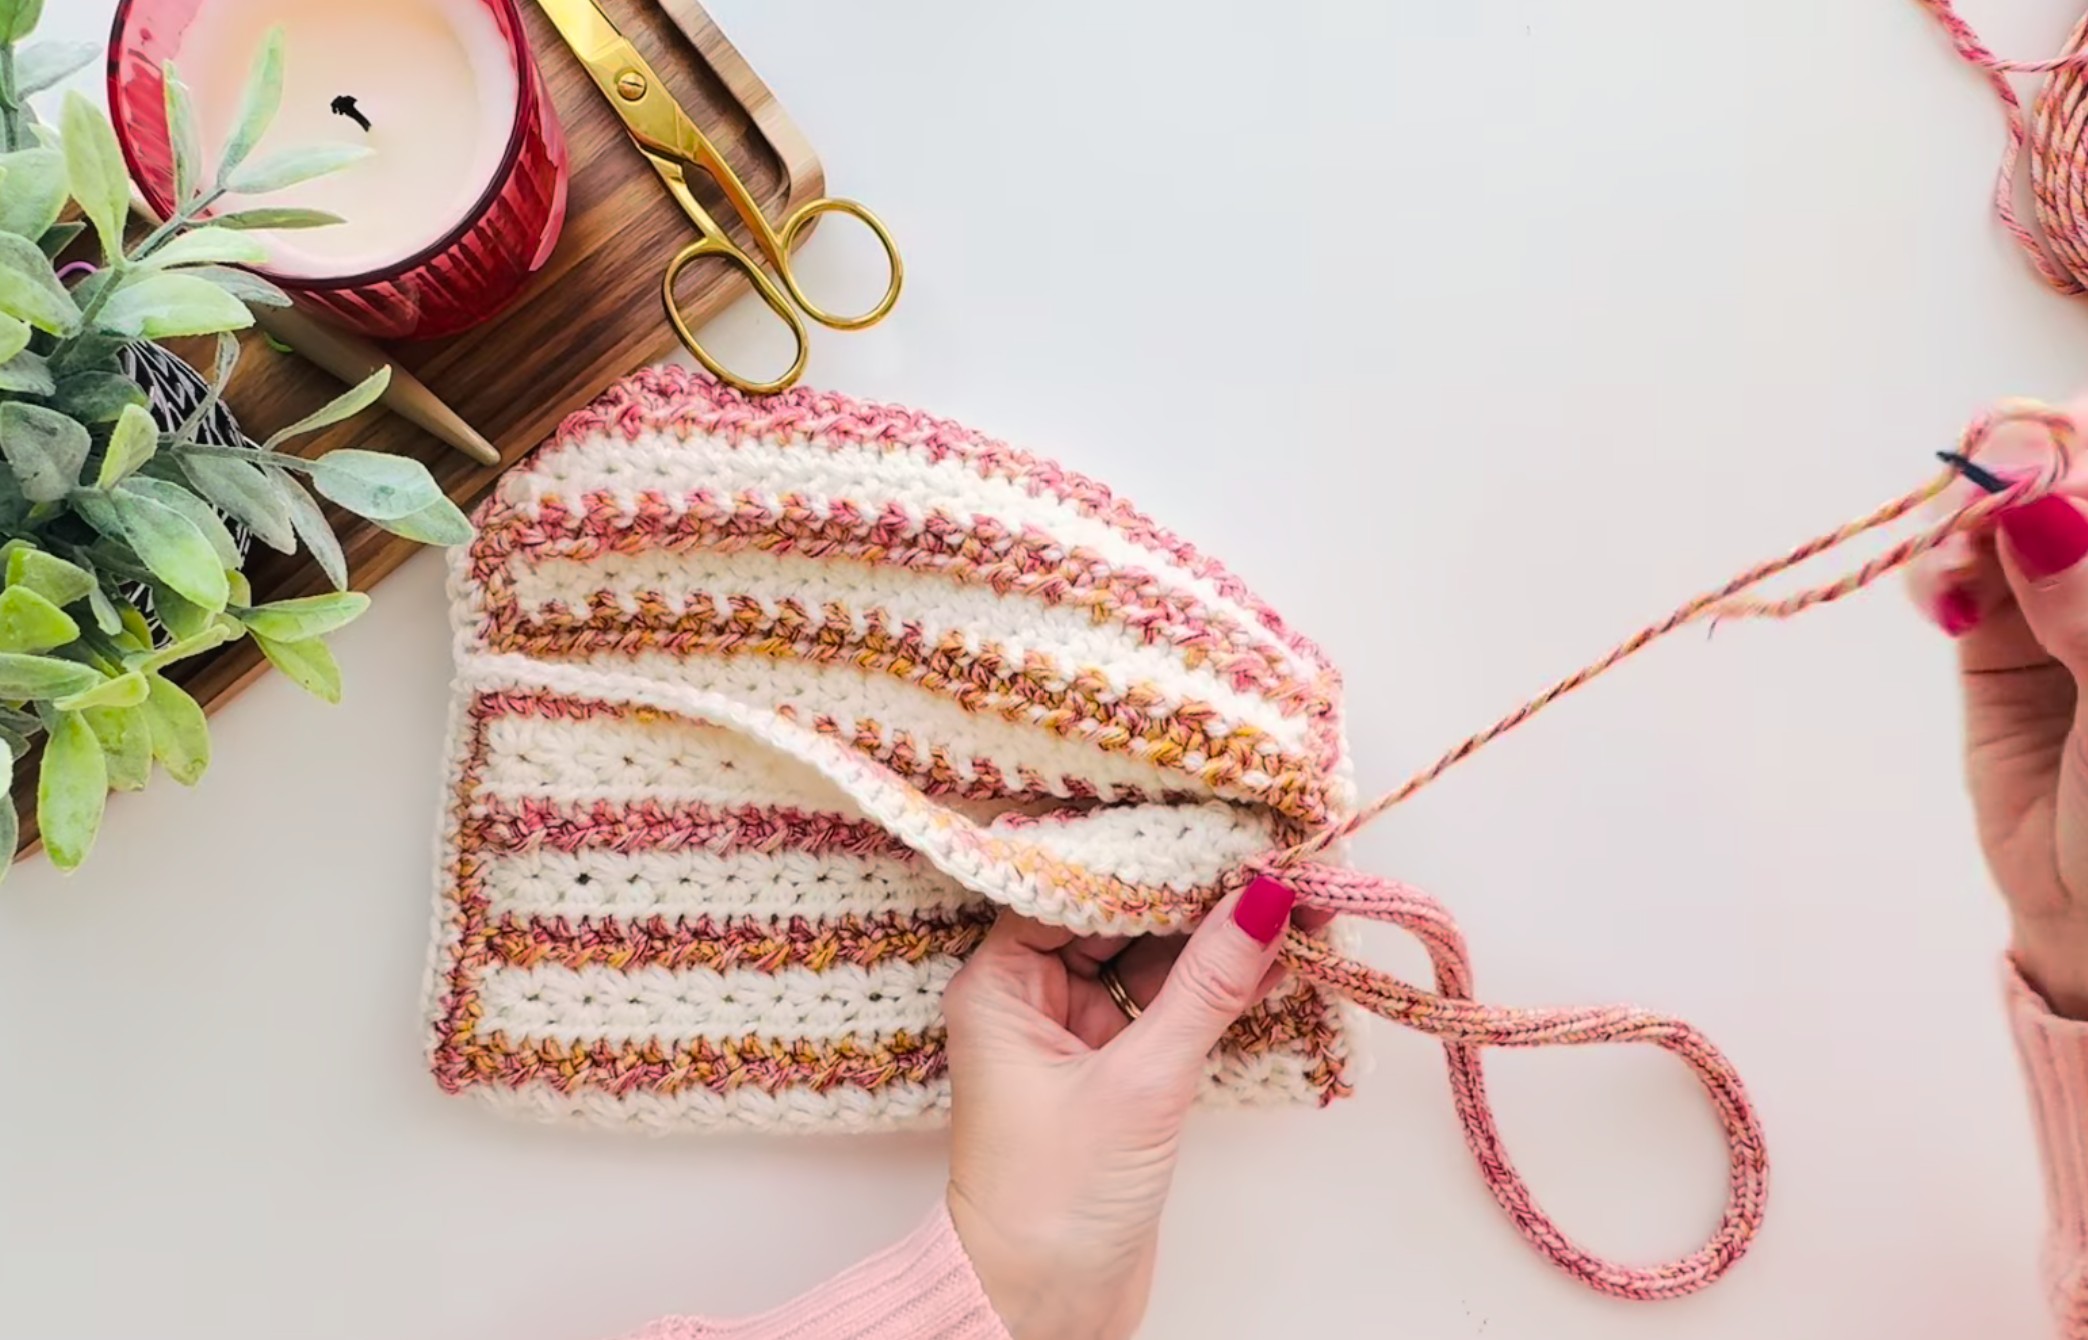
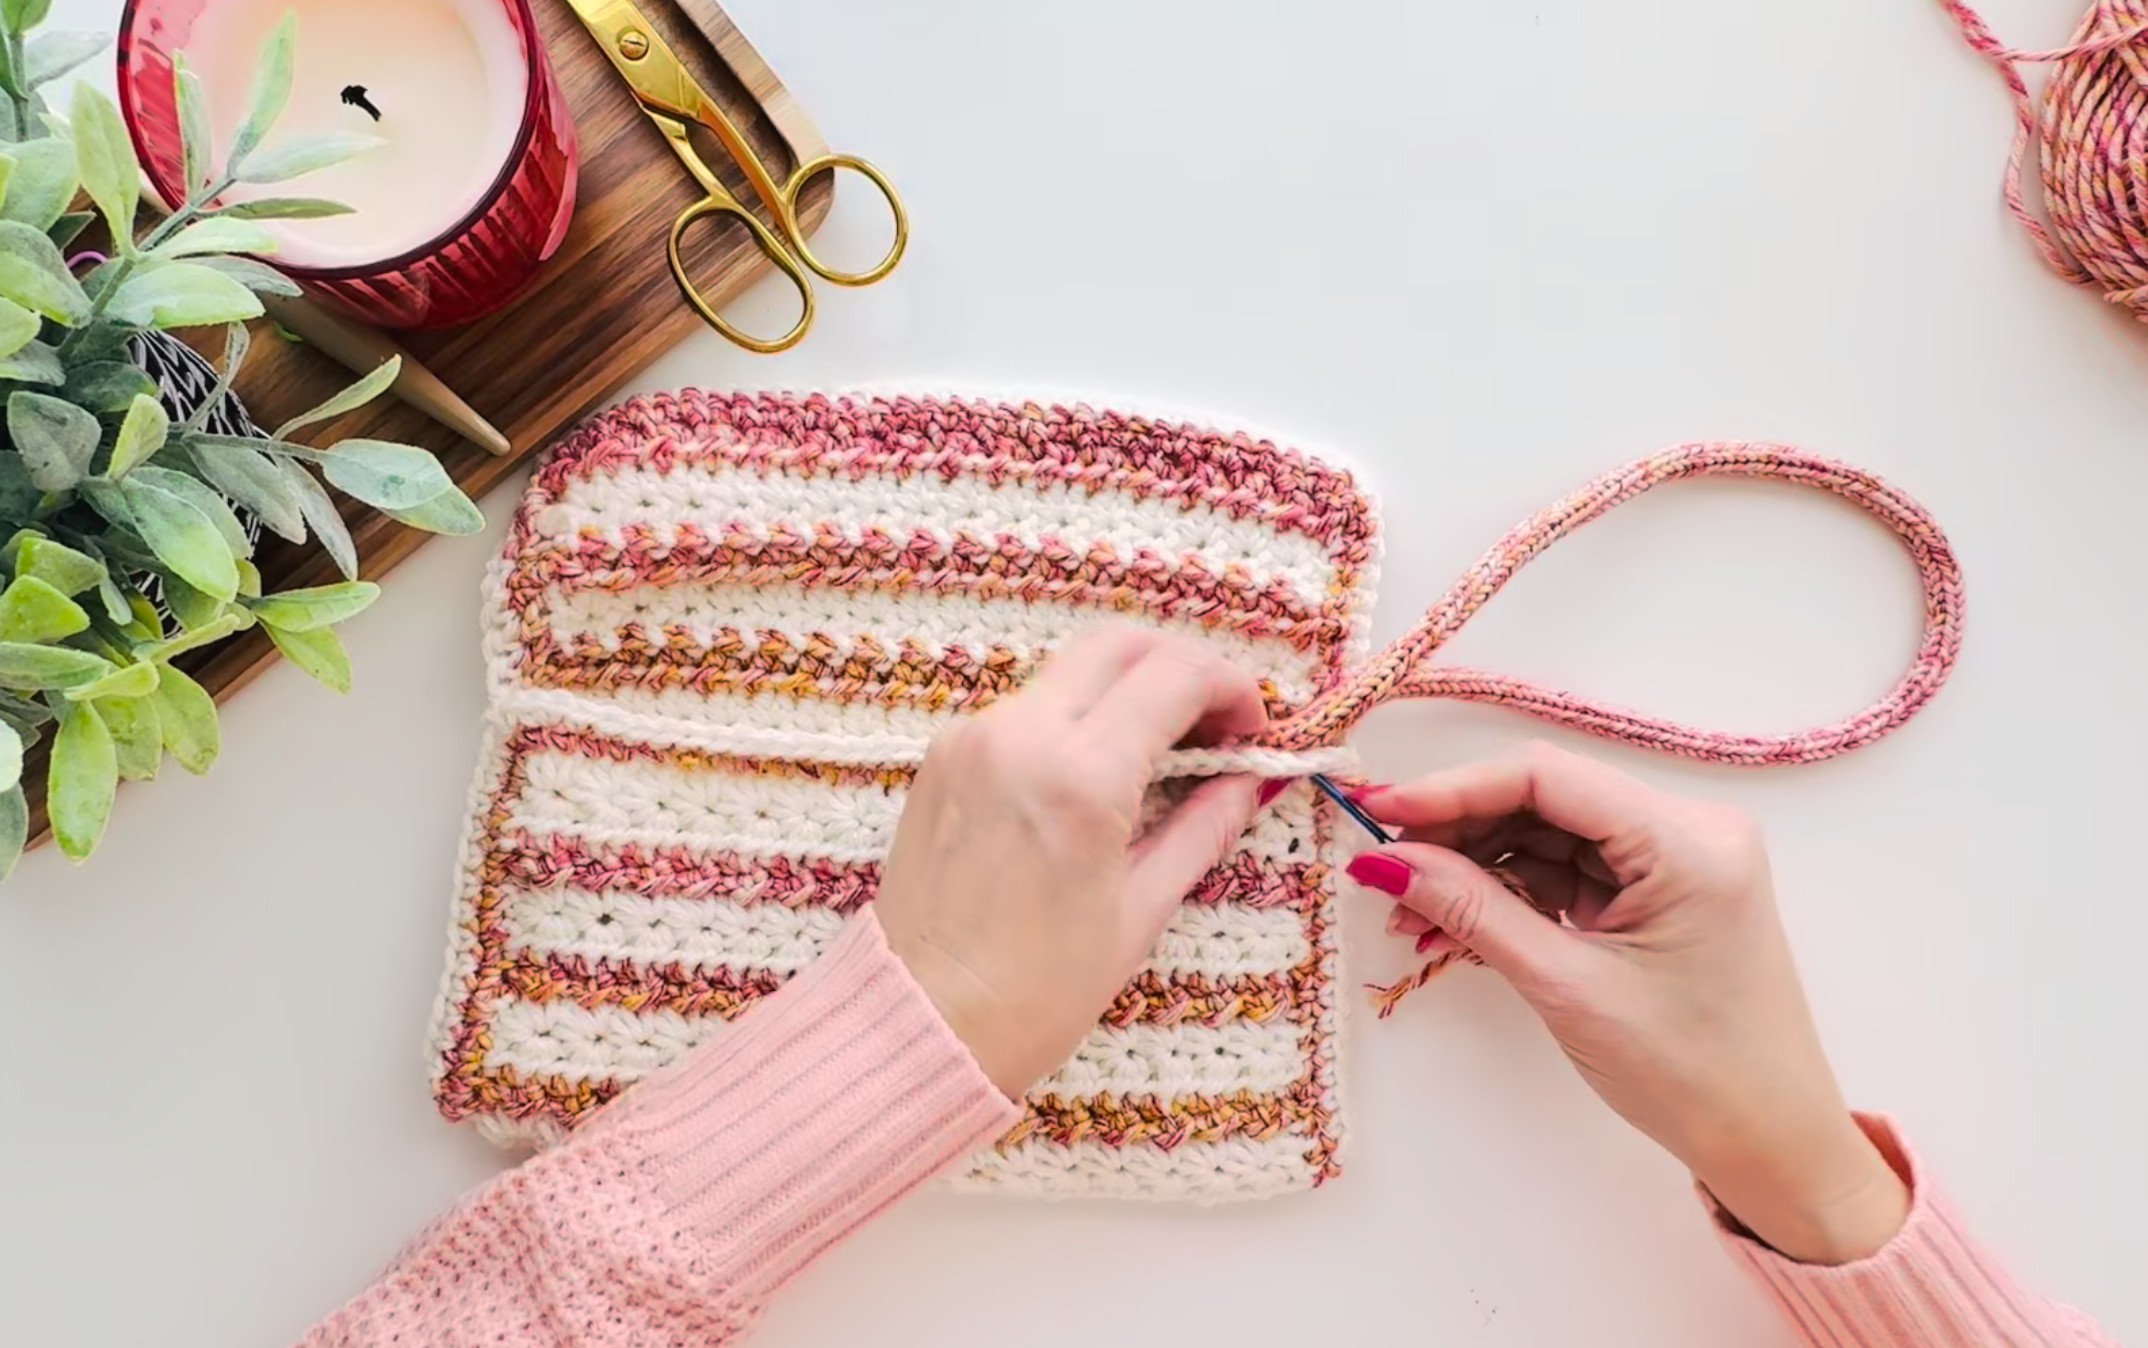
Optional I-Cord Handle
Using Caron Simply Mosaic:
Create an I-cord using a CayDo Automatic I-Cord Machine (or crochet I-cord by hand).
(Attaching i-cord to clutch is shown in tutorial video.)
Attach to one corner of the clutch to create a wrist strap.
Sew directly to corner
Reinforcing the seam corner earlier helps support the handle attachment.
Final Thoughts
This textured clutch is such a fun way to use self-striping yarn in a structured project.
The combination of Star Stitch and Crunch Stitch creates depth and visual interest, while the simple fold-and-seam construction keeps it approachable.
It’s perfect for:
- Spring events
- Easter
- Handmade gifting
- Church
- Date nights
- Or just because you made it
If you make one, I would absolutely love to see it. Tag me so I can admire your beautiful texture and color choices.
And if you loved this stitch combination, you might also love the Amelia Blanket — the larger version of this textured pairing.
Happy crocheting 💛