Discover essential beginner crochet tips in our latest blog post, designed to guide you through the basics of crocheting with practical advice and easy-to-follow techniques for crafting success.
Starting your journey into the crochet world can be exciting and a little daunting.
Today, we'll explore 15 tips and tricks for beginner crocheters designed to make your crochet experience smoother, more enjoyable, and more creative.
Whether picking up a crochet hook for the first time or looking to refine your basic skills, these tips will help you navigate the nuances of yarn types, hook sizes, basic stitches, and project selection.
From understanding the importance of gauge to mastering stitch markers, we'll guide you through the foundational elements that every new crocheter needs to know.
Plus, I’ll share some insider secrets to enhance your crafting sessions, making each stitch a step towards becoming a confident and skilled crocheter.
So grab your yarn and hooks, and let’s go!
Top Beginner Crochet Tips: Master the Basics Easily
Yarn
Turn skeins into balls of yarn before starting.
Yarn either comes in skeins or hanks, but you’ll want to turn it into a ball to make your crochet project easier.
This makes it easier to pull the yarn out without having to turn the skein over and possibly lose track of it., Yarn can be turned into a ball (or cake, as it’s also known) using a swift and a winder.
I personally use this swift and this winder, and I love them both. It’s a little bit of a process, but it will make your crochet project a lot easier in the long run.
Substituting yarn.
Unfortunately, sometimes yarn becomes either out of stock or discontinued while you’re working on a project. As sad as this is, there is a way to get as close to the old yarn as possible.
When you need to substitute a yarn, match the weight, color, and fiber of the yarn that you’re looking to replace. All of this information can be found on the yarn label, including the percentages of different fibers in the yarn.
If you need the yarn urgently, I recommend the Yarn Sub website. You can search for a yarn and see hundreds of potential replacements!
It’s a great site and a lifesaver if your favorite yarn is discontinued.
Crochet Patterns
Read through a pattern all the way before starting a project.
Keep an eye out for crochet size changes, stitches or crochet abbreviations you aren’t familiar with, and other things you’ll need to know in advance.
For example, a granny square afghan project I’m working on has me using a 5.5 mm hook for the majority of the square, but the border is supposed to be done with a 5 mm hook.
This is something I should know beforehand so I don’t end up with misshapen granny squares.
Become familiar with stitch abbreviations.
Most patterns won’t spell out stitch names, but there’s a universal abbreviation for most stitches.
If the abbreviations aren’t explained in the pattern, a quick Google search will let you know what the stitch is.
You can also check out our posts for both regular crochet stitch abbreviations and Tunisian crochet stitch abbreviations.
Nevertheless, it’ll be helpful to become familiar with the most common stitch abbreviations like stitch (st), single crochet (sc), double crochet (dc), and half double crochet (hdc). If there’s a special stitch, the abbreviation and its translation will usually be in the Special Stitch section of the pattern.
Determine if the turning chain counts as a stitch before your project begins.
This is an essential step you won’t want to miss, as it can change the whole outcome of your project.
You’ll “chain” a certain amount of stitches at the end of a row before turning and starting the next row. Sometimes, these chains count as one of the stitches in your row, and sometimes they don’t.
You’ll have to consult your specific pattern to determine if the turning chains count as a stitch. If they do, you will skip the first stitch in the row because the turning chain counts as a stitch.
If they don’t, you will put your first stitch in the first stitch on the row, and the turning chain will bump out to the side a little bit.
Make note of what hook/hook size you use for each project.
I’m very guilty of starting a project, putting it down, and returning to it only to find I don’t remember the size hook I used.
Save yourself the disappointment of having to frog (or undo) a project by writing down the project you’re working on and the hook you used.
You can write it down physically or make a list of WIPs (works in progress) and their corresponding hooks on your phone.
Make note of special stitches at the beginning of a pattern.
Most patterns will have a section at the very beginning titled Special Stitches.
These are stitches outside the standard crochet stitches you may not be familiar with. Look up and familiarize yourself with the stitches before you start to streamline the process.
Crochet Hooks
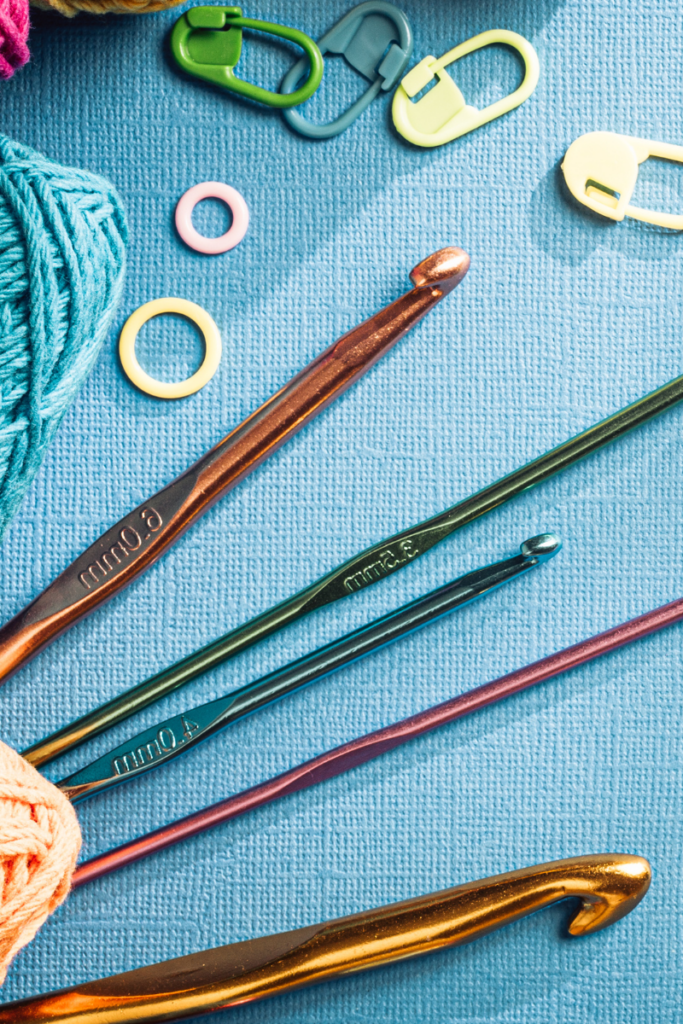
Try a variety of hooks.
There are so many types of crochet hooks out there! Plastic, aluminum, steel, wood, and more.
Each hook type has pros and cons, and sometimes, you’ll want to use one hook type over another. For example, using a wooden hook for softer, slippery yarn will help give the yarn some friction and keep it from slipping off the hook.
Metal (steel and aluminum) hooks are great for rougher yarn, such as wool, because they help keep the crocheting smooth.
Using wood for wool will potentially cause too much friction, and the yarn will have difficulty going through. Using metal for smoother yarns might lead to the yarn slipping off.
These are just things I’ve noticed, but of course, you can use whatever material you prefer.
When to switch crochet hooks.
If you’re doing a project and noticing something’s a little off, you may have to switch crochet hooks.
If you’re trying to figure out gauge and have too many stitches per inch, your hook is too small, and you’ll need to go up a half or whole size.
You'll need to decrease your hook size if you don’t have enough stitches per inch. This is especially important for projects where size is crucial, like clothing.
Your project could become too big or small if the correct hook size isn’t used.
Use one hook throughout your project.
Sometimes, you’ll want to switch hooks during a project and think it’s okay because they’re the same size hook. However, not all hook sizes are created equal!
If the hooks are two different brands or two different materials, there may be minor disparities, even if the size of both hooks is the same.
Stick to the same hook throughout your project to prevent a potential issue.
Gauge
Determine whether gauge is important in your project.
Gauge refers to how many stitches you have per inch.
This is important for wearables like sweaters, tops, and pants because yarn or a hook that’s too big or too small could change the size of the wearable. However, gauge isn't as important for things like blankets and scarves.
If a blanket turns out a little too big, it’s not detrimental to the project.
Make a swatch before beginning to determine gauge.
Before starting a project, consider doing a swatch (a small portion of the project, usually a 6x6 in square) to determine what the gauge of the yarn is.
This will prevent having to start over on a project because the yarn ends up being too big or too small for the project. I’m guilty of skipping this step every time I do a project, and it’s come back to bite me.
It may seem tedious, but it will definitely help, and you can always make a project out of your gauge swatches, so it doesn’t feel as tedious!
Stitch Markers
Use stitch markers in the round AND to mark the end of your row.
I don’t know what I would do without stitch markers. They’re a lifesaver not only for projects done in the round, like socks and hats, but for keeping your edges straight.
I highly recommend marking the end and beginning of a row with a stitch marker, even if your project is worked flat.
This will save a lot of pain later, and make sure you did the right amount of stitches.
If making a repetitive project, put a stitch marker at the beginning of the pattern repeat.
I have gotten lost while doing a project with a repeating pattern (the same sequence of rows done repeatedly).
To fix this and remember where you are in the pattern, put a stitch marker at the beginning of the pattern repeat.
For example, if you’re doing a repeat of a single crochet row, a bobble row, and a double crochet row, put the stitch marker at the beginning of the single crochet row.
This will also help with counting rows if you get lost.
Use stitch markers every 10 stitches if the beginning chain is long (100+ stitches).
When doing a large project, such as a blanket or scarf, put a stitch marker in every tenth stitch.
I’ve found that this prevents me from having to go back and count a million times and ensures I always have the right amount of stitches.
This is especially helpful when you have to chain over 100 chains, and losing track is easy.
Finishing
Weave in ends as you go.
Weaving in ends can be an extremely tedious and time-consuming part of crochet, but there are ways to fix that.
I recommend either crocheting over your ends as you go (holding the end and crocheting around it as you continue your work) or using a tapestry needle to weave the ends in as you go.
This will keep you from ending up with dozens of loose ends to weave in at the end of your project!
Bonus Tips
Use crochet gloves to ease hand pain.
Crocheting is fun and relaxing, but the repetitive hand motion that comes with it can be taxing on your hands and make crocheting painful.
A few months ago, I started using copper compression crochet gloves to ease the pain and let me tell you, they help tremendously.
It will take some time to get used to the feel, but they’ll be great for your hand health in the long run.
I use these gloves every day!
Wrapping Things Up
In conclusion, these beginner crochet tips are your stepping stones into the vast and vibrant world of crocheting.
As you practice and incorporate these techniques into your crafting routine, you'll find that each stitch becomes more intuitive and your projects more refined.
Remember, the journey of crochet is one of patience and continual learning. Don't hesitate to revisit these tips or seek further inspiration as you grow in your skills.
Happy crocheting, and may each yarn loop bring you closer to creating the beautiful, handmade items you envision!