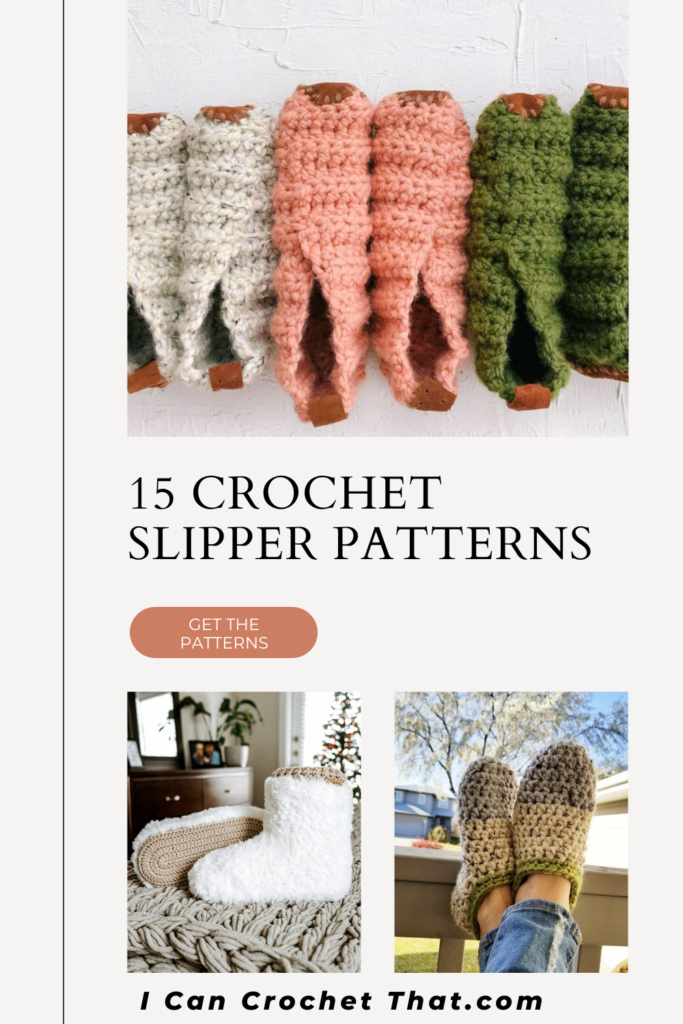
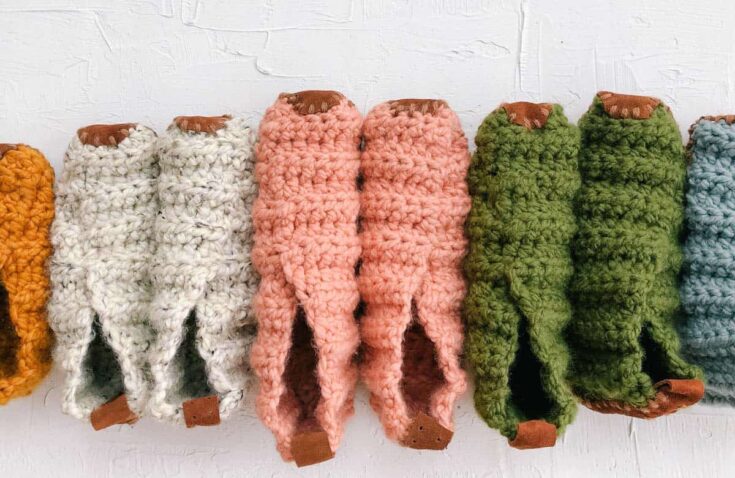
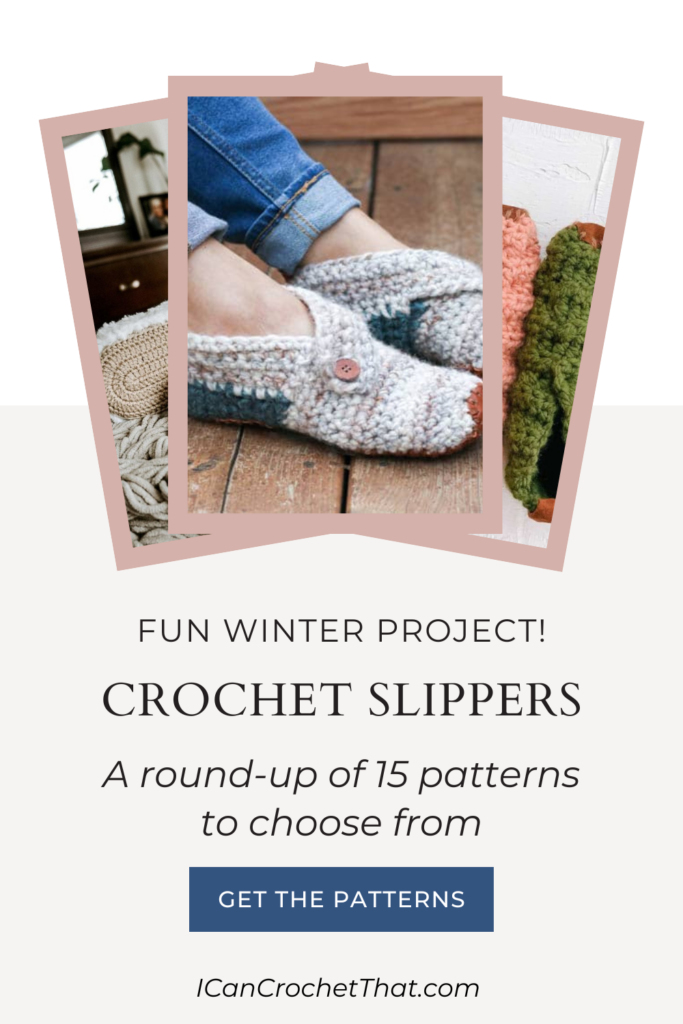
Ready to get cozy? Check out this round-up of crochet slipper patterns for one very relaxing night in.
As an avid shoe-hater, slippers are simply one of my favorite things (cue Mary Poppins).
They’re soft and cozy, made for chilly inside days by the fire with a movie and your latest crochet project.
They don’t have the uncomfy shoe feeling, but I’m not barefoot.
It’s a giant sock. What’s not to like?
I’ve rounded up fifteen crochet slipper patterns to try. Try one, try them all!
And after you've taken a look at these crochet slipper patterns, read on to get some basics for making your own pair.
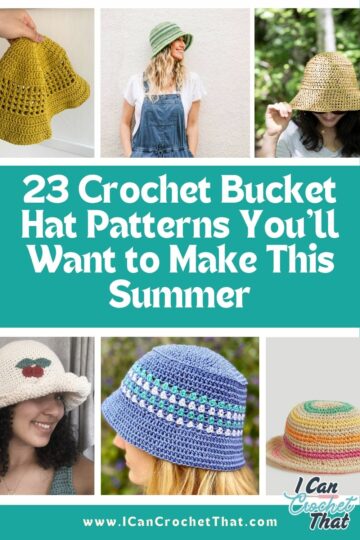
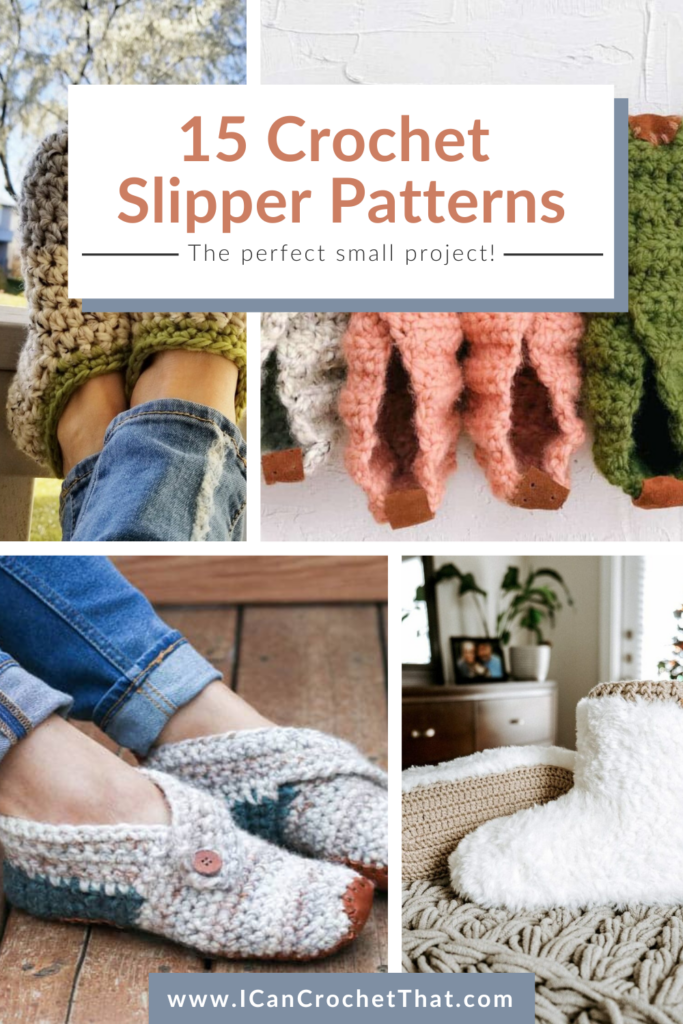
15 Crochet Slipper Patterns for a Cozy Night In
15 Crochet Slipper Patterns
FAST Crochet Slippers Made From Easy Rectangles
Slippers can seem intimidating, but all it takes for these crochet slippers from Make and Do Crew is two rectangles. Easy as pie!
Complete the project with some seaming at the very end and you have a new accessory.
Ballet Slippers Free Crochet Pattern
These slippers from Heart Hook Home are for those of you who like a more lightweight slipper, almost like a sock.
These have a dual cutout design on the top that makes them look classic and elegant.
You’ll need your favorite worsted-weight yarn and a size 3.25 mm hook for this project.
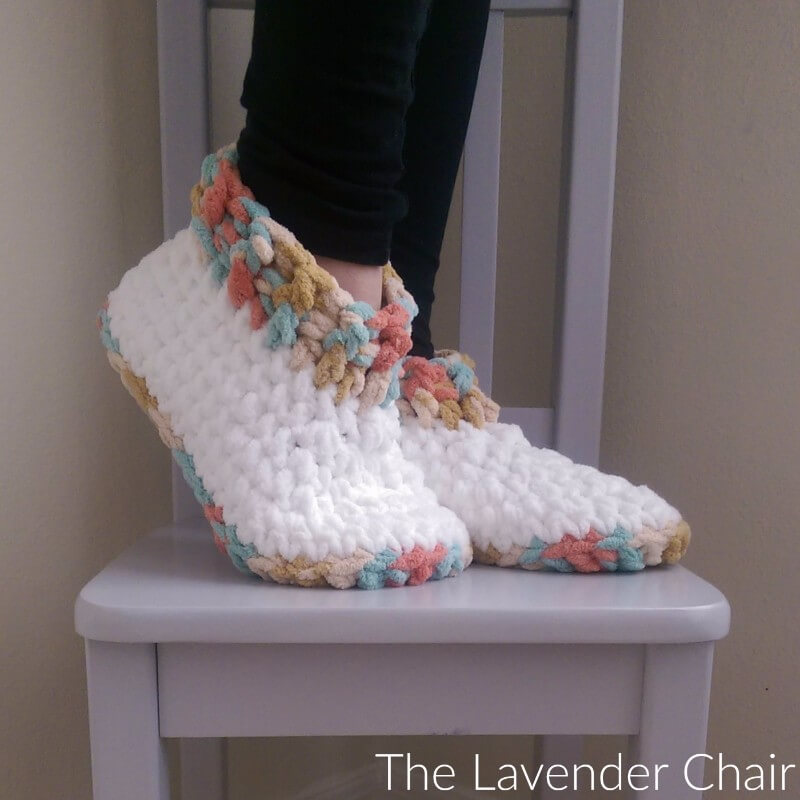
Cloud 9 Slippers Crochet Pattern
These crochet slippers from Lavendar Cloud quite literally look like a cloud!
Aside from the white yarn, there’s also a colorful border on the ankle and around the bottom of the slipper.
Since these are designed to be oh-so squishy soft, you’ll need super bulky (size 6) yarn and a size 9 mm crochet hook for this project.
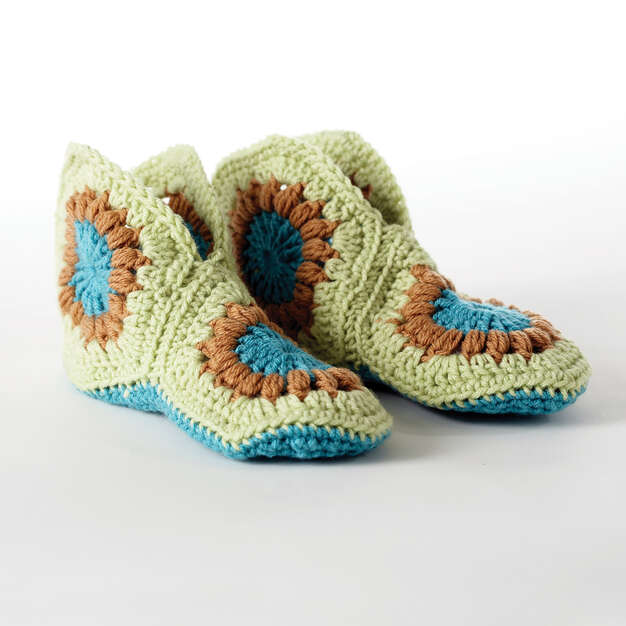
Bernat Granny Slippers, Kids 6/8
If you favor a patchwork, granny square style for your crochet projects, these granny slippers from Yarnspirations are up your alley.
They’re fun, and colorful, and give that wonderful homemade vibe. Plus, they come in kids’ sizes!
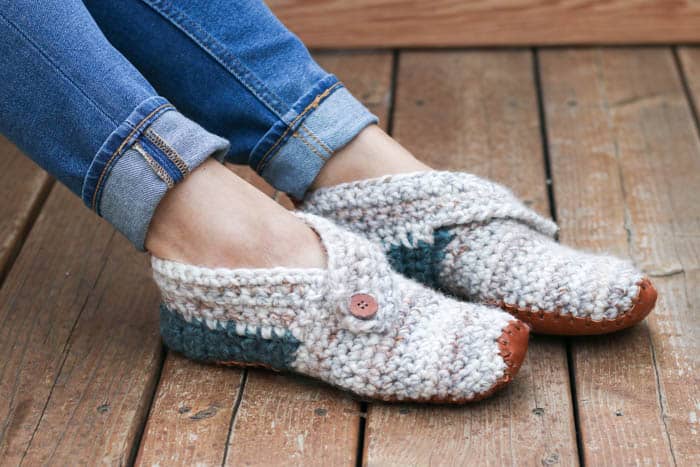
Stylish + Modern: Free Crochet Slippers Pattern for Women
Another set of crochet slippers from Make and Do Crew makes this list!
The style is, well, perfect with the wrap-a-round strap, pretty grey color, and button.
But to kick it up a notch, there’s an option to add some leather accents to the sole of the shoe to help with the grip.
There’s even a sole template included with the pattern to make the process even easier.
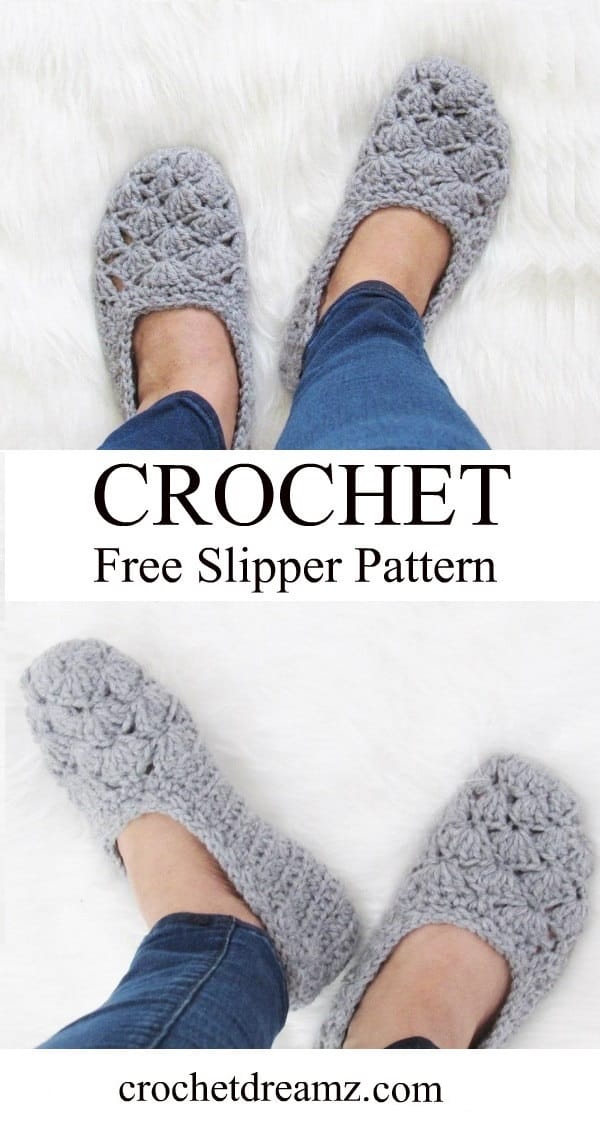
How to Make Easy Crochet Slippers, Shell Slipper
Looking for just a simple pair of slippers to slip on when you get out of bed? These easy slippers from Crochet Dreamz will do the trick.
They’re more like a thicker no-show sock rather than a slipper, so they’re less bulky and work up a lot quicker.
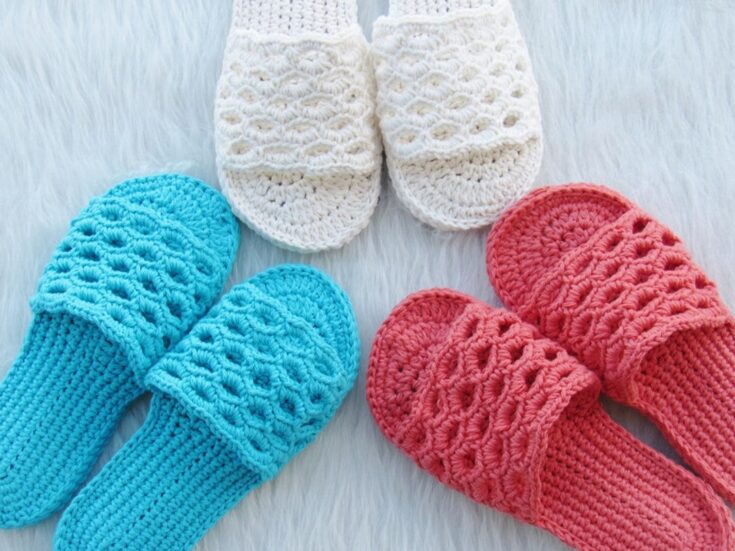
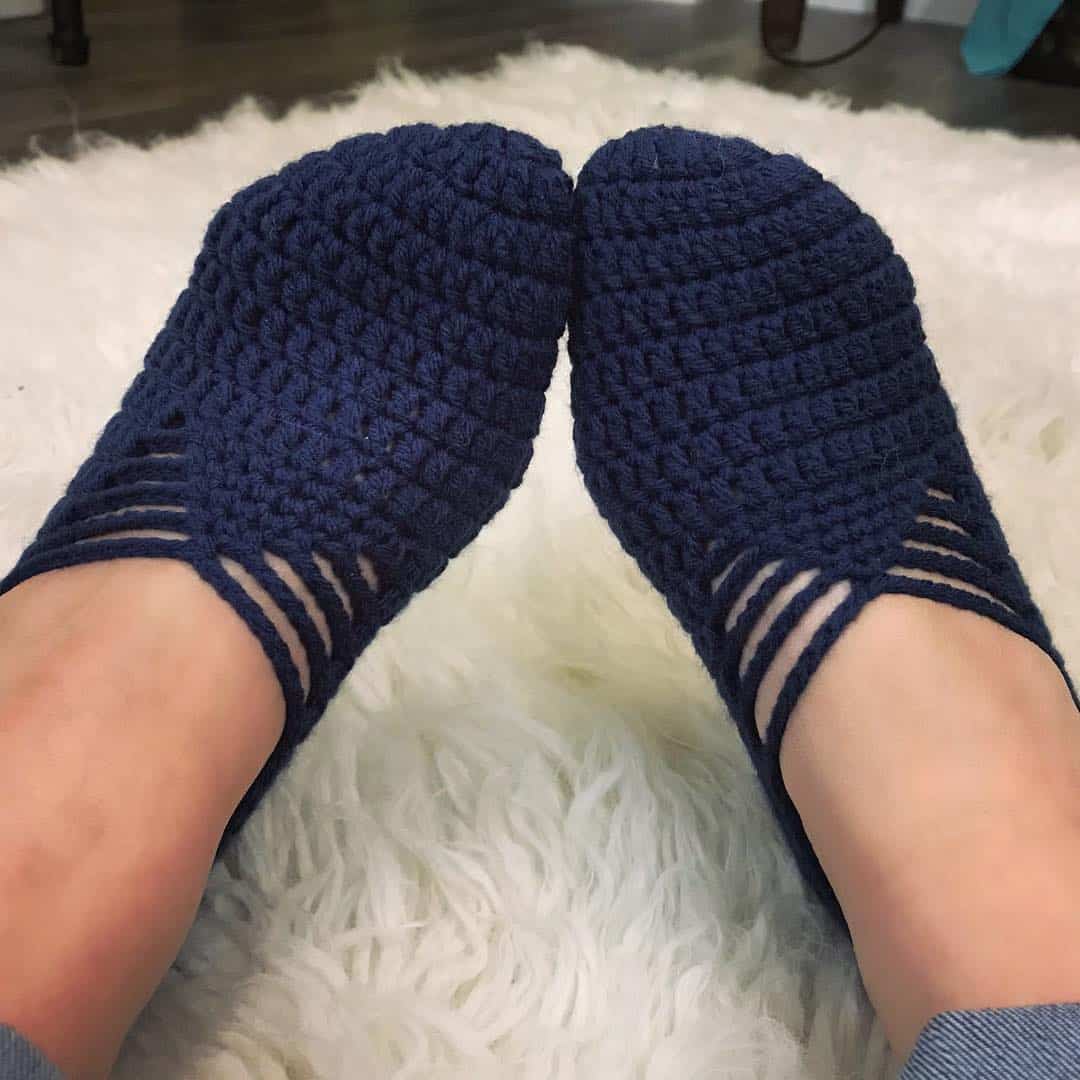
Crochet Slipper Pattern Crochet Woman's Slipper Pattern - Etsy
This is definitely the first crochet slipper pattern I’ve seen like this one.
It’s more of a slide than a slipper, which makes them super easy to slip on without a thought.
Plus, if you’re an avid slide wearer, these would be perfect for your feet!
You just need a 3.75 mm crochet hook to make these little guys.
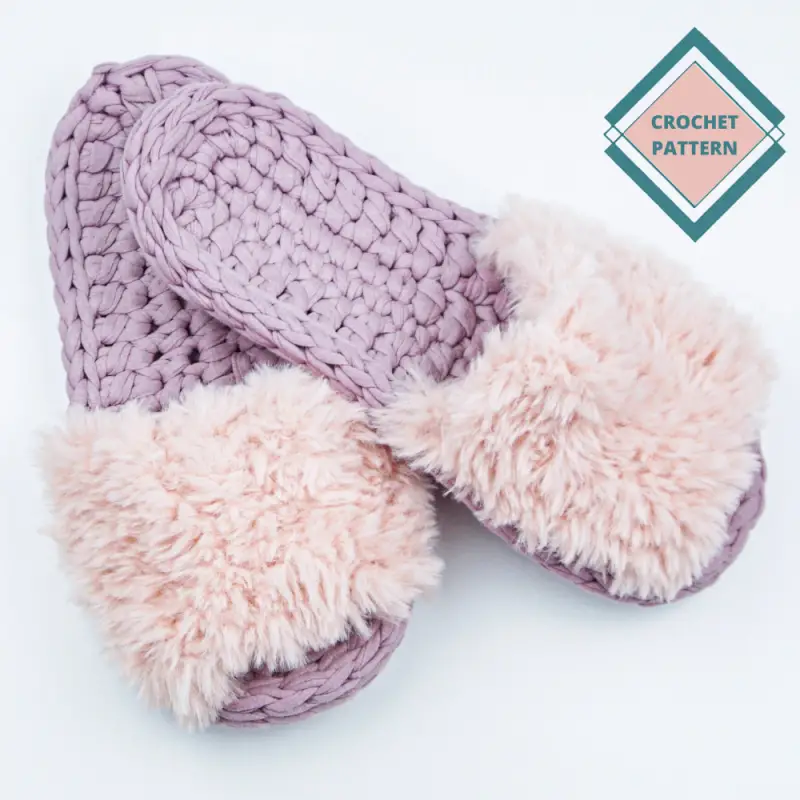
Crochet Slippers Free Pattern - tshirt yarn and crochet patterns
While searching for crochet slipper patterns, I found yet another one that’s slide-inspired. But this one is more for my folks who are all about things soft and fuzzy.
The strap of these is made from faux fur yarn, while the sole is made of t-shirt yarn! How neat is that?
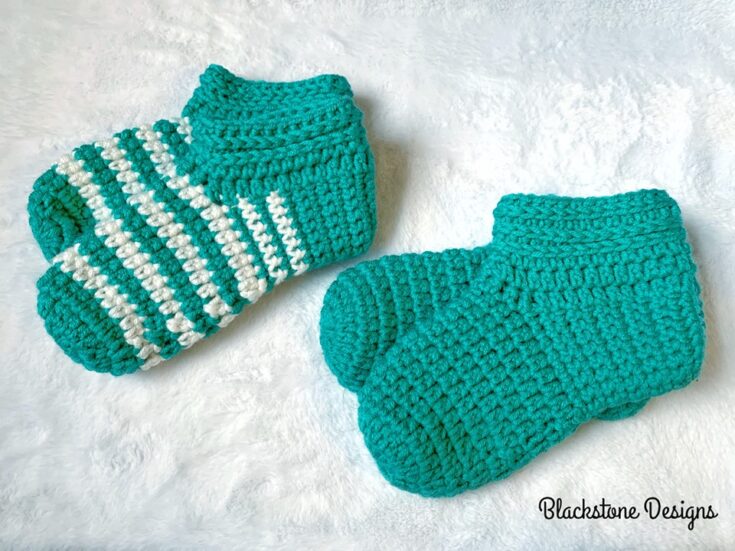
Simple Crochet Slippers Crochet Pattern Crochet Slippers - Etsy
These crochet slippers use thick yarn to create an easy, comfy slipper that will work up super quickly. I
t’s a great project to do on a plane ride or a short road trip.
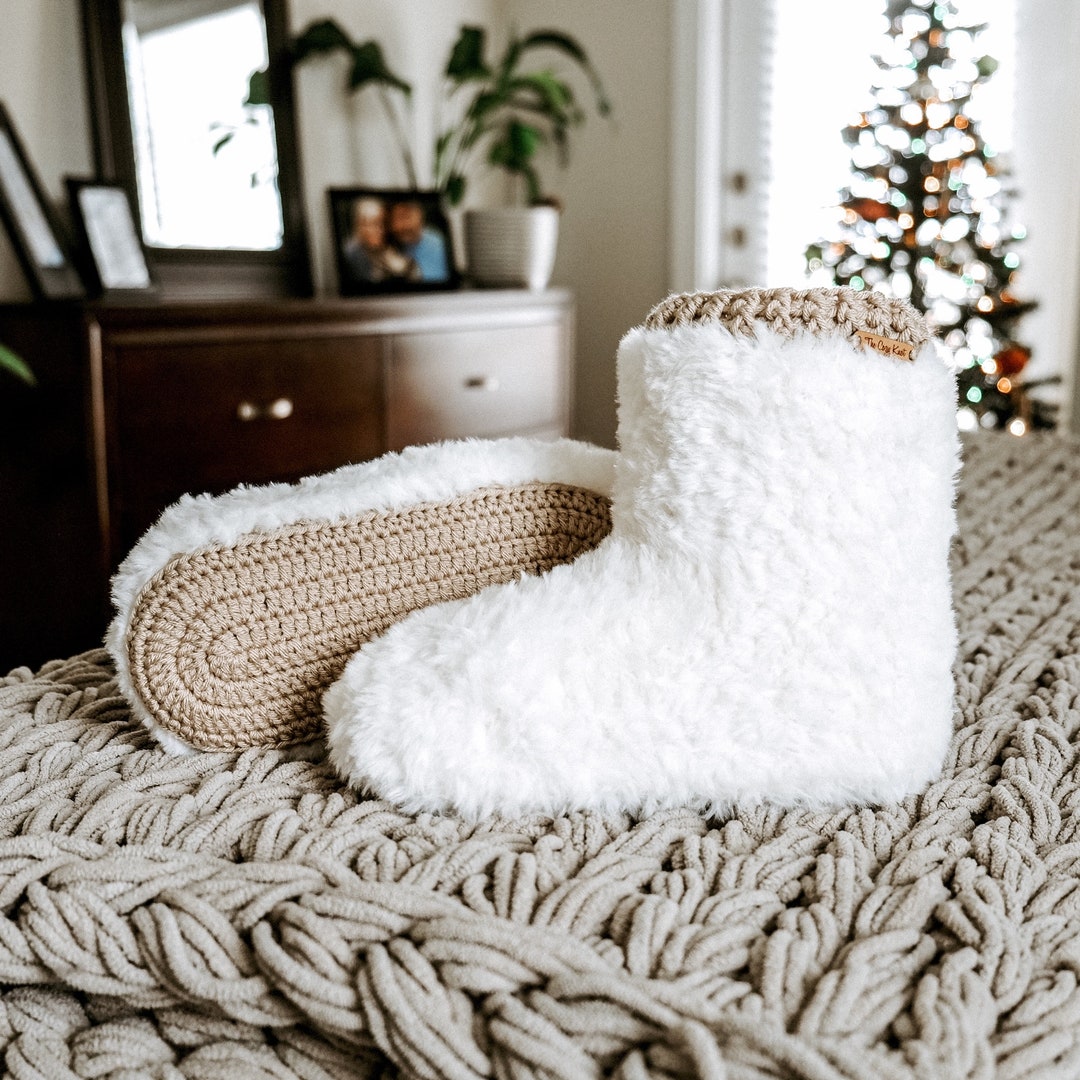
CROCHET PATTERN // Women's Slippers Faux Fur Fuzzy - Etsy
I can’t get enough of the faux fur-style slippers. They’re maximum cozy and work up so fast.
But these cabin boots jump to a new level. The soles and the cuffs are crocheted with worsted yarn, making them suitable for walking around the house in.
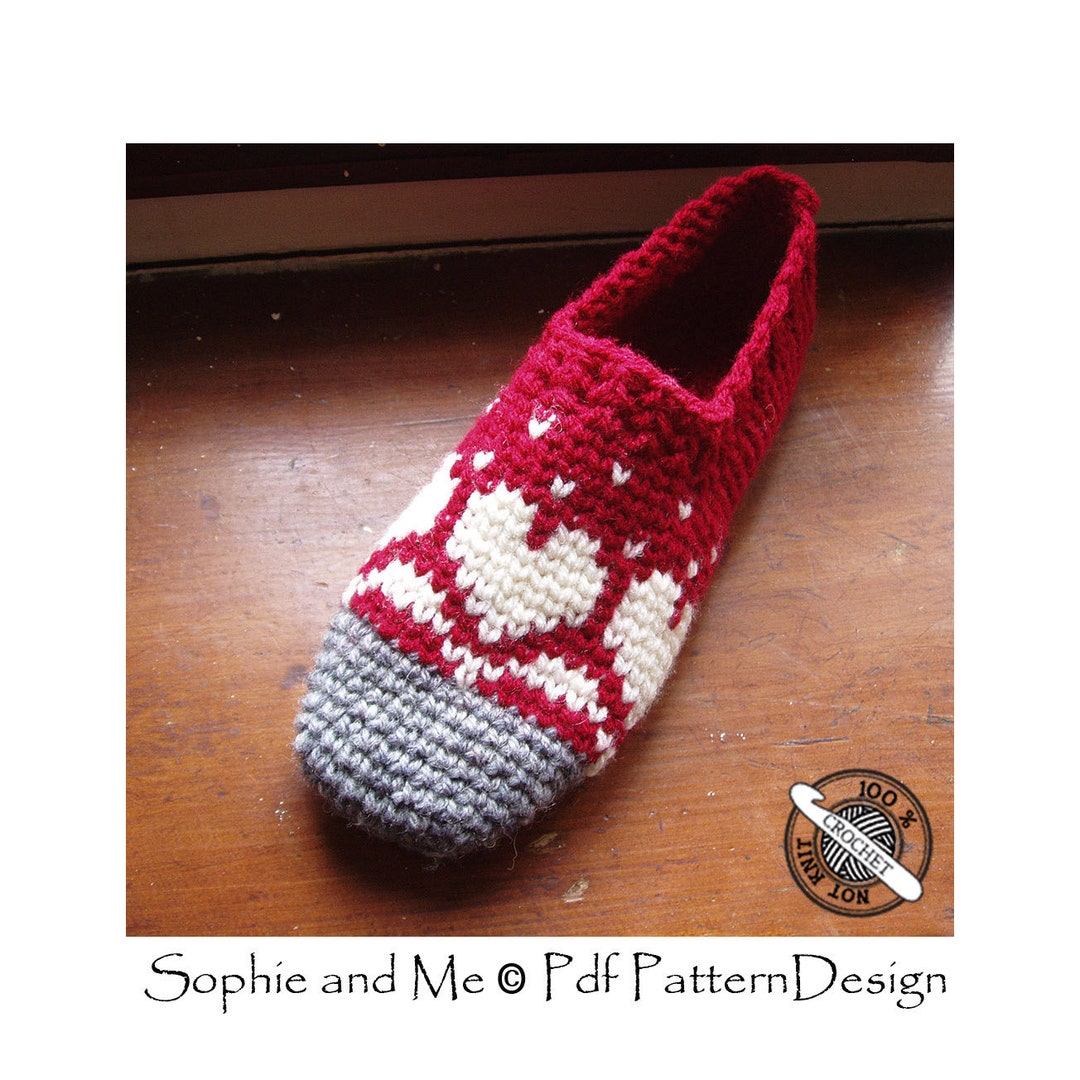
Snow Heart Slippers CROCHET PATTERN Instant Download PDF - Etsy
These heart slippers are absolutely precious.
They have large and small heart motifs near the top, and the toe is worked in a different color to give it a cozier, homemade look.
They would make a great gift for Valentine’s Day or a little gift for yourself.
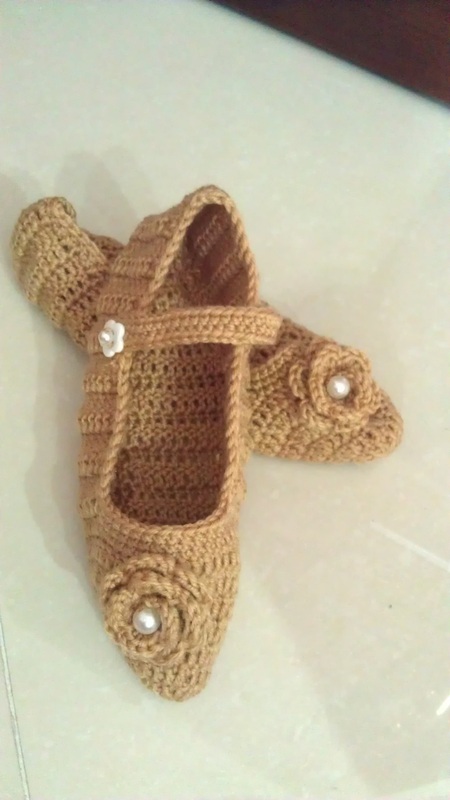
How to Crochet Mary Jane Slippers
Based upon the Buster Brown character of the same name, these Mary Jane slippers mimic one of the most recognizable shoes out there.T
hese slippers are a cozier version of the simple, strapped shoe everyone knows, and these add a pretty flower motif and flower button on the strap.
How to Make Friday Slippers for Adults – Free Crochet Pattern
It’s a Friday night and you’ve just gotten off work. What’s the first thing you do? Take your shoes off!
Take ‘em off and replace them with this comfy set of slippers that can be made in one sitting.
Get some bulky weight 5 yarn and a 6 mm hook, and you’re good to go.
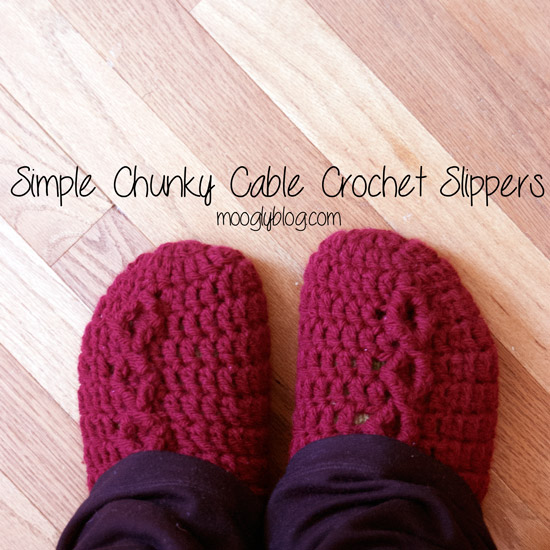
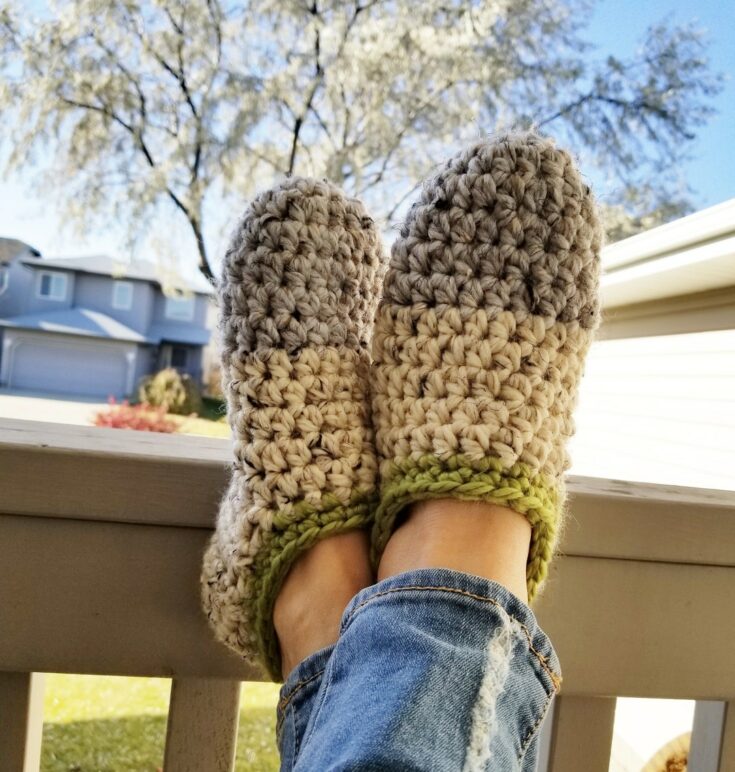
Simple Chunky Cable Crochet Slippers
Y’all know I was going to put a cable pattern on here.
These easy cable slippers can be made in less than an hour and are super snuggly.
They’re about ankle high and made with weight 5 yarn, so they’re soft and cushy.
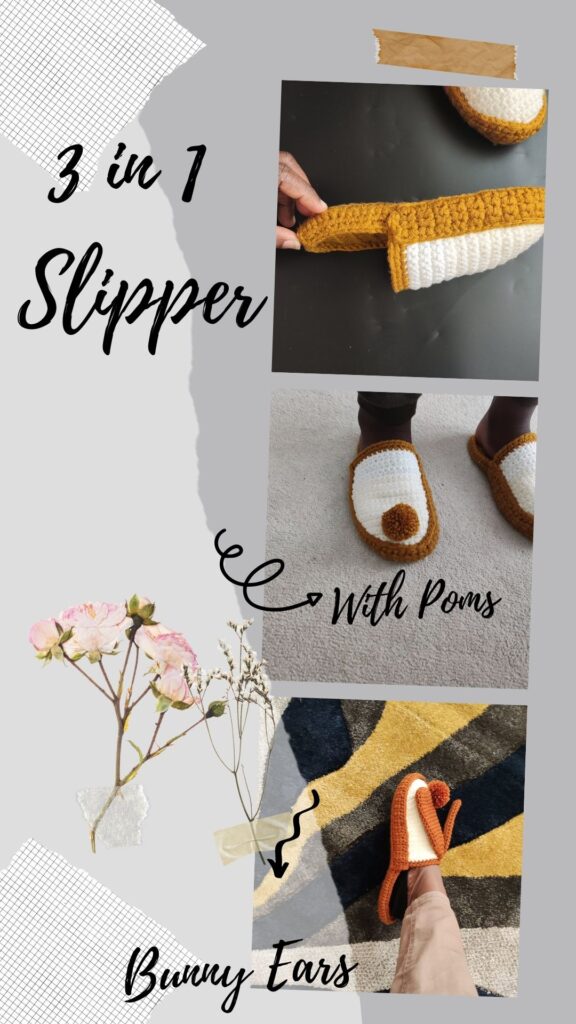
Bunny crochet slippers free pattern
Last but not least, we have these crochet bunny slippers.
I’m a child at heart and something like these bunny slippers is right up my alley of quirky, cute, and a touch of playfulness.
You can add the ears and pom poms for the full effect, or take both away for just a simple slipper. It’s really three patterns in one.
How do You Crochet a Simple Pair of Slippers?
Crochet slippers are a fun way to keep your feet nice and warm during those cold fall and winter months. Plus, they're just fun to make!
With simple materials and some patience, you can create a pair of slippers that you’ll love and will last season after season. Here’s how:
Materials Needed
To get started, you will need the following materials:
- Yarn in your desired color
- Crochet hook
- Tape measure
- Scissors
- Stitch markers (optional)
- Pompom maker (optional)
- One of the 15 crochet slipper patterns listed above!
Step-by-Step Guide
Here are the basics when it comes to making a very simple pair of crochet slippers.
Step 1: Measure Your Foot
Use a tape measure to measure around your foot and ankle. Make sure to measure both feet as they can be slightly different sizes.
Write down these measurements so you can access them later.
Step 2: Pick Out Yarn
Select yarn according to the pattern instructions and in your favorite color.
If you can't find the yarn listed in the pattern or you're wanting to shop from your yarn stash, a great resource for finding good substitutions is www.yarnsub.com.
For example, I typed in Lion Brand Pound of Love Yarn and this was the first result.
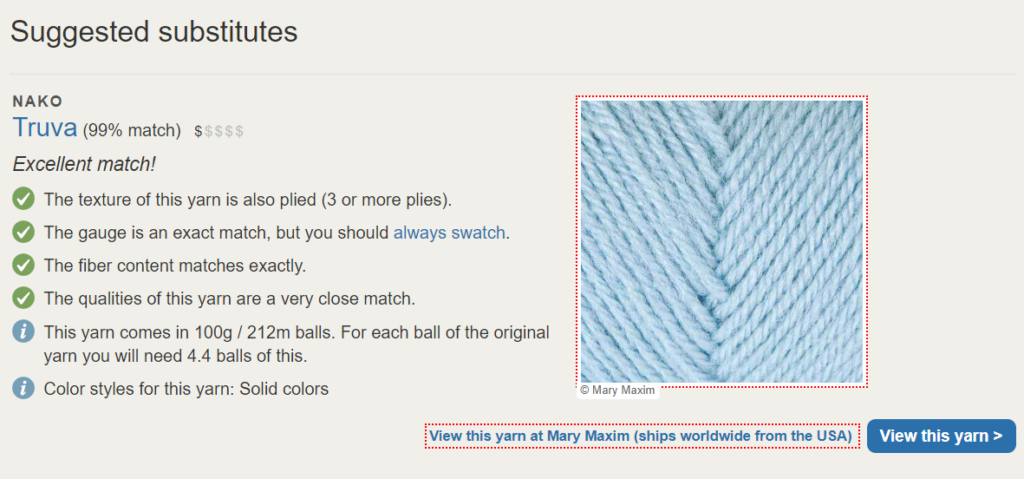
It's a great resource to either shop from your stash or find a compatible yarn if the one in the pattern isn't available.
Step 3: Start with the Toe
Most basic crochet slipper patterns will have you starting with the toe. Either by making a magic circle or working in the round.
Unless of course, you decide to make these slippers, which are made entirely out of a rectangle!
Step 4: The Sides
The next step is usually working up the sides and the heel. Some of the patterns tell you to try on your slippers as you go, so you can make sure they fit.
Step 5: Finishing Touches
Now for the fun part! The finishing touches.
For an extra special touch, you can add pompoms, fringe, buttons or even leather soles.
Now it's time to slip those feet into your new pair of crochet slippers.
How to Make Crochet Slippers Non-Slip
Whether you're making a pair of these for yourself, your kiddos or possibly a grandparent, sometimes you just need a little extra grip on the bottom.
So, how do you make crochet slippers non-slip? Several ways:
You can add leather soles to the bottom after you've finished crocheting your slipper. Follow the instructions (found at the bottom of the post) from this crochet slipper pattern.
Apply puff paint for fabric in lines to the soles of your slippers. Just make sure you let it dry for 24 hours before use.
Apply hot glue using a hot glue gun and sticks - If you're crafty, most likely you already have some hot glue laying around.
Sew on shelf liner to the soles of your slippers - Say what?! Yep, that shelf liner you use in your kitchen can be cut and sewn to the bottom of crochet slippers for some ncie grip.
Are You Ready to Choose One of These Crochet Slipper Patterns?
We hope we helped you find just the right pattern to make the perfect pair of crochet slippers.
For more cozy crochet patterns perfect for fall and winter, check out these round-ups: