Unlock the world of advanced crochet stitches for beginners and elevate your crafting skills. Explore beautiful textures in your projects with our comprehensive guide!

Crochet, with its intricate patterns and beautiful textures, has captivated crafters for generations.
For those just starting their crochet journey, the world of stitches can seem so big and complex. But don't be intimidated; you're in for a delightful adventure!
Today, we're going to dive into some advanced crochet stitches that beginners can start practicing.
Whether you've recently mastered the basics or are looking to challenge your skills, these stitches will open up a new realm of creative possibilities.
We’ll look at the instructions for bobbles, puffs, shells, and more as we explore ten advanced crochet stitches that will elevate your crochet game to the next level.
Let's get started!
Advanced Stitches for Beginners to Boost Your Skills

Once you've learned these, keep scrolling to see a round up of patterns for each of these crochet stitches!
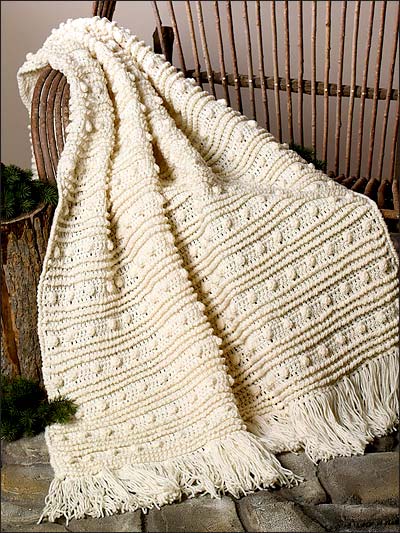
1. Bobbles
Bobbles are clusters of double crochet stitches worked into the same stitch or space, creating a raised texture. Bobbles are often used to add dimension and visual interest to various crochet projects, such as blankets, hats, and bags.
Here's how to make a basic bobble stitch:
Video:
Written Instructions:
1. Start by working to the stitch where you want to create the bobble.
2. Yarn over and insert your hook into the designated stitch.
3. Yarn over again and pull up a loop. You should have three loops on your hook.
4. Yarn over and pull through the first two loops, leaving two loops on your hook.
5. Repeat steps 2-4 two or more times, depending on the desired size of your bobble. Each repetition creates a partial double crochet stitch (or another specified stitch).
6. Once you have the required number of partial stitches on your hook, yarn over one more time and pull through all the loops on your hook. This will secure the bobble in place and create a rounded cluster of stitches.
7. To finish the row or round, continue with your regular stitch pattern.
The number of partial stitches you make for the bobble and the stitch used for those partial stitches can vary, depending on the pattern's instructions.
Most commonly, bobbles are made with double crochet stitches, but they can also be made with single crochet or other stitches for different effects.
They can also be spaced out evenly or clustered close together, and they can be used for various decorative and functional purposes in your crochet projects.
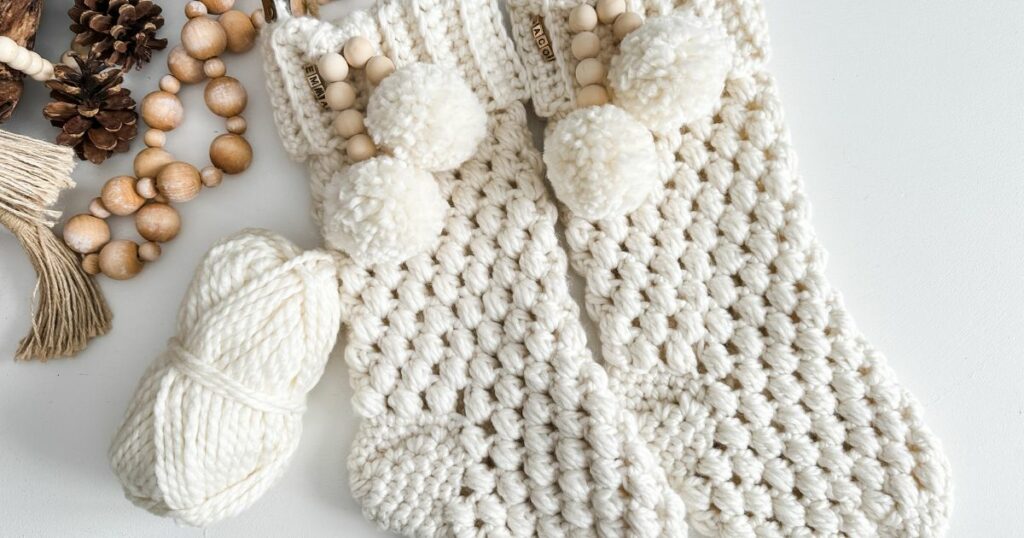
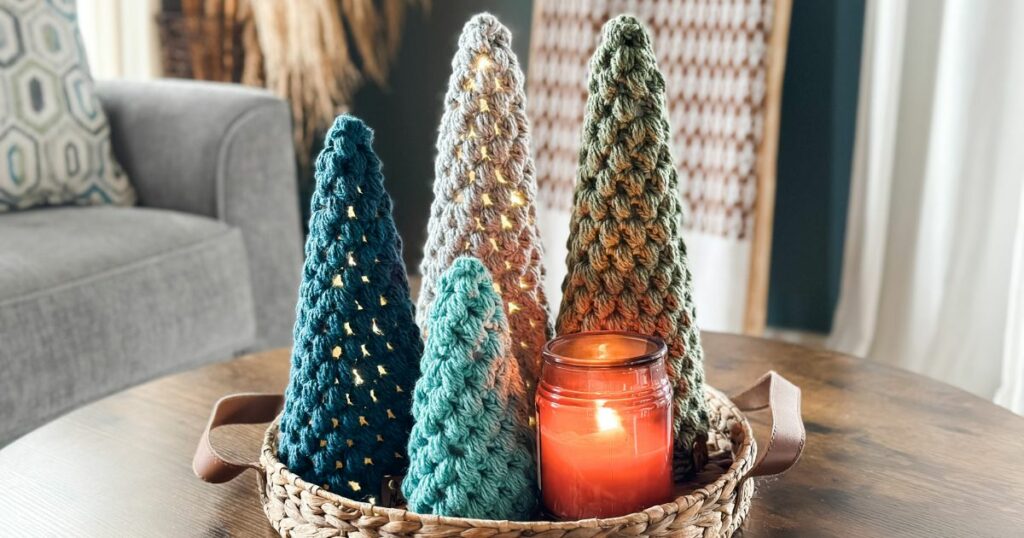
2. Puff Stitch
A puff stitch is a decorative and textured stitch that creates a soft, puffy cluster of stitches on your fabric. It's often used to add a three-dimensional, textured element to various crochet projects, such as blankets, scarves, and baby clothing.
Puff stitches can vary in size, depending on the pattern and the number of loops worked into the same stitch.
Here's how to make a basic puff stitch:
Video tutorial:
Written instructions:
1. Begin by yarn over (YO) and insert your hook into the designated stitch.
2. YO again and pull up a loop. You should have three loops on your hook.
3. YO once more and insert your hook into the same stitch.
4. YO and pull up another loop. You should now have five loops on your hook.
5. Repeat step 3 and step 4, adding more loops to your hook. The number of repetitions will depend on the pattern and the desired size of the puff stitch.
6. Once you have all the required loops on your hook, yarn over one last time and pull through all the loops on your hook. This secures the puff stitch in place and creates the puffy cluster.
7. To finish the row or round, continue with your regular stitch pattern.
The number of loops you work into the same stitch can vary, and some patterns may call for more or fewer loops. The key to achieving a nice puff is to maintain consistency within the same project.
3. Popcorn Stitch
A popcorn stitch is a decorative and textured stitch that creates a raised, rounded, and compact cluster of stitches on your fabric.
It's similar to a bobble stitch but typically consists of a group of double crochets (or other specified stitches) worked into the same stitch or space and then cinched together with a single crochet to form a "popcorn" shape.
Popcorn stitches are often used to add dimension and visual interest to various crochet projects, such as blankets, hats, and sweaters.
Here's how to make a basic popcorn stitch:
Video tutorial:
Written instructions:
1. Start by working to the stitch where you want to create the popcorn.
2. Begin by crocheting the specified number of double crochets (or another specified stitch) into the same stitch or space.
3. Once you have completed all the required stitches, secure the popcorn in place with a single crochet and chain 1 or 2 (as specified in your pattern)
4. To finish the row or round, continue with your regular stitch pattern.
The number of stitches used to create the popcorn and the stitch used (e.g., double crochet, treble crochet) can vary, depending on the pattern's instructions.
Popcorn stitches can also be combined with other stitches and used in different ways to create interesting textures and designs in crochet projects.
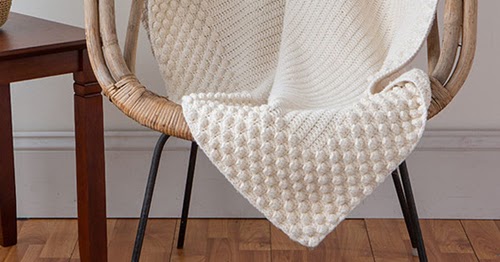
4. Front Post and Back Post Double Crochet
Front post double crochet (FPdc) and back post double crochet (BPdc) are two crochet stitches that are used to create ribbed or textured patterns in your crochet work.
They are worked around the post of the previous row's stitches instead of into the top loops, which creates a raised and textured effect.
Video for both stitches:
Here's how to make a front post double crochet (FPdc):
1. Yarn over (YO) your hook.
2. Insert your hook from the front to the back and then around the post of the double crochet stitch from the previous row, coming out on the other side of the post (from right to left if you're right-handed, or from left to right if you're left-handed).
3. YO again and pull up a loop, so you have three loops on your hook.
4. YO and pull through the first two loops on your hook (two loops remaining).
5. YO and pull through the last two loops to complete the FPdc.
Here's how to make a back post double crochet (BPdc):
1. Yarn over (YO) your hook.
2. Insert your hook from the back to the front and then around the post of the double crochet stitch from the previous row, coming out on the other side of the post (from right to left if you're right-handed, or from left to right if you're left-handed).
3. YO again and pull up a loop, so you have three loops on your hook.
4. YO and pull through the first two loops on your hook (two loops remaining).
5. YO and pull through the last two loops to complete the BPdc.
Front post double crochets and back post double crochets are often used in combination to create various textured patterns, such as ribbing, cables, and basketweave designs.
By alternating between FPdc and BPdc stitches and varying the placement and frequency of these stitches, you can achieve different effects and textures in your crochet projects.
These stitches are commonly used in projects like scarves, hats, and blankets to add depth and visual interest.
Try our Kara blanket pattern which features these stitches!
5. Shell Stitch
A shell stitch in crochet is a decorative and textured stitch pattern that typically consists of multiple stitches (usually double crochets) worked into the same stitch or space to create a shell-like or scalloped appearance.
The double crochets are sometimes separated by chains.
Shell stitches are used to add visual interest, texture, and dimension to crochet projects such as blankets, shawls, baby clothes, and more.
Here's a basic example of how to create a simple shell stitch:
Video tutorial:
Written instructions:
1. Start by working to the stitch or space where you want to create the shell.
2. Depending on the pattern and the desired size of the shell, yarn over (YO) and insert your hook into the designated stitch or space.
3. YO and pull up a loop.
4. YO again and pull through the first two loops on your hook (two loops remaining).
5. YO once more and pull through the last two loops on your hook to complete the first stitch of the shell.
6. Repeat steps 2-5 into the same stitch or space for the specified number of times. This will create a grouping of stitches that forms the shell.
7. To separate shells or continue with the pattern, skip 2 stitches.
8. To finish the row or round, continue with your regular stitch pattern.
The number of stitches in each shell, the type of stitch used (e.g., double crochet, treble crochet), and the spacing between shells can vary, depending on the specific pattern you're following.
You can create different effects and patterns by adjusting these variables.
6. Basketweave Stitch
This stitch pattern alternates between front post and back post double crochets to create a woven or basket-like texture.
It is achieved by alternating sets of front post double crochets (FPdc) and back post double crochets (BPdc) in specific sequences.
The result resembles the look of a woven basket, with raised and recessed areas that create a visually interesting and three-dimensional texture.
Here's how to create a basic basketweave stitch pattern:
Video tutorial:
Written instructions:
**Note**: This example assumes a multiple of 4 stitches for the pattern repeat. Ch 3 counts as stitch
You can adjust the width of the pattern by changing the number of stitches in the foundation chain (as long as it's a multiple of 4).
Foundation: Make a chain in multiples of 8 then add 4.
Row 1: In the 4th chain from the hook, (the chain 3 counts as first dc) dc into each stitch across. Ch 3 and turn.
Row 2: FPDC (front post double crochet) around the next 4 dcs. Then, BPDC (back post double crochet) around the next four. Alternate to the end. Make a dc in the top chain of the beginning ch 3. Chain 3 and turn.
Row 3: FPDC around the post of the next 4 DC, BPDC around the posts of the next 4 and repeat across. The last stitch will be a dc into the top of the turning chain.
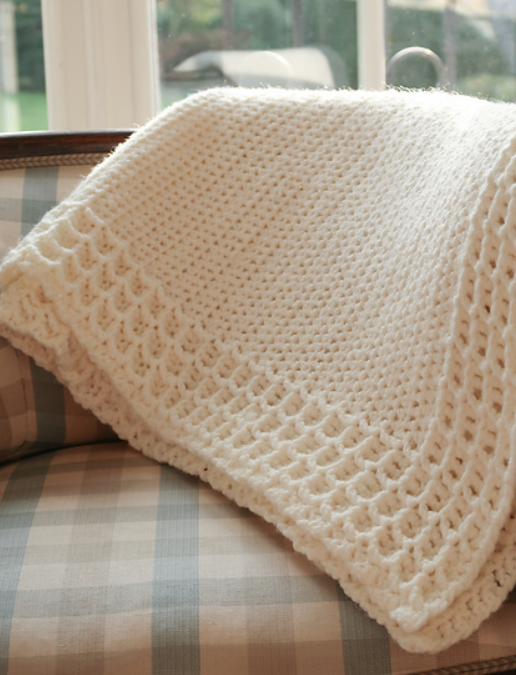
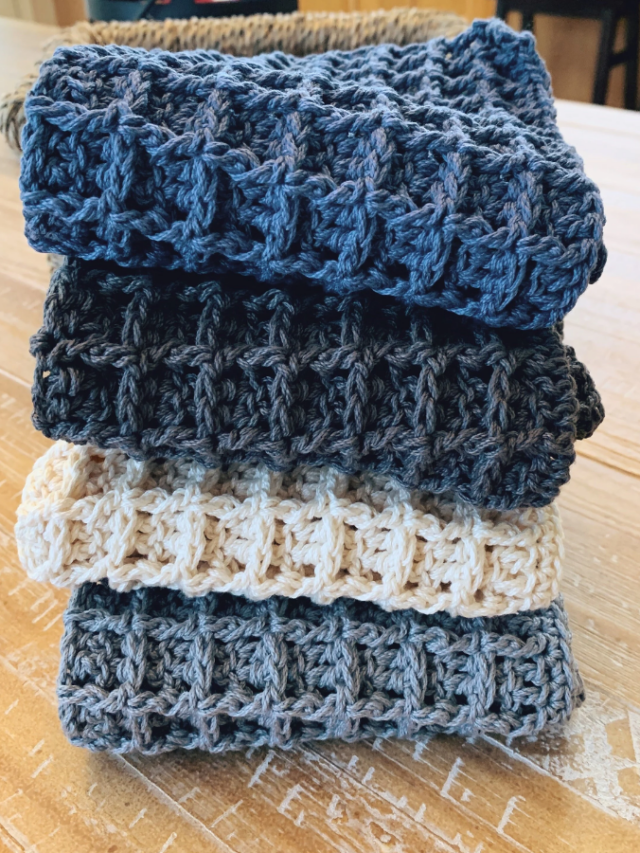
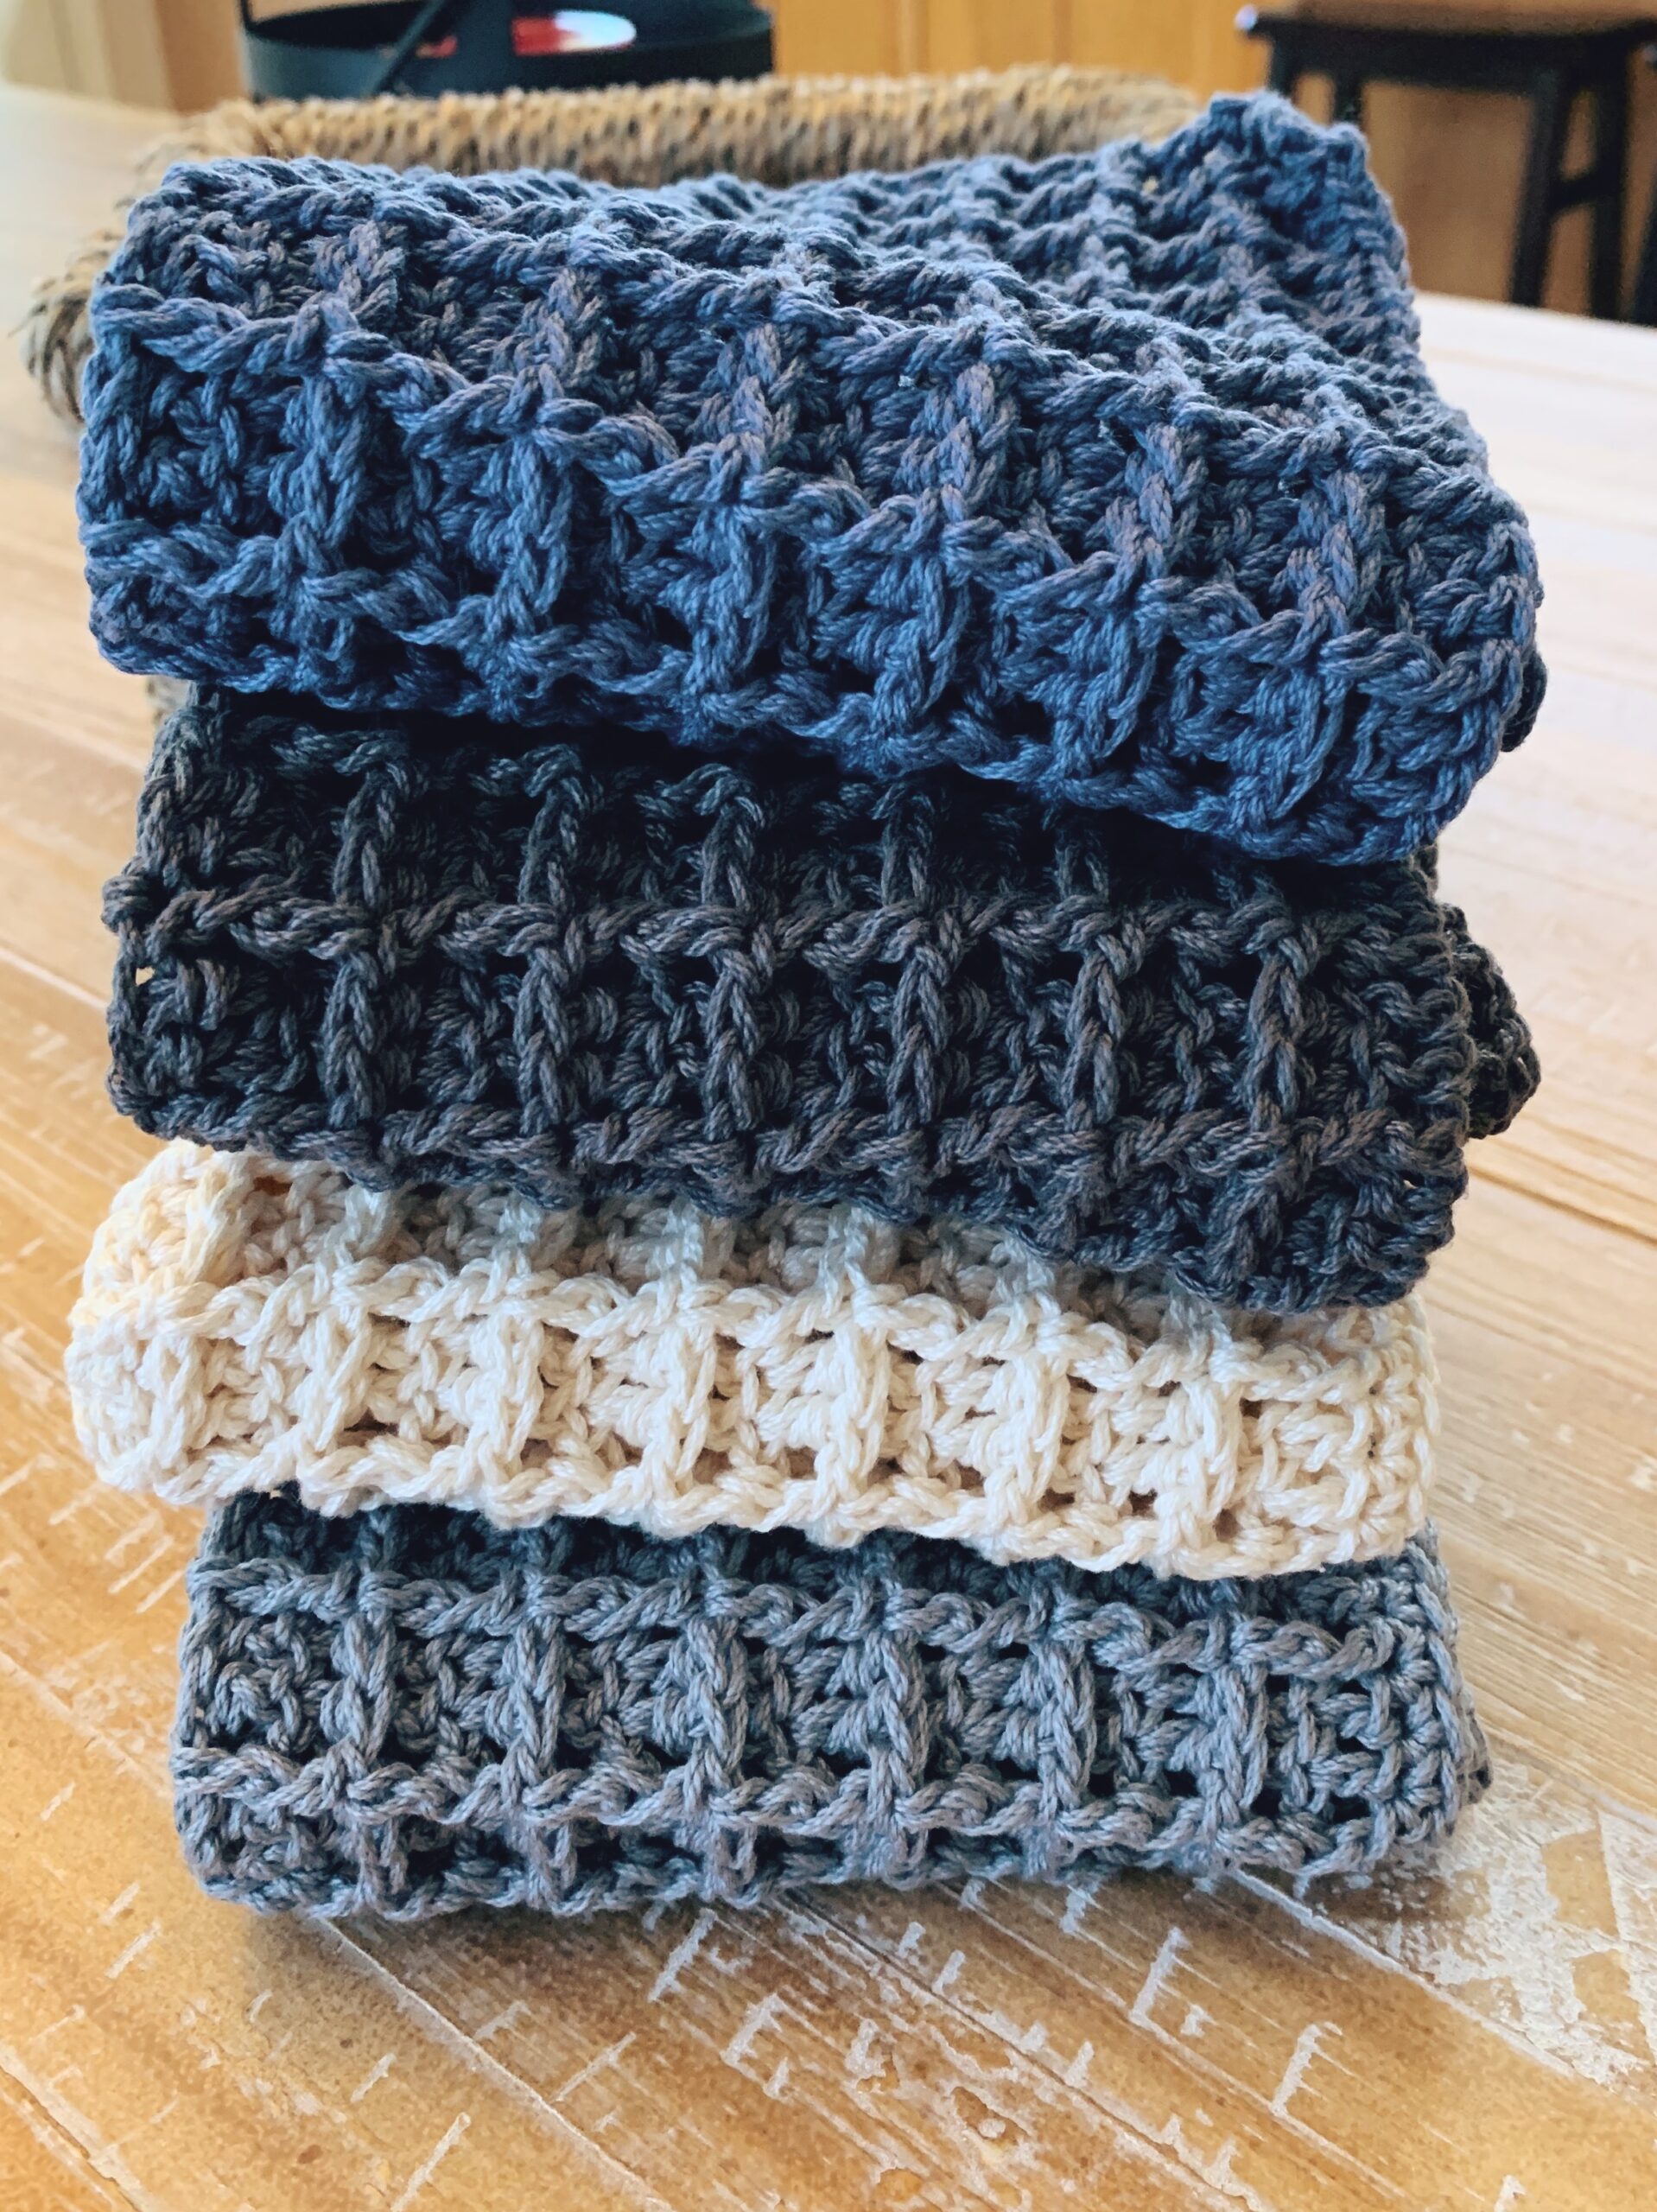
7. Waffle Stitch
The waffle stitch in crochet is a textured and reversible stitch pattern that resembles the pattern found on a waffle.
It's a dense and squishy stitch that's often used for creating cozy and warm blankets, scarves, dishcloths, and other projects where a thick and textured fabric is desired.
Here's how to create the basic waffle stitch:
Video tutorial:
Written instructions:
**Note**: This example demonstrates the waffle stitch with single crochet and double crochet stitches.
1. Start with a foundation chain with a multiple of 3 plus 2 additional chains for turning.
2. Row 1: Begin in the second chain from your hook. Work a single crochet (SC) in each chain across the row. Chain 1 and turn.
3. Row 2: In the first stitch, work a double crochet (DC). Then, in the next stitch, work a front post double crochet (FPdc) by inserting your hook from the front to the back and then back to the front around the post of the stitch in the row below. Complete the double crochet as usual. *DC in the next stitch, FPdc in the next stitch.* Repeat this pattern across the row, ending with a DC in the last stitch. Chain 1 and turn.
4. Row 3: In the first stitch, work a double crochet (DC). Then, in the next stitch, work a back post double crochet (BPdc) by inserting your hook from the back to the front and then back to the back around the post of the stitch in the row below. Complete the double crochet as usual. *DC in the next stitch, BPdc in the next stitch.* Repeat this pattern across the row, ending with a DC in the last stitch. Chain 1 and turn.
5. Repeat Rows 2 and 3 to create the waffle stitch pattern. Continue repeating these two rows until your project reaches the desired length.
The alternating front post and back post double crochets create the raised areas that give the waffle stitch its texture.
This pattern is versatile and can be adjusted in size and color to suit various crochet projects. It's important to keep your tension even, especially when working the front and back post double crochets, to achieve a consistent and attractive waffle pattern.
Try our Crochet Waffle Stitch Dishcloth Pattern!
Checkout These Gorgeous Patterns Featuring These Advanced Stitches


7 Advanced Stitches & Patterns for Beginners To Try
Waffle Stitch Crochet blanket
"Crocheting a blanket is not just a creative endeavor; it’s a labor of love, a tangible manifestation of warmth and comfort. When it comes to choosing a stitch pattern that embodies coziness and style, the waffle stitch stands out as a popular choice among crochet enthusiasts."
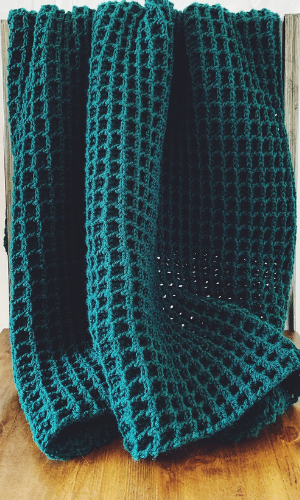
Evergreen Crochet Blanket; Waffle Stitch
"This evergreen crochet blanket is the perfect addition to your holiday decor. The color is beautiful and the textured crochet stitch used to whip this up makes it extra comfy."
All-Purpose Waffle Stitch Crochet Dishcloths
"Do you love a good Anthropologie dupe? If so, you’ll love these Waffle Stitch Crochet Dishcloths, which are similar to the oh-so-popular Market Dishcloths."
Basket Weave Crochet Baby Blanket
"If you’re looking for a baby blanket that’s easy to learn and fun to crochet, look no further than the Basket Weave Crochet Baby Blanket. It’s the first baby blanket I ever crocheted and it can be yours too!"

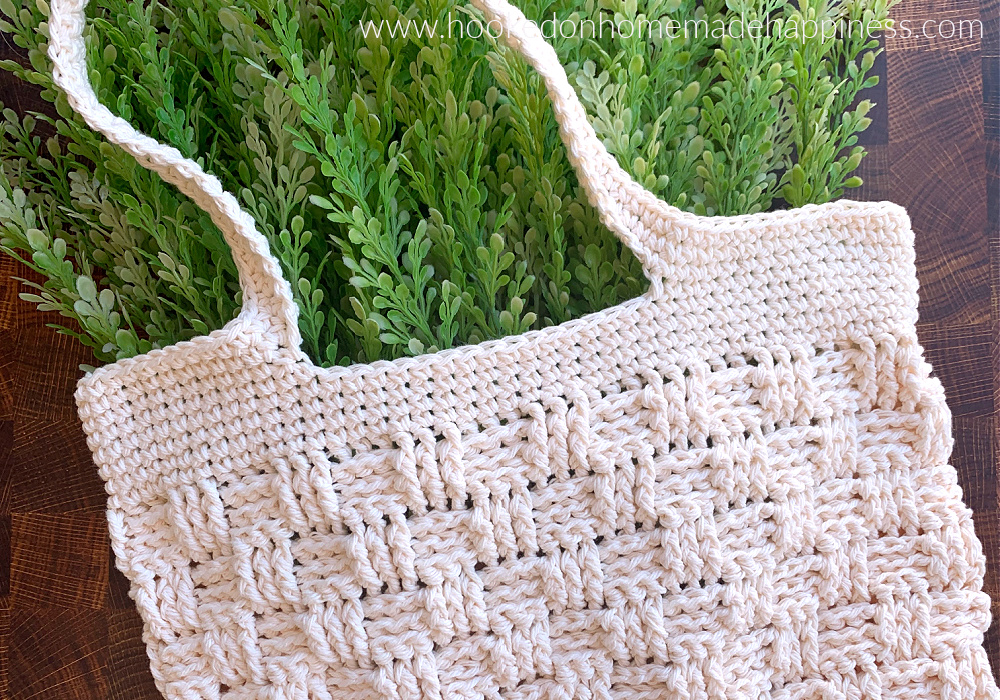
Basketweave Market Bag Crochet Pattern
"The Basketweave Market Bag Crochet Pattern uses one of my favorite stitches… the Basketweave Stitch! I’ve used it in so many designs. It always makes for such beautiful textures."

How To Crochet The Basket Weave Stitch - Plus Free Pattern!
Grab this free crochet basketweave washcloth pattern today!
Shell Stitch Jumper pattern by Jane Green
"Today we will crochet a warm, beautiful and cozy sweater. I used a crisscross shell stitch to create a knitting texture. The pattern is very flexible so you can use any semi-wool or acrylic yarn you have."

Crochet Lap Throw - The Wildflowers Lapghan
"The Wildflowers Lapghan is made with a simple and fun-to-work shell stitch that provides gorgeous texture, featuring a lightweight cotton blend yarn and fun tassels. This crochet lap throw uses an easy four-row repeat that works up fast and is perfect for beginner to intermediate crocheters looking to expand their skills."
Crochet Shell Stitch Baby Blanket – Free Pattern
"Learn how to crochet an easy shell stitch baby blanket with this free pattern + video tutorial. This beginner crochet baby blanket is perfect for all genders."
Crochet Table Runner Pattern - The Alpine Table Runner
"This crochet Table Runner pattern features a gorgeous texture and diamond motif perfect for accenting your tablescapes."
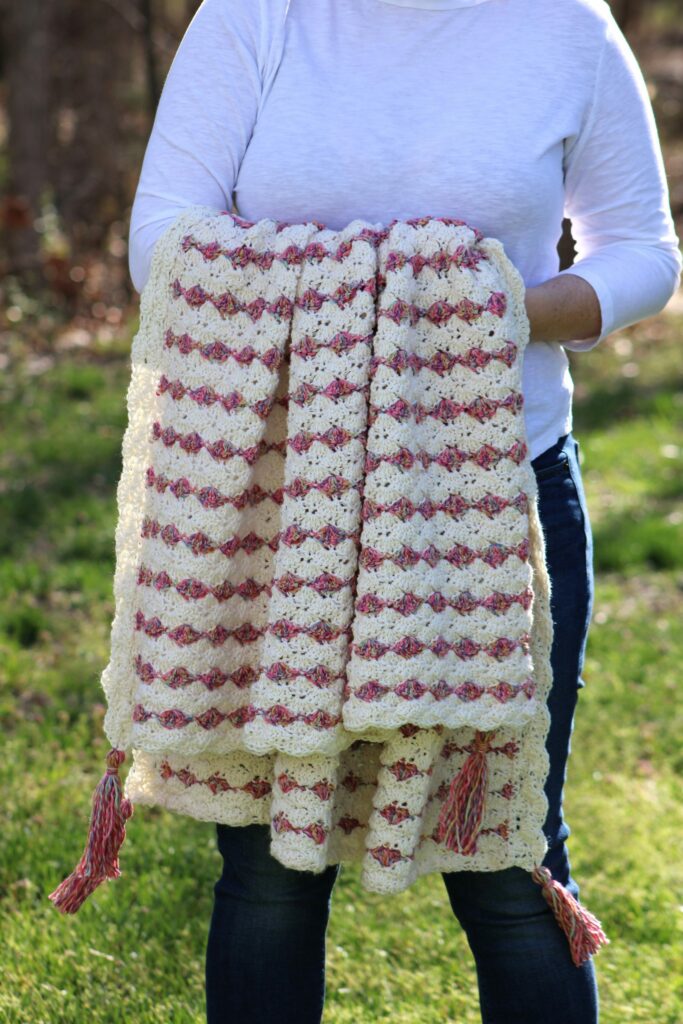
The Kara Blanket - An Easy Textured Crochet Blanket Pattern
"This easy textured crochet blanket pattern features raised stitches, an abundance of tassels, and a beautiful yarn that is soft and incredible to work with."
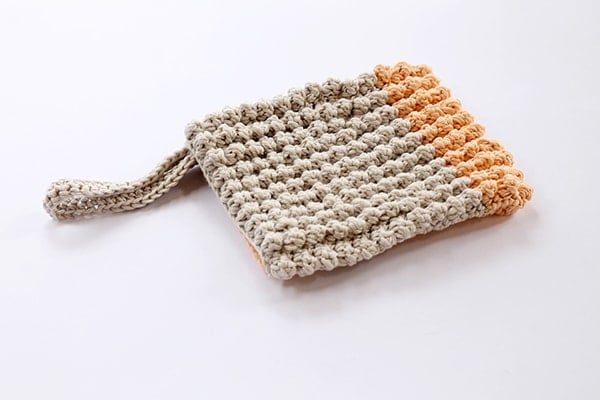
Crochet Wash Mitt Pattern {The Popcorn Stitch}
"In this post, you will see a crochet wash mitt pattern.
With one side made using the popcorn stitch for scrubbing and the other from single crochet, this wash mitt is a bathroom essential!"
Popcorn Throw Crochet Kit and Free Pattern | Crochet.com
"Basic stitches are combined in a special way to create a simple but sweet throw with a pop of texture in the wide border, suitable for adults and kiddos alike!"
Popcorns & Stripes Afghan
"Simple, classy and subtle, this free crochet pattern for an Aran afghan is the perfect blanket to cozy up with on a cold night. Customize the yarn color to match your home decor."

Bulky & Quick Puff stitch Stockings Free Crochet pattern and video tutorial.
"The Bulky & Quick Puff Stitch Stockings are a quick and easy crochet pattern. Stockings are crocheted in a bulky puff stitch pattern. Crochet this beautiful stocking for your children or loved ones. Personalize with Gold Alphabet Beads or a chalkboard name tag. The stocking is worked in the round from the toe-up, finishing with a folded-over join-as-you-go band. The heel is completed at the end of the pattern. Add beaded pompoms for a fun and festive embellishment."
Farmhouse Granny Square pattern by Lindsay Oncken (Bundle)
"An easy-to-follow guide to creating your very own uniquely textured, crocheted granny square! These squares can be used to make blankets of any size and color combination. When combined, they create a unique diamond pattern."

Crochet Puff Stitch Trees free crochet pattern.
"Decorate for the Holiday Season with these Puff Stitch Crochet Trees. Crochet Christmas Trees are a quick and fun crochet project that makes the perfect gift or item to sell at markets. The Puff Stitch crochet Tree goes over a foam cone. You may string LED lights around the cone to illuminate the trees."

Pinewood Pillow: Free Crochet Pattern
"The crisp fresh smell of pine trees is one of my favorite things about the holidays. There’s something about it that makes me want to curl up by a fire with a hot mug of tea, and watch snow fall outside. Growing up by the beach, I always had to travel to be in the forest surrounded by pine trees. So that means that I have to bring the pine trees a little closer to me by crocheting my latest free crochet pattern, the Pinewood Pillow! This tapestry crochet pillow pattern is made using Faux Fur yarn and chunky yarn to give all sorts of amazing texture to this pillow case. I’m pretty much obsessed!"
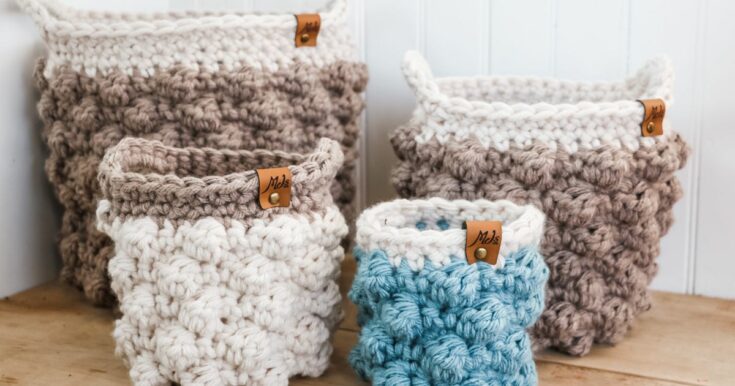
Crochet Bobble Basket Pattern
"Check out our latest crochet pattern – the easy Bobble stitch crochet plant basket pattern! This versatile crochet pattern can serve as a wonderful plant pot cover or a regular crochet basket. On the blog, we’re even offering the 6″ plant pot cover for free for MJ’s subscribers, along with a helpful YouTube video."
Crochet Bobble Blanket Pattern - With Video Tutorial
"I know that you guys love blanket patterns! That is why I decided to make my first pattern of the year a thick and chunky, bobble stitch crochet blanket. The stitch pattern is pretty simple. And since the pattern calls for bulky weight yarn, you will see progress quickly -which is always encouraging."
These stitches can add depth and dimension to your crochet projects, and while they may be considered advanced, with practice, beginners can achieve great results.
It's a good idea to start with small practice swatches before incorporating these stitches into larger projects to get comfortable with the techniques.
But don’t be afraid! Practice makes perfect. Which stitch will you try first?