Get your crochet hooks ready and dive into this fun and easy striped corner-to-corner crochet blanket pattern. It's a really fun project, perfect for anyone who wants to use up some of that leftover Mandala yarn we love so much!
You can purchase a printable PDF of this pattern at our shop here or Etsy here.
You may have noticed if you've made many of our patterns that we're kind of in love with self-striping yarn. It all started with the "Let's Go Camping" Blanket, and the rest is history.
I went on to create many more patterns using this type of yarn. Here are a few of them:
We also have a round-up of 25 self striping yarn patterns you can check out. Needless to say, we're obsessed.
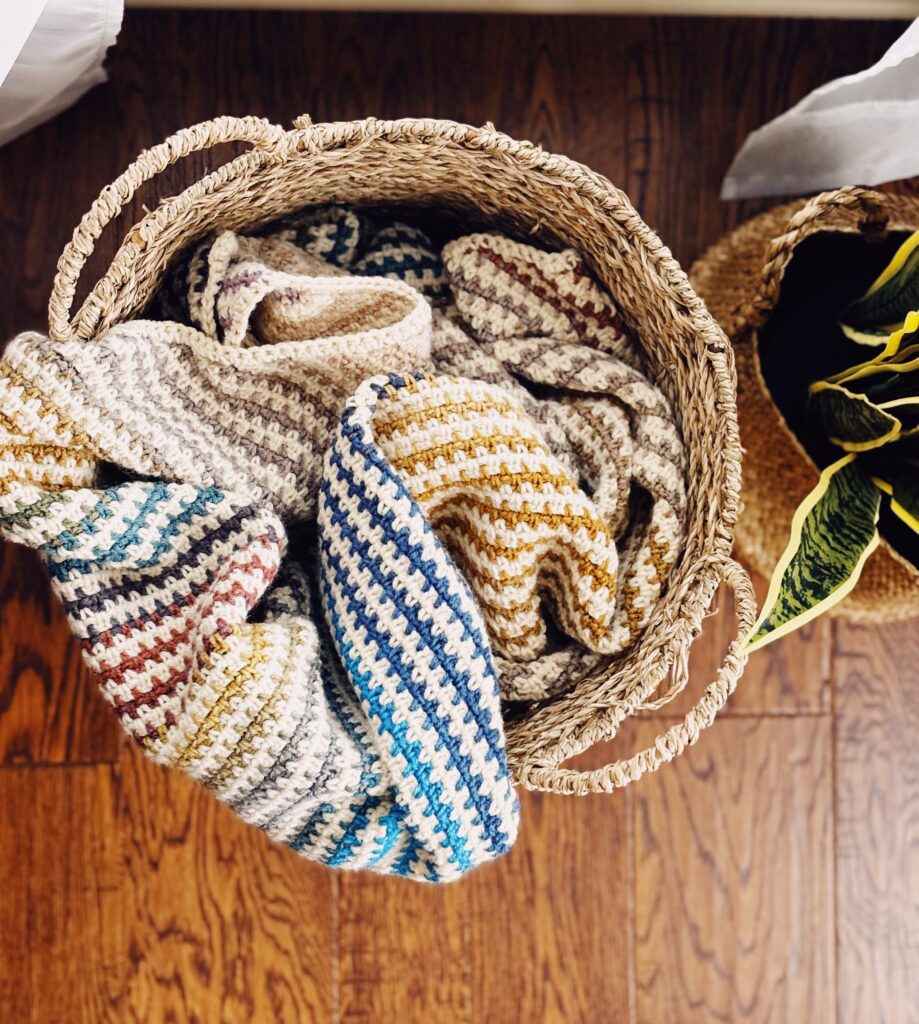
In making all of these blankets + all of the experimenting I do with patterns that never see the light of day, I've accumulated quite a collection of half used self striping yarn.
I hated seeing it just sitting there unused, so I came up with a pattern for it!
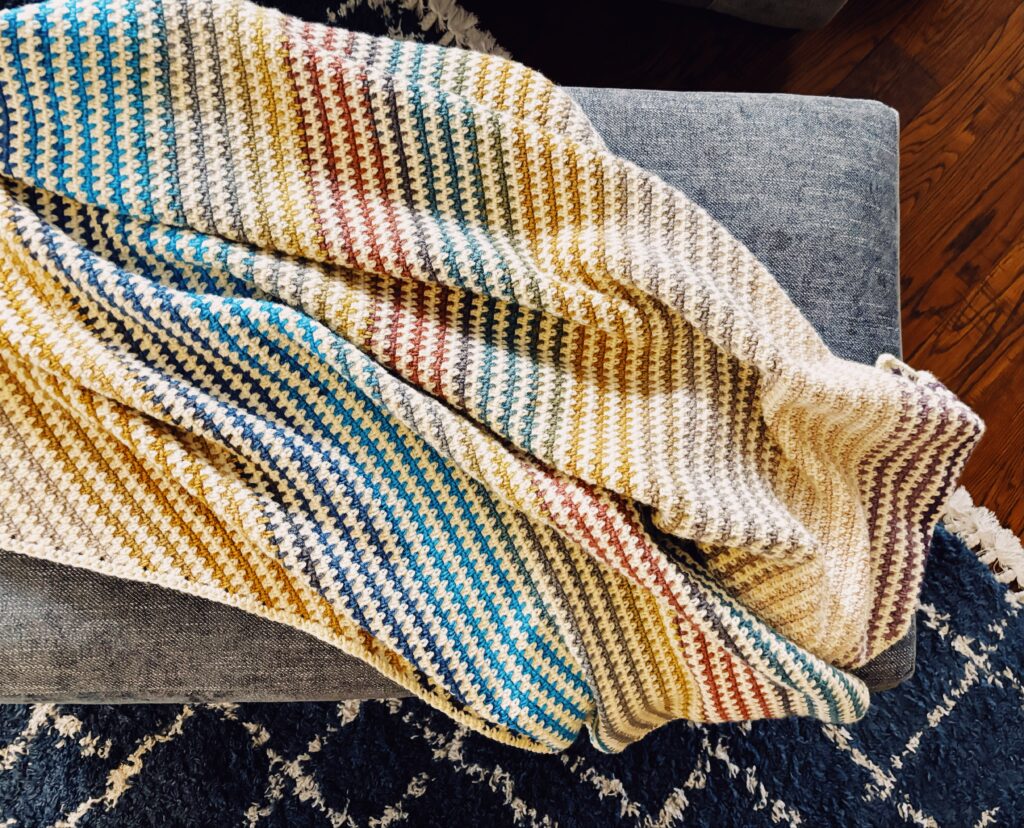
Introducing the Penny blanket...
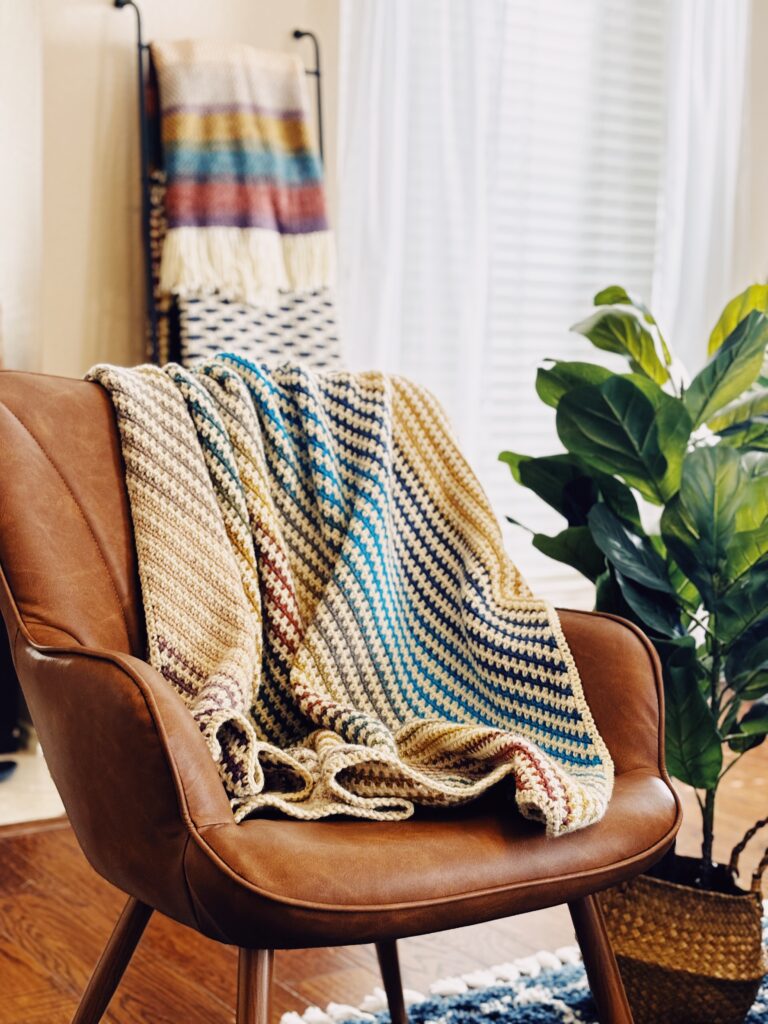
Crochet Corner to Corner Blanket Pattern - The Penny
Pattern Description:
The Penny Blanket is the perfect way to use up all those bits of leftover Mandala yarn. It's made with a corner-to-corner moss stitch that starts small and gets bigger as you go. The mix of different yarn colors makes each blanket totally unique and full of personality.
Notes:
- Finished size measures 46” x 48 ½″ long
- This blanket is worked corner to corner
- This blanket is a square, but I’ve included instructions if you want to make it a rectangle
- This blanket has increase rows and decrease tows
- Video tutorial for the corner to corner moss stitch is HERE
- This stitch is also called the linen stitch
- (sc, ch1, sc) is the increase on both sides
- skipping multiple sc stitches are the decrease rows
- This pattern is two rows of a solid color and two rows of Mandala; you do not fasten off between color changes and instead pull up the yarn along the side. You’ll cover these up with the border.
- This pattern uses leftover Lion Brand Mandala yarn, about 3 skeins of it + Lion Brand pound of Love -- you can use other scrap yarn for this blanket if you’d like. This mixes a weight 4 and a weight 3 yarn and works really well together
Special Instructions
Instructions for a Rectangle Blanket:
Here are the instructions if you want to make this a rectangle and not a square. Just remember that a larger blanket will require more yarn:
Section 1: Increase on both sides until the blanket is the width you'd like
Section 2: Increase on one side until the blanket is the length you'd like, while decreasing on the other side
Section 3: Once the blanket is the length you'd like, decrease on both sides
Materials:
HOOK(S)
J/ 6.0 mm crochet hook
YARN A
Weight 4 • approx. 1020 yds
Lion Brand Pound of Love (1 skein)
Color:
Vanilla
YARN B
Weight 3 • approx. 1500
Lion Brand Mandala, (About 3 skeins)
Colors:
Sphinx
Warlock
NOTIONS
Scissors
Tapestry needle
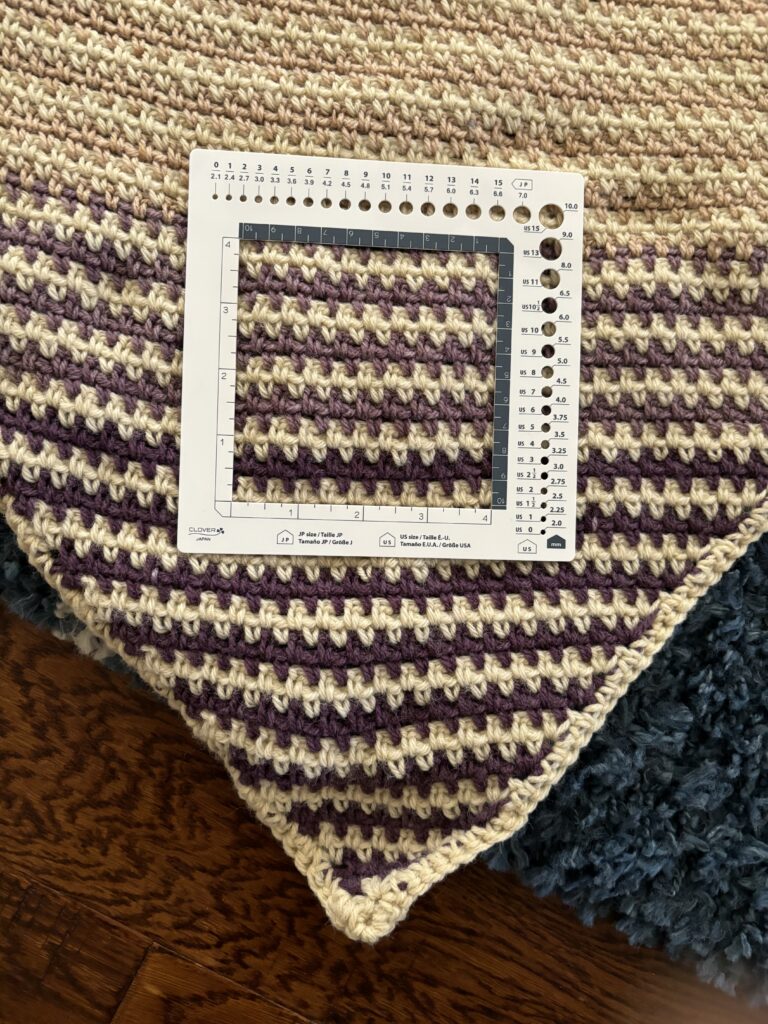
GAUGE (4 X 4)
19 sts x 18 rows (I’ve included a picture of how I measured gauge)
Abbreviations & Stitches
ch chain
rep repeat
yo yarn over
sc single crochet
sk skip
sp space
st(s) stitch(es)
sc (single crochet)
- Insert the crochet hook into the stitch (st) where you want to make the single crochet.
- Yarn over, pull up a loop (2 loops on hook)
- Yarn over, pull through both loops on hook
Corner to Corner Moss Stitch Video Tutorial
The Pattern
Foundation row With Yarn A, Ch 3
Row 1 sc in 3rd chain from hook, ch 3, turn
Rows 2 (sc, ch1, sc) in ch from previous row, ch 3, turn (this chain was made from the 2 sts you skipped in row 1)
Switch to Yarn B
Row 3: * skip sc, sc in next ch-1, ch1; repeat from * to last sc. (sc, ch1, sc) in ch-3 of previous row, ch 3, turn
Row 4: * skip sc, sc in next ch-1, ch1; repeat from * to last sc. (sc, ch1, sc) in ch-3 of previous row, ch 3, turn
Switch to Yarn A
Row 5: * skip sc, sc in next ch-1, ch1; repeat from * to last sc. (sc, ch1, sc) in ch-3 of previous row, ch 3, turn
Row 6: * skip sc, sc in next ch-1, ch1; repeat from * to last sc. (sc, ch1, sc) in ch-3 of previous row, ch 3, turn
Rows 7 - 151: rep rows 3 - 6 (all increase rows)
Begin decrease for square blanket. If you want to make a rectangle blanket, follow instructions under “Special Instructions.”
Switch to Yarn B
Row 152: * skip sc, sc in next ch-1, ch1; repeat from * to last sc. sc twice in ch-3 of previous row, ch 2, turn
Row 153: skip 2 sc, sc in next ch-1, ch 1 * skip sc, sc in next ch-1, ch 1; repeat from * to last ch 1 sp, sc in ch 1 sp (don’t ch1 before sc), sc in ch-3 of previous row , ch 2, turn
Switch to Yarn A
Row 154: skip 2 sc, sc in next ch-1, ch 1 * skip sc, sc in next ch-1, ch 1; repeat from * to last ch 1 sp, sc in ch 1 sp (don’t ch1 before sc), sc in ch-2 of previous row , ch 2, turn
Row 155: skip 2 sc, sc in next ch-1, ch 1 * skip sc, sc in next ch-1, ch 1; repeat from * to last ch 1 sp, sc in ch 1 sp (don’t ch1 before sc), sc in ch-2 of previous row , ch 2, turn
Rows 156 and on: Repeat rows 152 - 155 until you 2 sc left, do not chain 2 on row before last row, ch 1 instead
Last row: sc in ch-2 of previous row.
Fasten off Yarn B
Do not fasten off Yarn A
Continue with Yarn A for border
For border
ch 1, sc all around the blanket, 3 sc in each corner (make sure to crochet over the yarn ups where you made the color changes to hide it)
End with 3 sc in corner, sl st to first sc
Fasten off; weave in all ends
Video tutorial for border HERE